


DIY roof with thermal and pest protection
Author of solution (idea): Ondřej Hercog and the Bumblebees PLUS
Tested in practice: FROM season 2018
Test results: verified, safe when following manufacturing recommendations and usage methodology
The group of breeders for whom the tool is suitable: unrestricted
Justification secure roof seal, with the option to remove the thermal insulation insert during the summer months, to allow the roof, and thus the hive to cool
Note: Manufacturing technology according to your own capabilities, but always in such a way that the roof structure is rigid and resistant to weather conditions
Introduction
The roof is an important part of the house and you can learn more about its importance for the house HERE
Manufacturers of hives tackle these requirements with varying degrees of success. A similar roof to the one we describe here is currently only manufactured by one producer in the Czech Republic. They have designed the roof so that the thermal insulation board can be removed, which we consider a good solution.
We have therefore designed a solution that eliminates any shortcomings of commercially produced roofs.
Roof according to us design I am
- Robust
- solid
- good seal
- heavy, so that the wind won't carry it away Construction (at dimensions of 50x50cm, it weighs approx. 4.5kg)
Ours The solution also has the following advantages and when you remove the thermal insulation board, the roof:
- it will still seal well
- Thanks to this solution, common parasite species cannot bite through to the nest
- it will sit at the same height thanks to a wooden slat frame
- it will not therefore rest on the ventilation opening or other parts of the structure
Making a quality beehive roof yourself or modifying an existing one to the desired parameters isn't that difficult. Perhaps all manufacturers will soon be making good roofs themselves and supplying you with quality goods. Many of them already know how to do this = it's possible.
If the manufacturer's supplied roof comes unstuck or deforms during the season, claim it, as this will force the manufacturer to modify it.
We recommend using this roofing solution in combination with with a protective net. This significantly enhances the protection of the hive’s inhabitants against parasite attacks.
We have written about our solution on our website repeatedly, see for example HERE
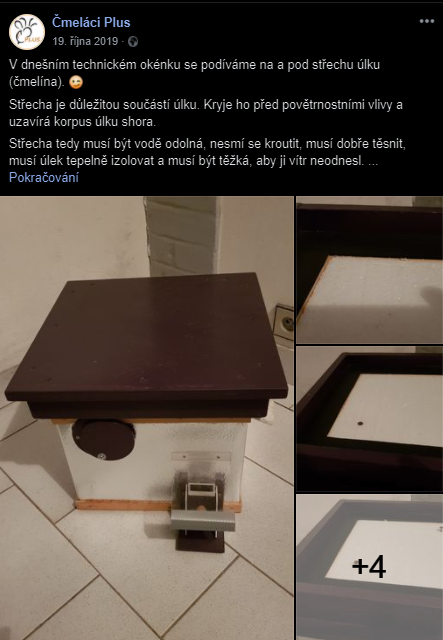
Roof with removable insulation insert
Source FB Bumblebees PLUS
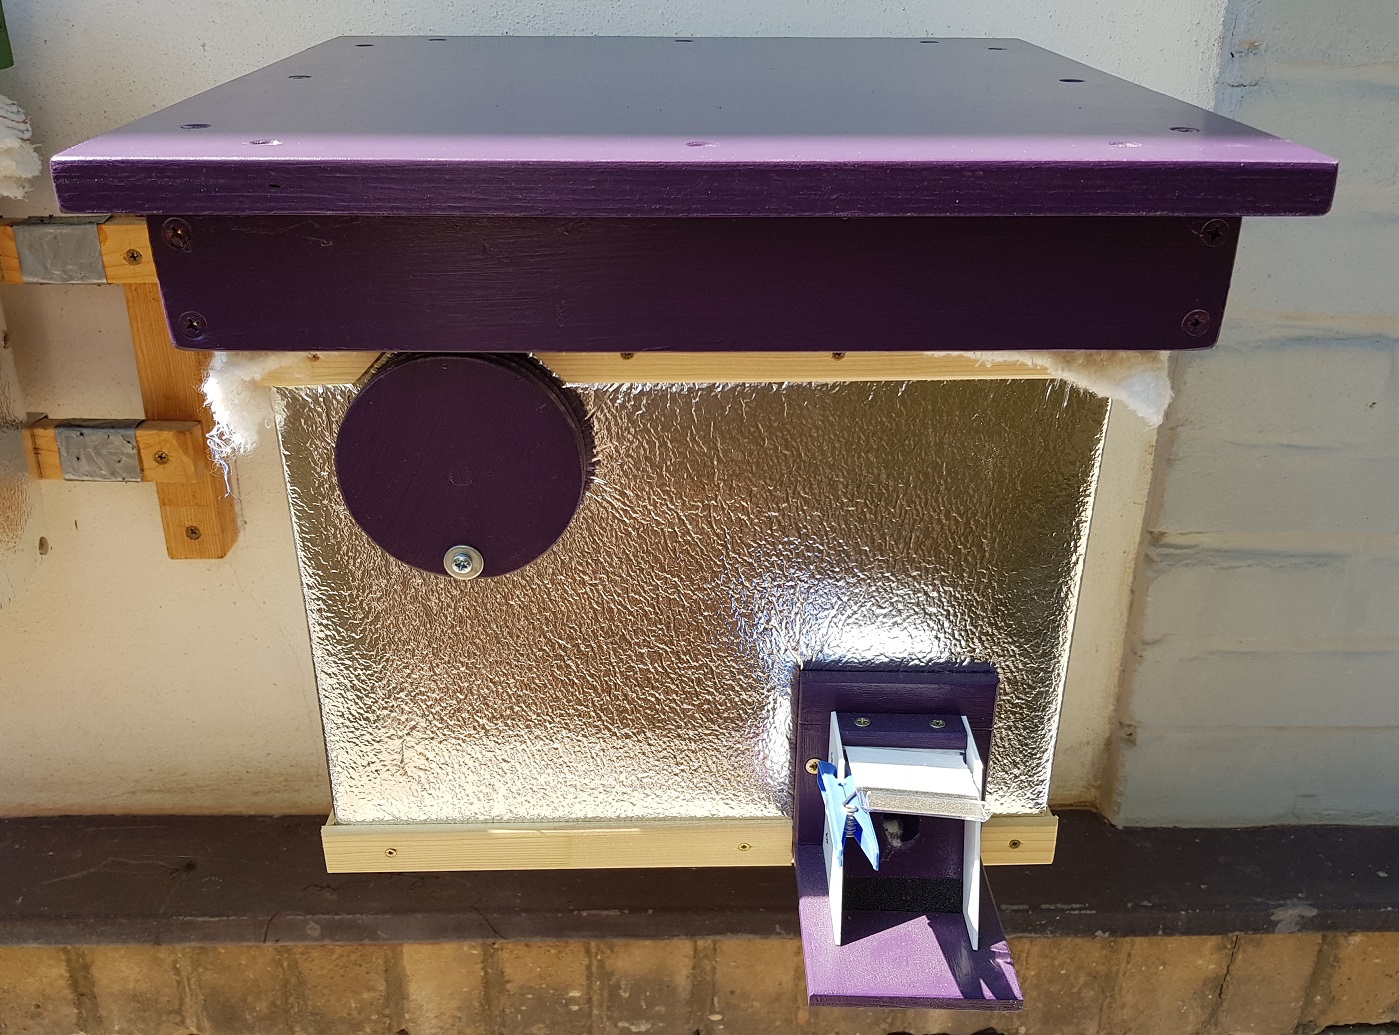
The roof of the hive is on, with an absorbent cloth underneath to drain off moisture.
Photo O. Hercog 6/2019
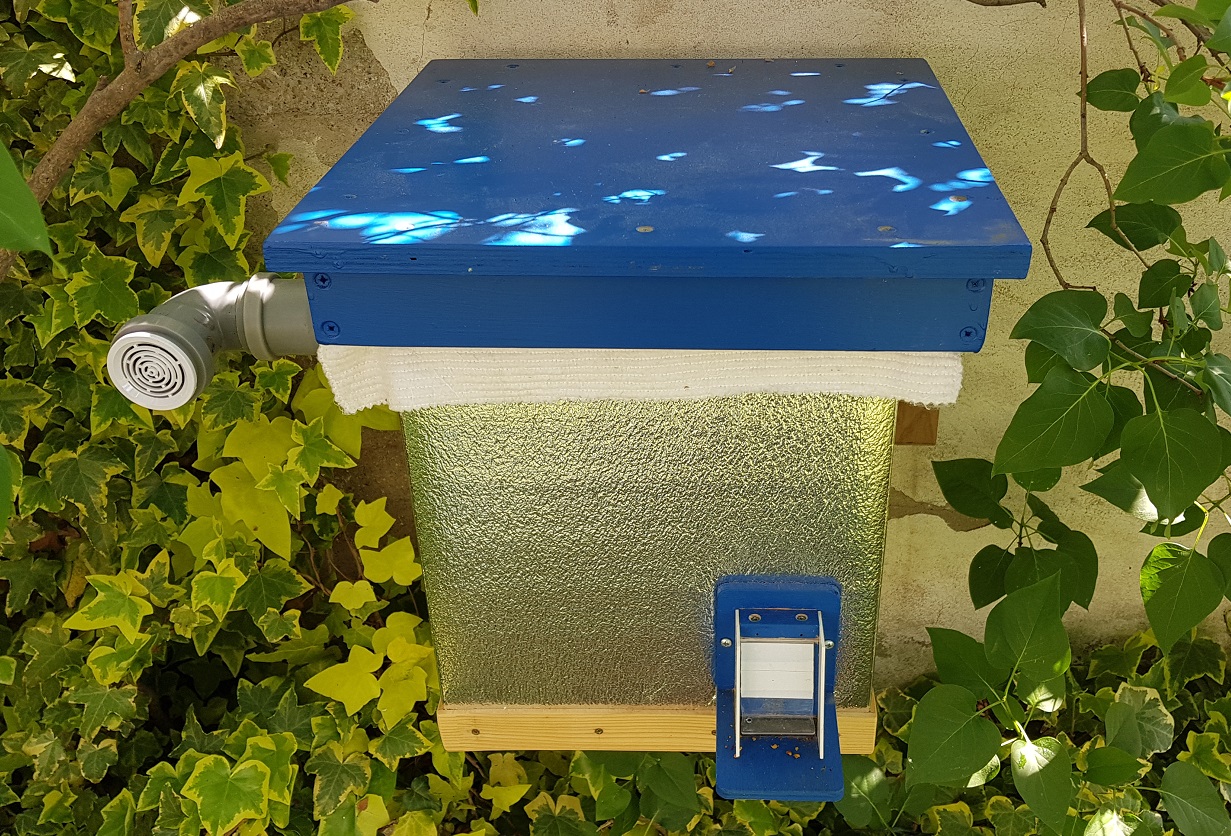
Ventilation socket from HT pipe
Photo O. Hercog 5/2020
Roofing material
hodí. proveden Water-resistant plywood. On the contrary doesn't fit Chipboard and OSB boards, these change shape and properties in damp conditions.
Material
- Construction – shuttering plywood is very good, it's homogeneous and has a surface finish that makes it practically indestructible. This material can be bought at a DIY store where they will cut it to size for you, and you just assemble the parts at home.
18mm (dark) shuttering plywood is available at the hobby market. - Insulation board 30 mm polystyrene
- Slats – precise planed spruce/pine battens from a DIY store, 30 mm high, 40-50 mm wide
- Seal – we recommend low-profile soft sealing, our design uses fan seals, e.g. recommended materials HERE
- Silicone sealant – for sealing leaks and joints
- Colour – acrylic exterior paint
- Wood glue
- Wood screws with countersunk heads – e.g. diameter 3-5mm, length 40-45mm (depending on the thickness of the board used for roof construction
- Roof accessory board (undocumented in photographs) – a plate made of plastic, or old PVC linoleum
Roof dimensions
The dimensions provided here are indicative for a hive with a 30 x 30 cm body footprint. If you are making the roof yourself, please adjust the dimensions according to your hive.
Note: some manufacturers' hives have a design feature – the front wall has rounded side walls (large radius). This is purely a design element with no functional significance. When applying our instructions, this radius will be a problem for you, just as it would be when applying additional thermal insulation.
Adapt the roof construction accordingly, or consider whether to remove the radius from the wall (proceed with regard to the insulation's warranty period).
The frame on which the roof is seated on the hive body has an overlap in height so that the roof does not fall off, and also play in the sides so that an absorbent cloth can be inserted underneath it to drain moisture.
If you make the roof exact, you won't be able to insert a cloth underneath, and once the roof gets damp due to moisture, it will change size and won't be easy to put on or take off.
Solution
- Overlap The roof should overhang the floor plan by at least 5-10 cm (a larger overhang is better).
- Frame, on which the roof sits on the hive body, has:
– height overlap 10-20mm so that the roof does not collapse
– for the side 5-10mm, so that an absorbent cloth can be placed underneath to drain moisture - It is good to attach (glue) an additional roof to the roof, for example made of old linoleum, with a floor plan larger than the roof structure. This will create an additional a safe overhang for rainwater runoff
Warning:
- When constructing a roof, apply sealant to the inner frame in the roof. Select a frame width that will maintain a seal even if the roof is shifted sideways.
- At the same time, do not make the seal wider, as bumblebees sometimes tend to chew through seals.
Roof construction
Manufacturing process:
- The roof consists of Flat platters of square footprint (here 50x50cm) and
perimeter frame approximately 50mm in height (for a batten height of 30mm and an overhang of 20mm). - The perimeter frame is joined with wood screws.
- The perimeter frame must be produced precisely so that it does not warp. For the joints, it is recommended Use glue.
- The surround frame is glued and screwed to the roof,When fitting, use similar screws. .
- Inner frame It is constructed from precisely planed slats.
- The frame parts are set into the roof construction on a layer of adhesive and secured with screws.
- Joints and any leaks are recommended Seal with silicone sealant.
- Provide the roof coating.
- Fit the inner frame seal.
- At the Seal bonding be precise – there must be no gaps in the connections. this can be solved by first applying the seal to two opposite sides.
Seal strips, which you insert between them, should be a few mm longer = the seal will expand after sticking and will seal well even at the joints.
Warning
- If the corpus of the ulcer has a seal, further sealing on the roof is not necessary.
- When constructing a roof, apply sealant to the inner frame in the roof. Select a frame width that will maintain a seal even if the roof is shifted sideways.
- At the same time, do not make the seal wider, as bumblebees sometimes tend to chew through seals.
- For the same reasons, high sealing is also not appropriate.
Control
- There must be no gaps in the construction, and the roof must not warp – otherwise it would not sit properly on the hive body.
- If the roof does not sit precisely on the body of the hive throughout its entire scope, even small gaps will arise, which are an easy entry point for parasites.
- The breeder might only discover the mistake later, when they are looking for the cause of an infestation in an otherwise well-secured hive.
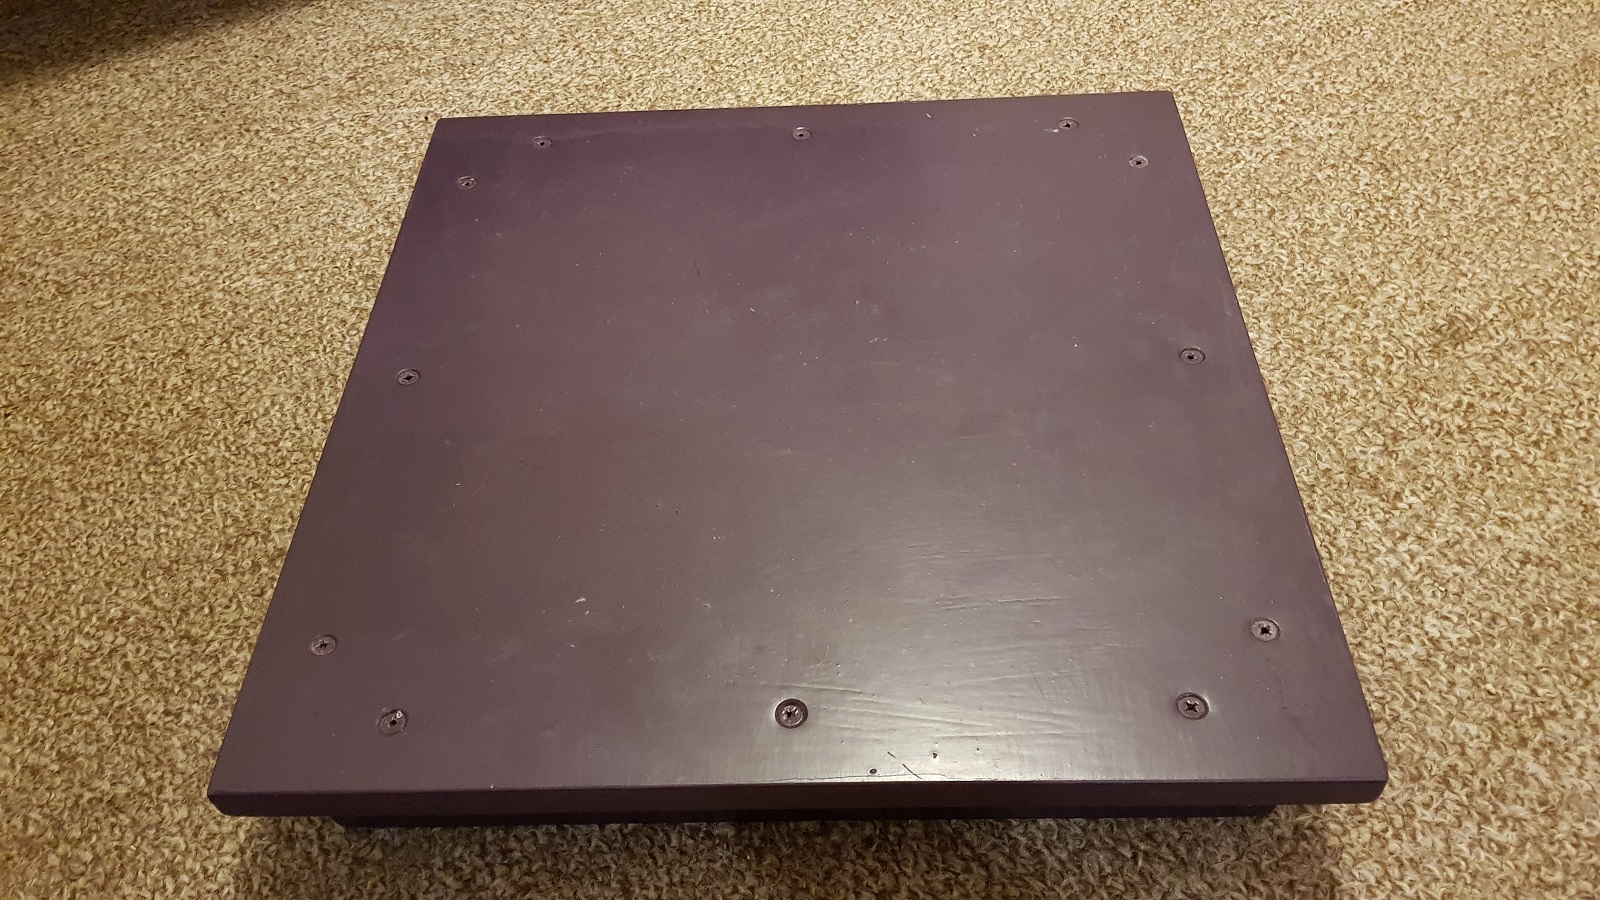
Bumblebees PLUS – Hive roof without additional protection against rain
Photo O. Hercog 6/2019
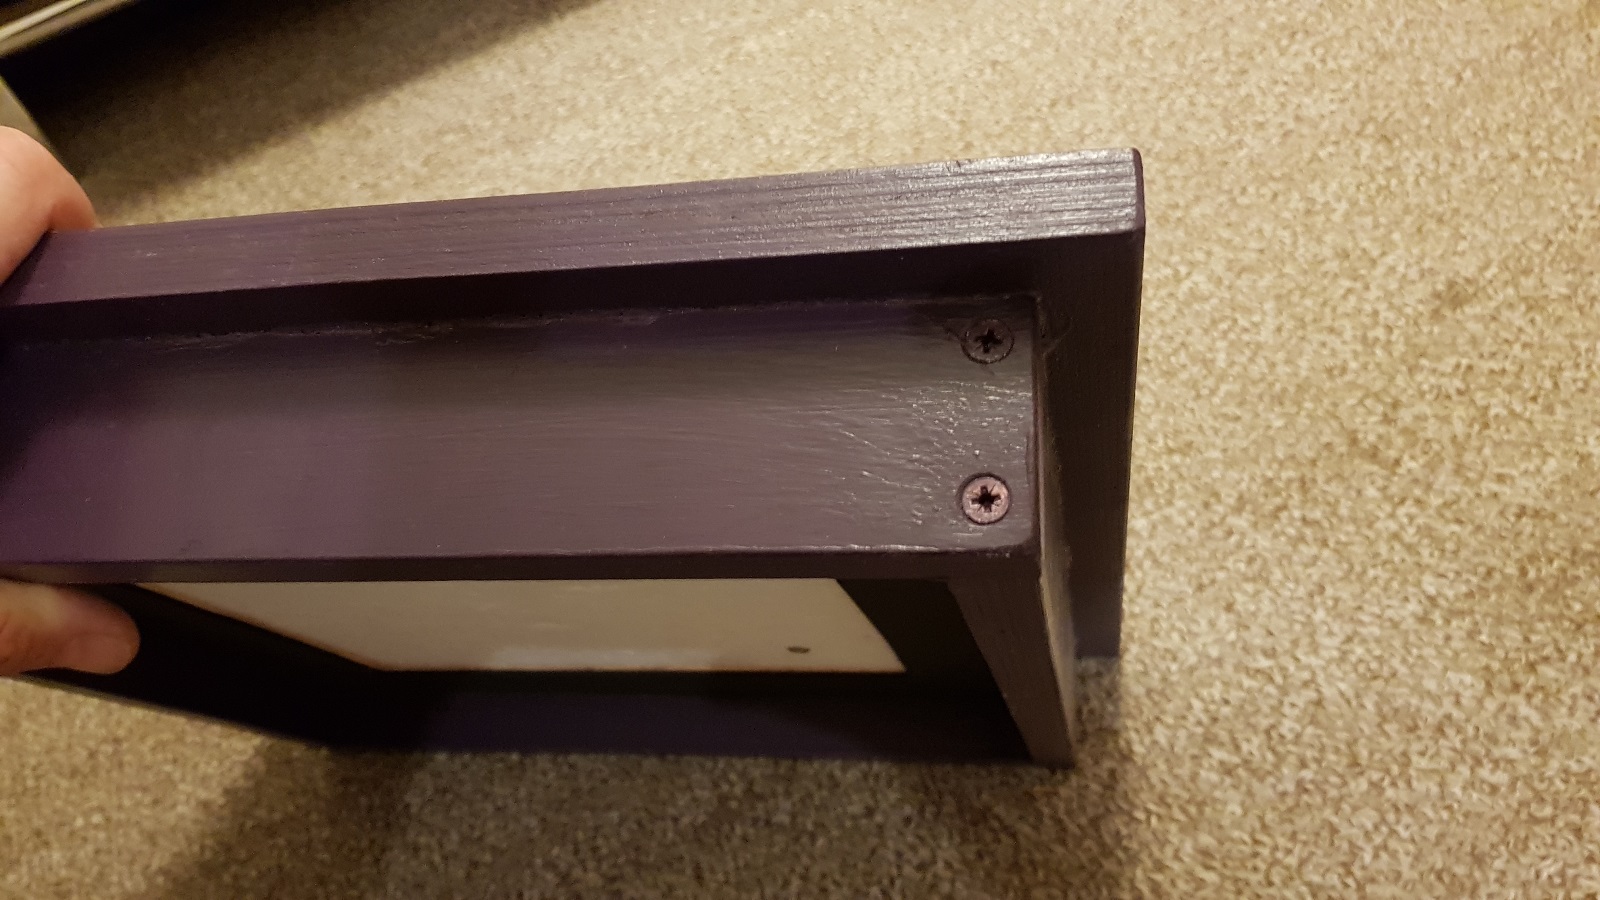
Beehive roof frame construction detail
Photo O. Hercog 6/2019
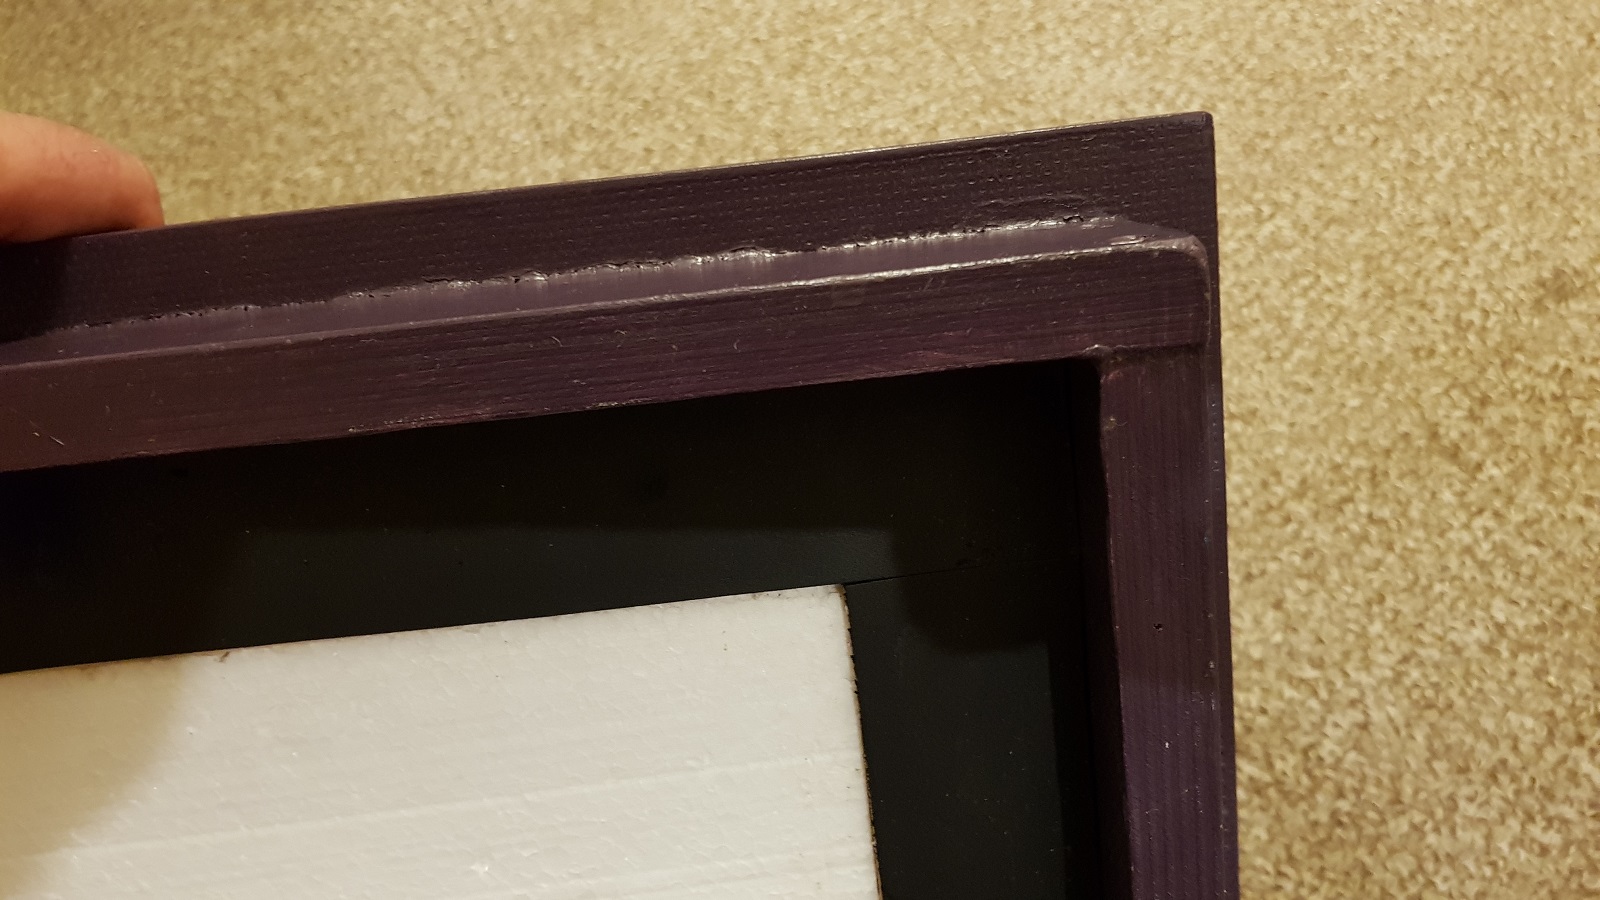
Beehive roof frame construction detail
Photo O. Hercog 6/2019
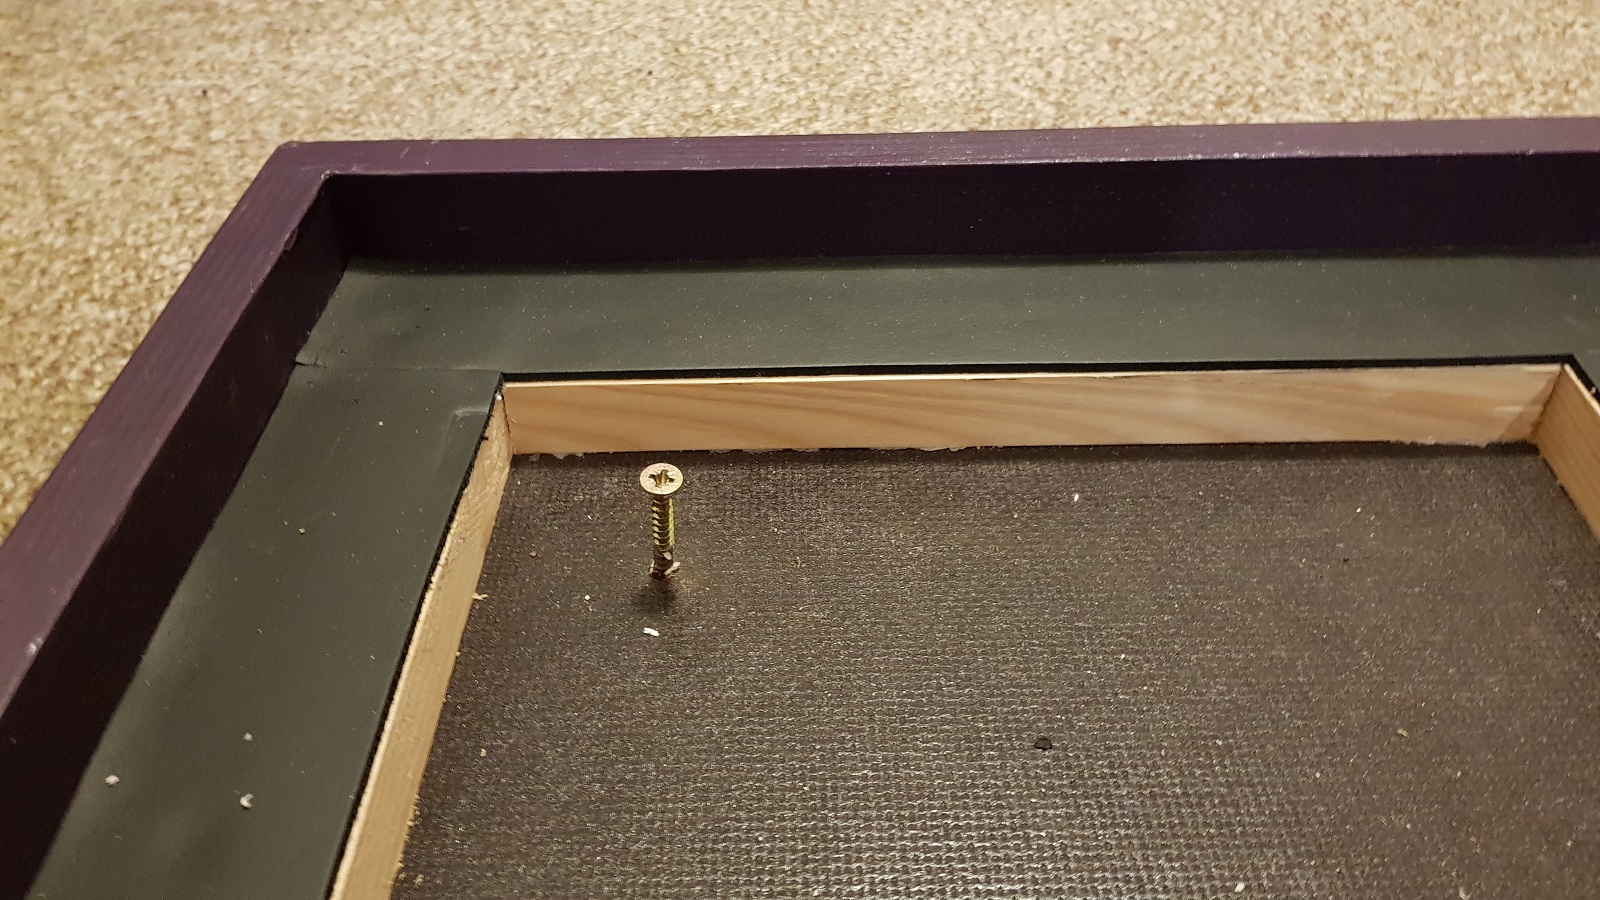
Roof of the hive with removed thermal insulation – view of the inner frame and seal
Photo O. Hercog 6/2019
Roof insulation
The roof, like the body of the hive, must provide thermal insulation for the hive.
Procedure
- Cut out and insert the polystyrene board into the inner frame.
- Fasten the board with one or two screws with a larger head
Warning:
- pokud není deska z polystyrénu chráněná proti čmelákům, je lepší ji If a polystyrene board is not protected against bumblebees, it is better to to sack after the season and replace with new clean
- in the 2020 season, we recorded a number of cases where they were hidden directly in the casing larvae of the parasitic beetle Antherophagus nigricornis
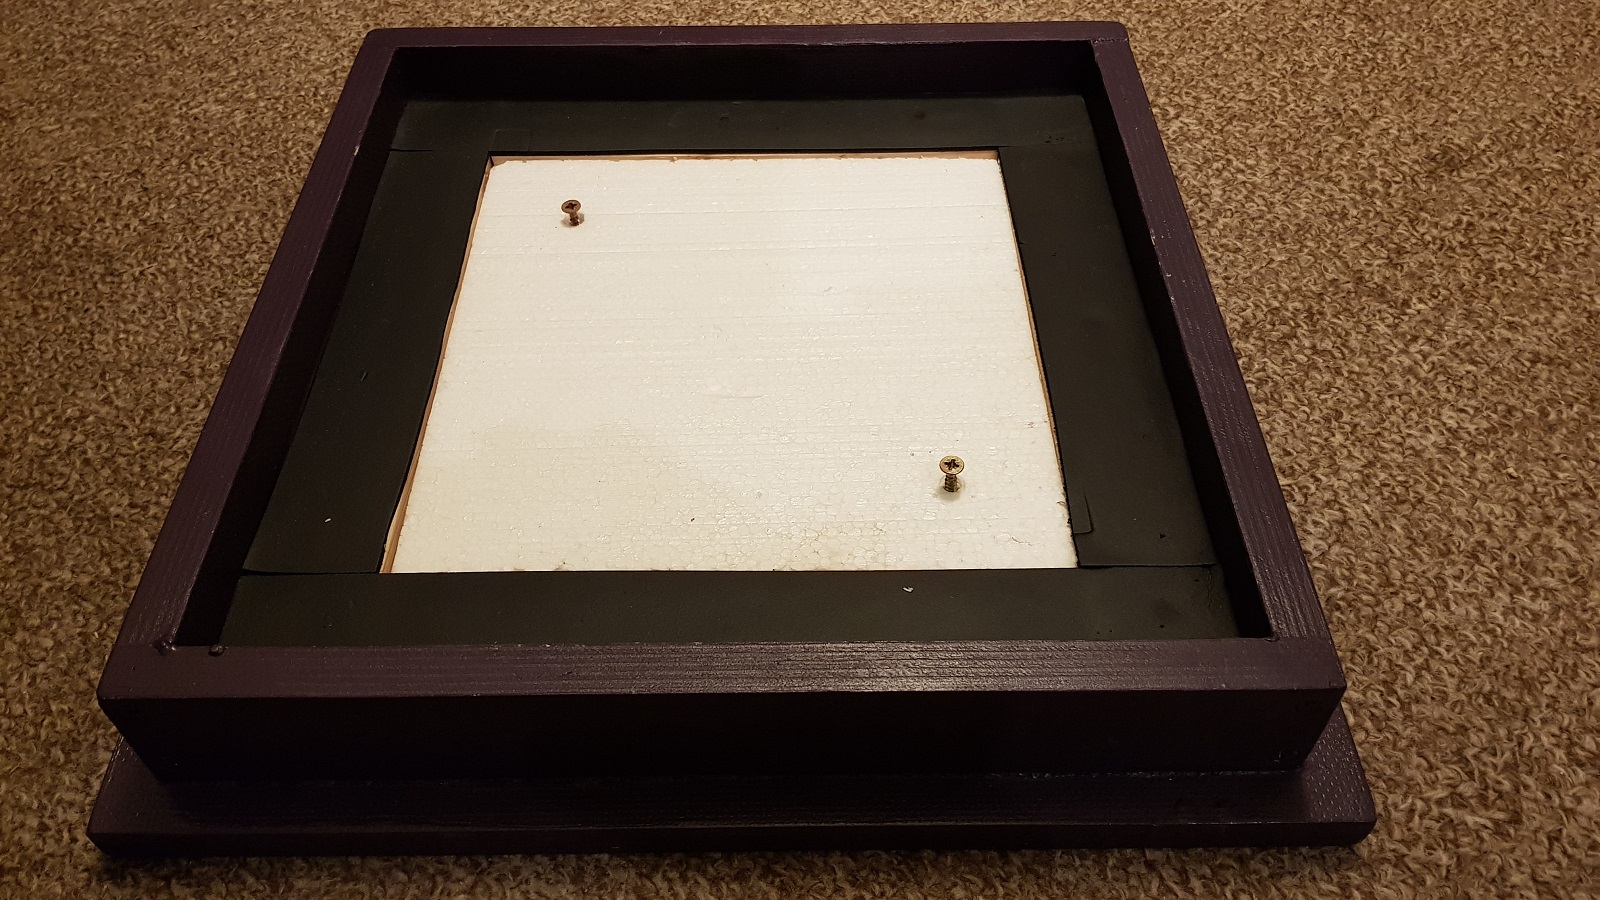
The roof of the hive with thermal insulation
Photo O. Hercog 6/2019
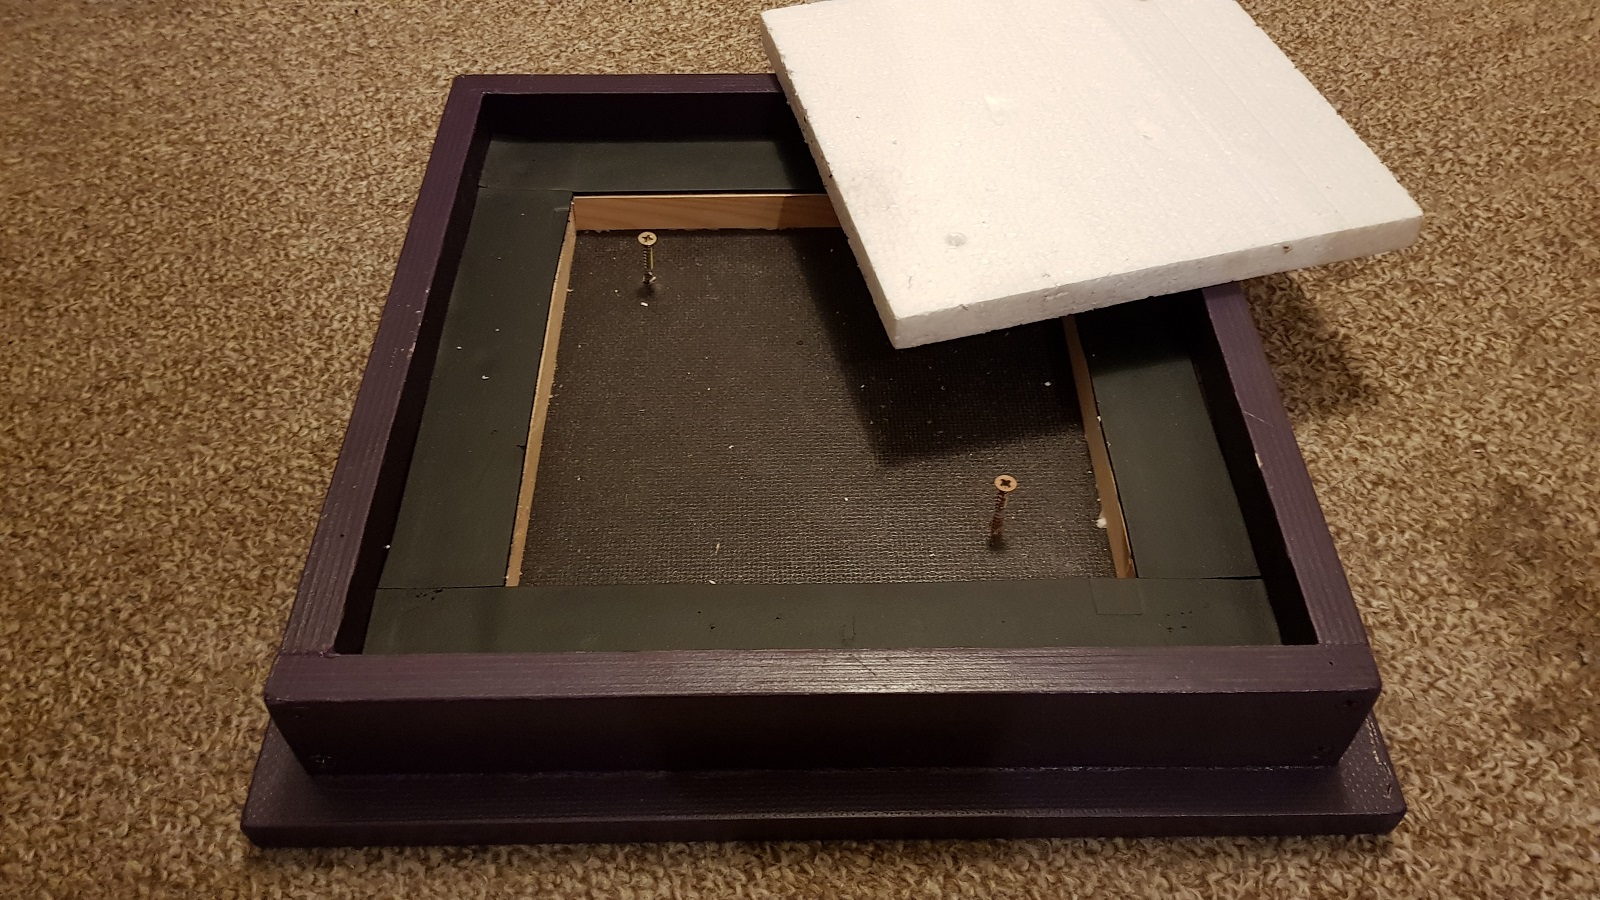
Hive roof with removed thermal insulation
Photo O. Hercog 6/2019
Additional roof insulation against precipitation
It is worth making or purchasing a roof from quality materials. You will extend the lifespan of the roof by attaching an additional waterproof layer to its upper side and supplementing it with a quality coating.
The essential thing is that you can create A greater overhang for rainwater runoff but you won't unnecessarily increase the weight of the roof
Procedure
- As supplementary layer Attach a plastic board to the roof – PVC boards are available in DIY stores. Old linoleum can also be used.
- The optimal method is to glue such insulation, for example with Chemopren.
- Do not use asphalt sheeting – would have stunk.
- We do not recommend using tin, In the heat, it would warm up and the hive would overheat. Furthermore, raindrops hitting the metal sheet would disturb the hive's inhabitants.
Note: some manufacturers use it, we will wait for the experiences of more breeders. - If you are adding extra insulation to the roof, make sure it is with an overlap of at least an additional 20 mm on each side – water will drain better and will not leak into the roof structure.