
Ventilation attachment on the hive
(roof not attached)
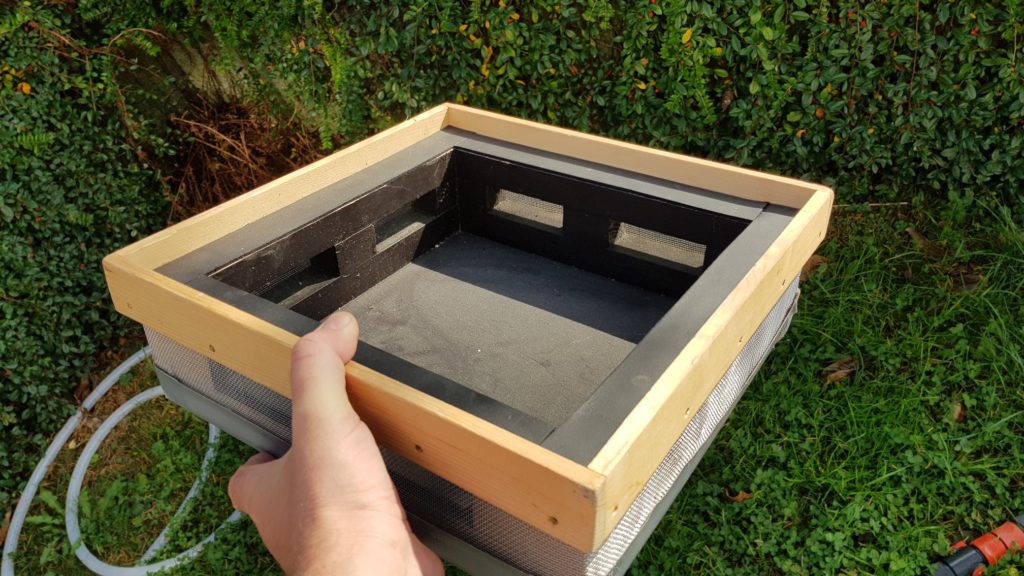
Ventilation attachment
Author of the invention: Ondřej Hercog
Tested in practice: YES since the 2018 season on a total of 8 hives
Testing results: verified, safe when following the production recommendations and usage methodology
Group of breeders for whom the tool is suitable: intermediate (completed at least 1 successful breeding season)
Justification: Production requires adherence to the procedure and accuracy. Application of the tool to the hive is tied to external climatic conditions and the degree of colony development. (This is not a permanent hive tool)
What is a ventilation attachment and what is it used for?
The ventilation insert is an additional part for a bumblebee hive. It is a frame with ventilation holes that is inserted under the roof of the hive.
The raised roof allows the hive to ventilate, removing excess moisture and reducing the formation of mold in the nest. Thanks to the mesh on the ventilation holes, parasites cannot enter the hive.
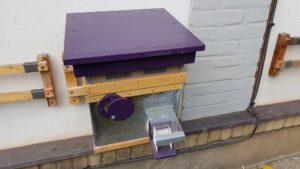
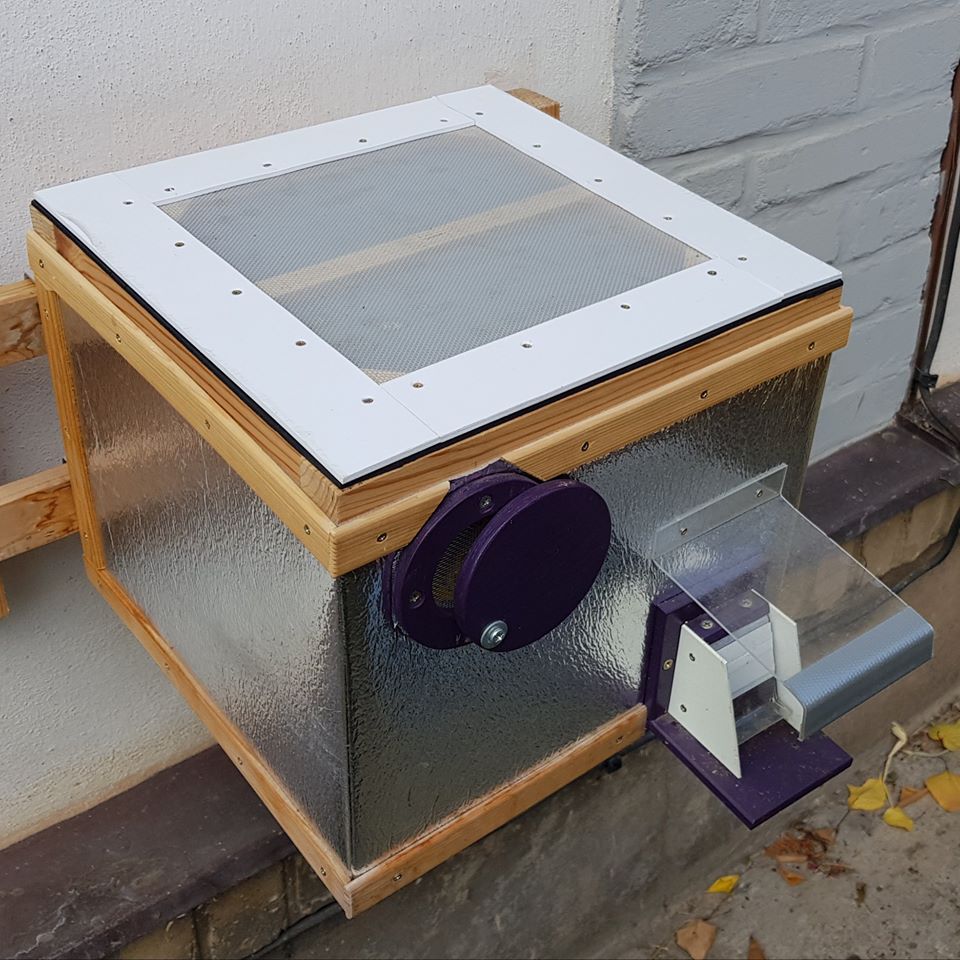
Hive with ventilation attachment installed
(all photos by Ondřej Hercog)
How to make an attachment?
It is a simple wooden structure made of planed battens/planks – a frame with a cover plate on top. The frame construction copies the outline of the hive body, on which the roof is then placed.
This can be solved by making a frame out of battens to create vents about 1-2cm high. It is less laborious to drill/cut holes in the frame.
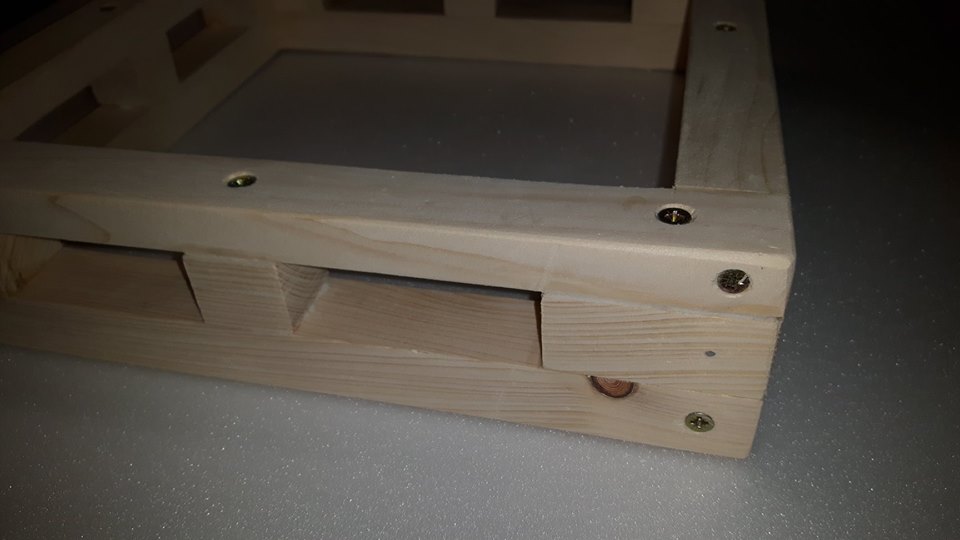
Ventilation extension made of battens.
The joints are glued and supplemented with screws.
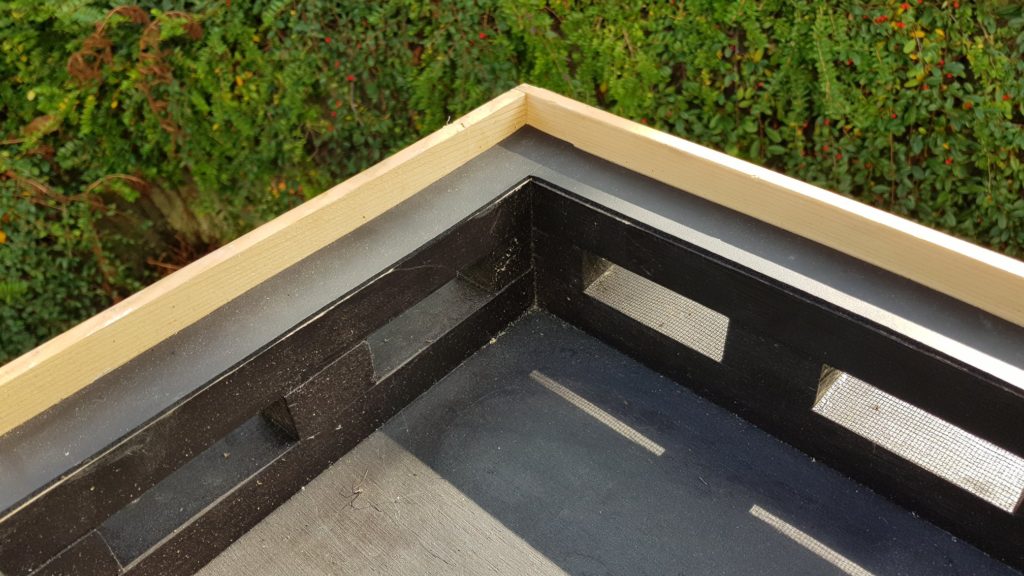
The vents should be positioned so that the roof placed on the frame does not obstruct ventilation.
Cover the frame from above with a board, glue it in place and tighten the screws. There must be no gaps or gaps anywhere!

The top of the cover extension is closed with a plywood board.
Now paint the inside of the extension, preferably black paint. This will ensure that the bumblebees cannot see the light under the roof.
Cover the perimeter of the extension where the ventilation holes are created with a mesh made of Uhelon 53S . Then cover this with a fine aluminum mesh so that bumblebees do not chew through the Uhelon 53S.
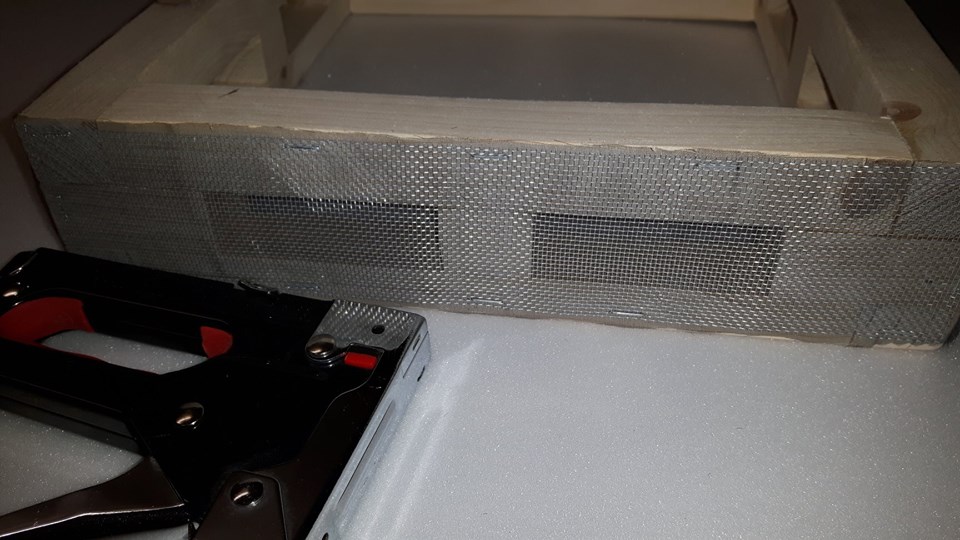
The ventilation holes are covered with Uhelon 53S and then with a fine aluminum mesh.
I prefer to use nailing clamps.
I then trim the frame with thin wooden strips so that the mesh fits well.
If you are not using a protective screen on the hive, I recommend covering the ventilation holes with nets from the inside as well.
I recommend having a protective net under the extension, this increases the protection of the nest against parasites.
I keep the protective net on the hive at all times.
You can use a staple gun to attach the nets, for example. Make sure that the nets adhere perfectly to the frame everywhere!
Now trim the frame with wooden strips. These will press the mesh firmly and close any gaps. Attach the strips with countersunk screws.
Trim the bottom of the extension so that the trim extends beyond the bottom edge of the extension. This will keep it stable on the hive and prevent it from sliding off.
Ventilation attachment – detail of the bottom side with strip and seal.
Provide the lower edge of the extension with a soft seal. Use the same seal as used for the protective grille (Tesa / fan seal). This will ensure that the extension fits well and sits well on the hive.
View of the ventilation attachment from the bottom.
The inner surfaces are painted with black matte acrylic paint.
The contact surfaces are provided with a soft seal (here, a seal for the fans).
A strip on the perimeter ensures that the attachment does not slide out of the hive.
Inspect the attachment. There should be no leaks anywhere that parasites could get into the nest. Pay attention to the details, they are the key to success.

technical drawing of the structure
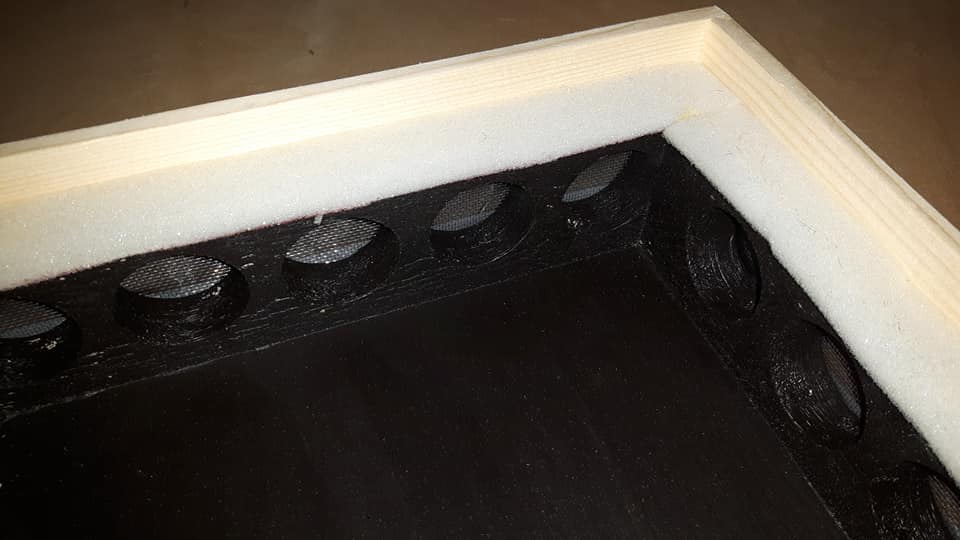
An alternative design of the extension:
instead of battens, I used a planed board and drilled holes in it.
The seal is made of 5mm foam, but it has a shelf life of about 1 year.
How and when to use the attachment?
The attachment works well if you use it correctly. Otherwise, it could damage the nest.
We recommend using the attachment in conjunction with the hive protection net !
We recommend using it only for the time necessary to ventilate the moisture .
We do not recommend using the attachment when the outside temperature is lower than 18 and higher than 30 degrees.
It is not necessary to ventilate the nest when you are installing the queen or when the nest is weak. Using an extension would rather disturb the nest inhabitants.
The attachment is therefore well suited for a strong nest at a time when there are no extreme temperatures, or when mold is starting to form in the nest. I also use the attachment in the fall, when moisture condenses in the hive due to temperature changes and needs to be eliminated.
On a hot summer day, I use the attachment at night, when the nest can be ventilated and the temperature in it can be reduced.