Breeding bumblebees on a grid - a mesh that solves moisture drainage
Author of the solution (idea) : various solutions, modification Čmeláci PLUS
Tested in practice: yes
Test results: we are waiting for the results
Group of keepers for whom the tool is suitable: no restrictions
Justification: High humidity in the nest sometimes causes water to accumulate in the lower part of the hive - along the walls; Karel and other keepers use a grate on the bottom of the hive so that the moisture is separated and does not bother the inhabitants of the hive. This solution is one of the options for how to easily make such a net.
Last updated: 9/3/2022
Humidity in the hive – does it matter/does it matter?
We recommend filling the shelter at least 3/4 of the space, but in such a way that the ventilation hole is not covered.
What about excess moisture at the bottom?
The use of Mirelon insulation foil has proven very successful. It acts not only as additional insulation, but also as an effective surface finish. You can read about this solution HERE .
Moisture separation mesh
We will inform you about the test results.
Production instructions
Material
- wooden slats
- screws and wood glue
- stainless steel mesh – beekeeping mesh 3.15/0.8 – stainless steel
– the mesh is commonly available in beekeeping shops,
alternative clay mesh (insect net) – has a mesh size of approx. 1 mm
– the mesh is available as an insect net in hobby shops - staple gun / larger stapler
Procedure
- Just make a frame out of battens. It's worth gluing the joints and connecting them with screws.
- The dimensions of the frame should be such that there is a gap of about 5mm around the perimeter (the hive is lined with cardboard).
This is enough to comfortably insert and remove the frame even if it swells due to moisture.
It is necessary to test and adjust the dimensions according to your hive. - The screen should not interfere with the placement of the passage (tube). If necessary, move the opening in the hive above the screen.
- Attach the clay mesh to the frame.
A staple gun is the best way to attach it. - It is advisable to secure the edges of the net, for example with adhesive tape.
Sharp edges of the net can injure both the beekeeper and the bumblebees. - Attach the curtains to the frame in a similar way, as the frame can be removed using these.
This can be done well using clamps, as well as the netting. - Tests that the frame can be removed freely
Notes on the nets used
- If you use thicker beekeeping mesh, parasites will fall through the mesh more reliably.
- This mesh is a little more difficult to work with, but it is indestructible
- If you use a fine mesh, the parasite penetration will be less, but it will be sufficient for moisture removal
Construction
- Line the hive with cardboard, the procedure is HERE
You don't need to line the new hive with cardboard, let the bumblebees smell it - Insert the separation mesh
- You can place a little Lignocel in a cloth bag under the net, it absorbs water.
Be careful, Lignocel can increase its volume significantly when absorbing water, use only enough so that it does not lift the net. - Attach the entrance passage to the hive wall.
Use screws or make a wooden part, as shown in the photo. - Adjust the bumblebee lift so that it does not cover the entire mesh, so that water can get around it and under the mesh
- Next, prepare the dough using the standard procedure
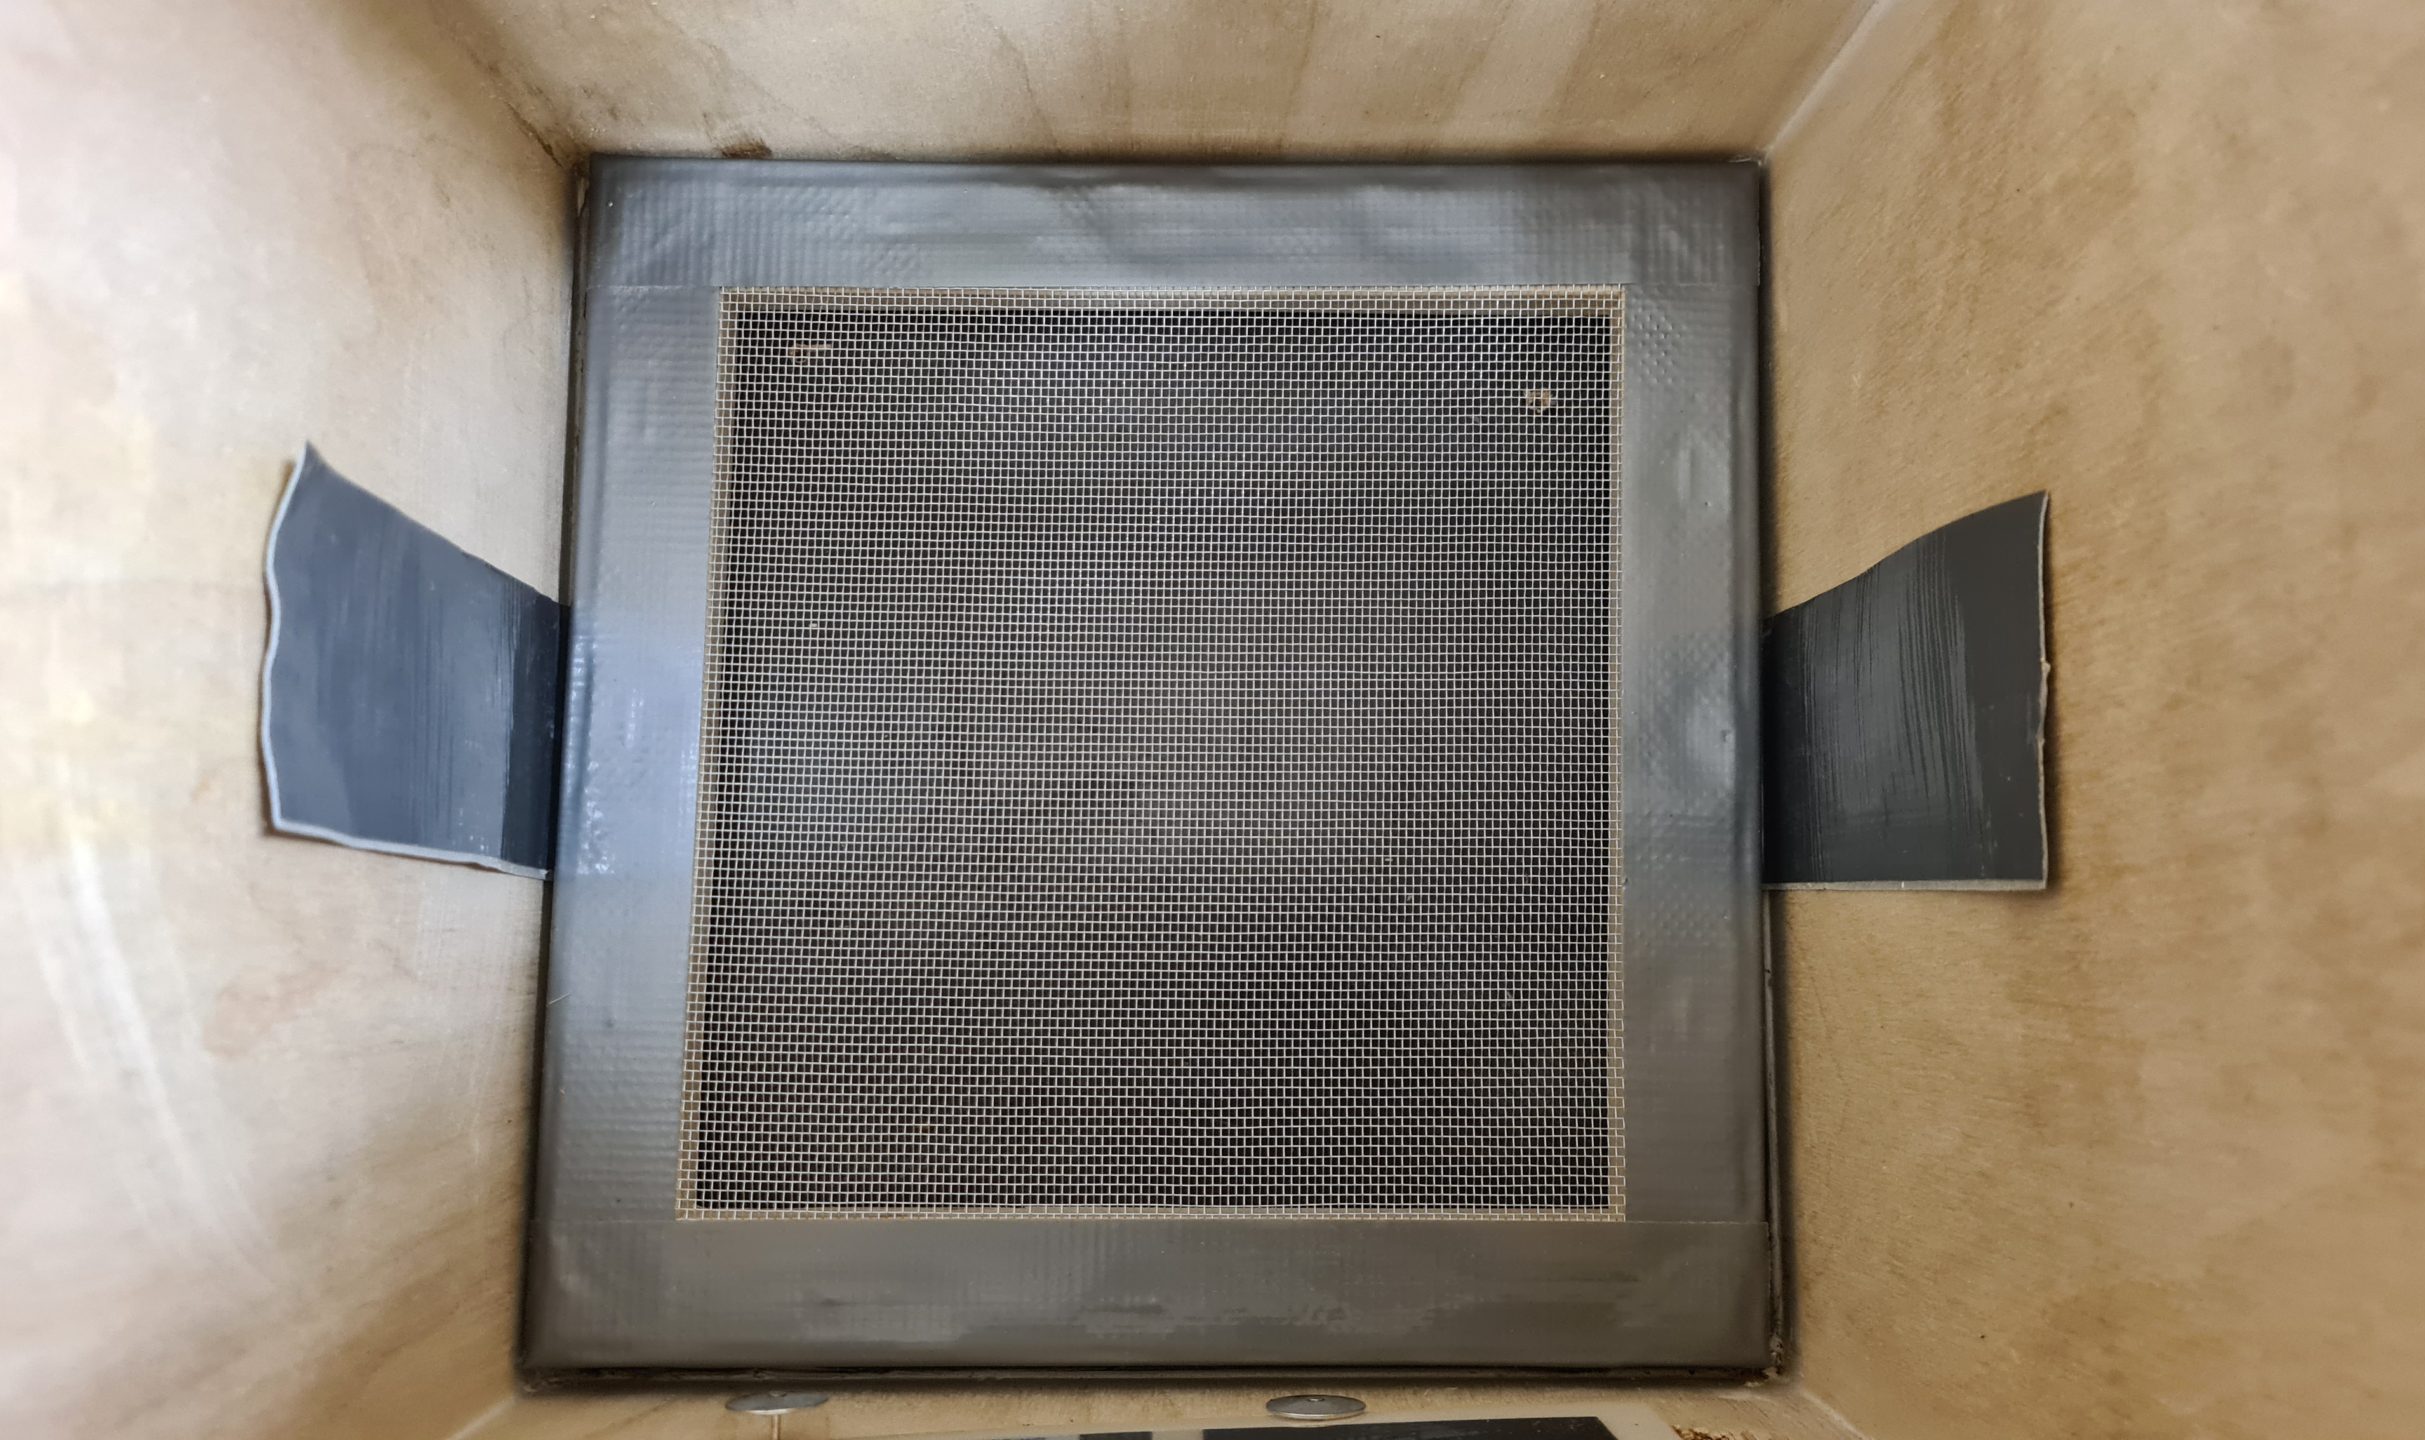
A simple frame made of wooden slats. If they are coated with waterproof varnish, they will last longer. The net is attached with clamps.
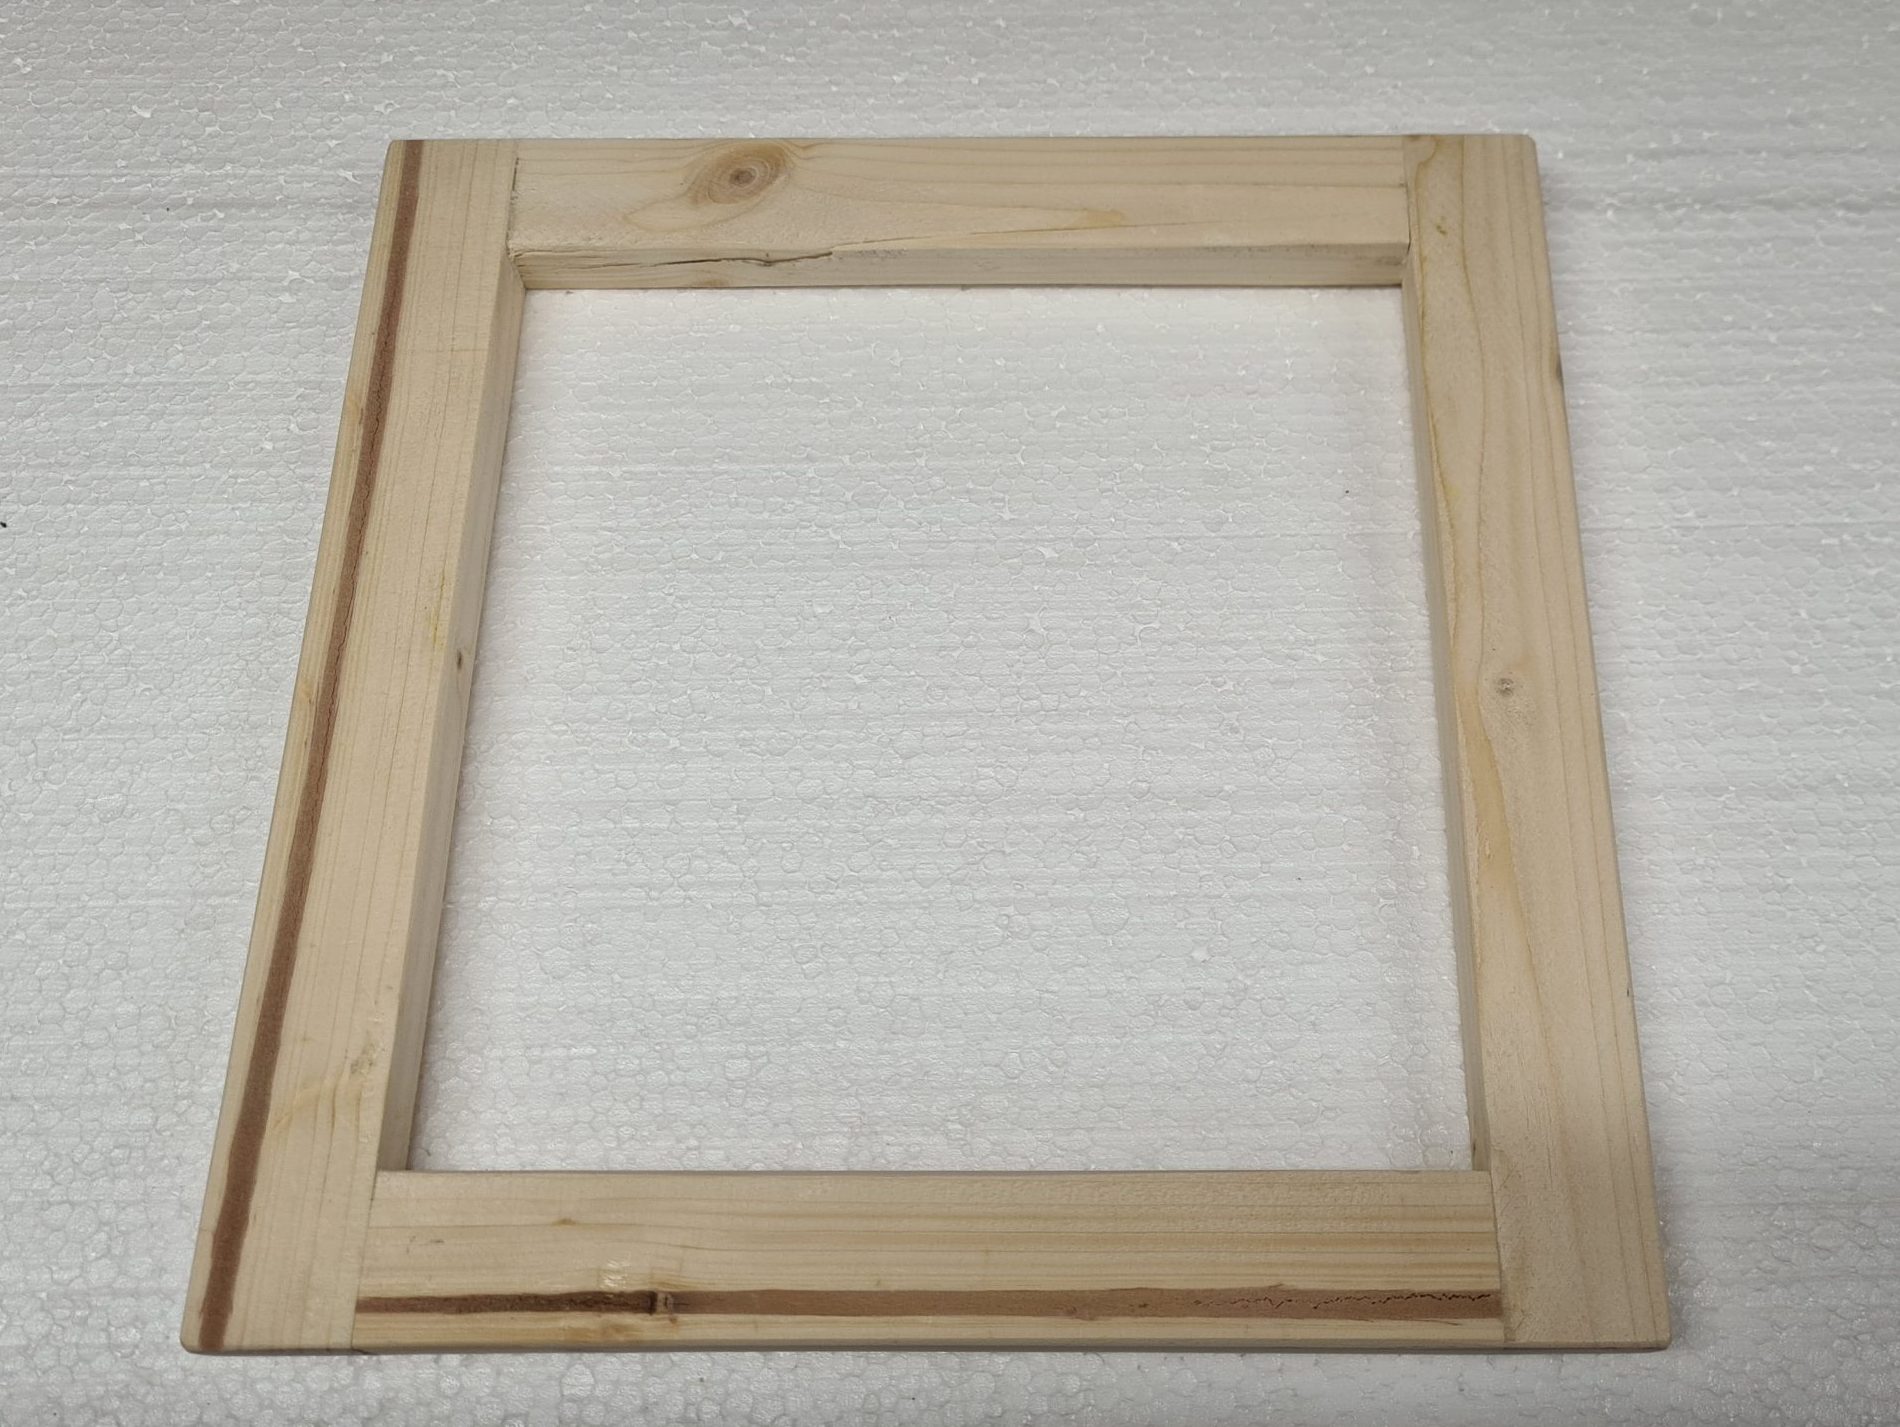
Nest net – frame
Photo: O. Hercog 3/2022
Nest net – frame
Photo: O. Hercog 3/2022
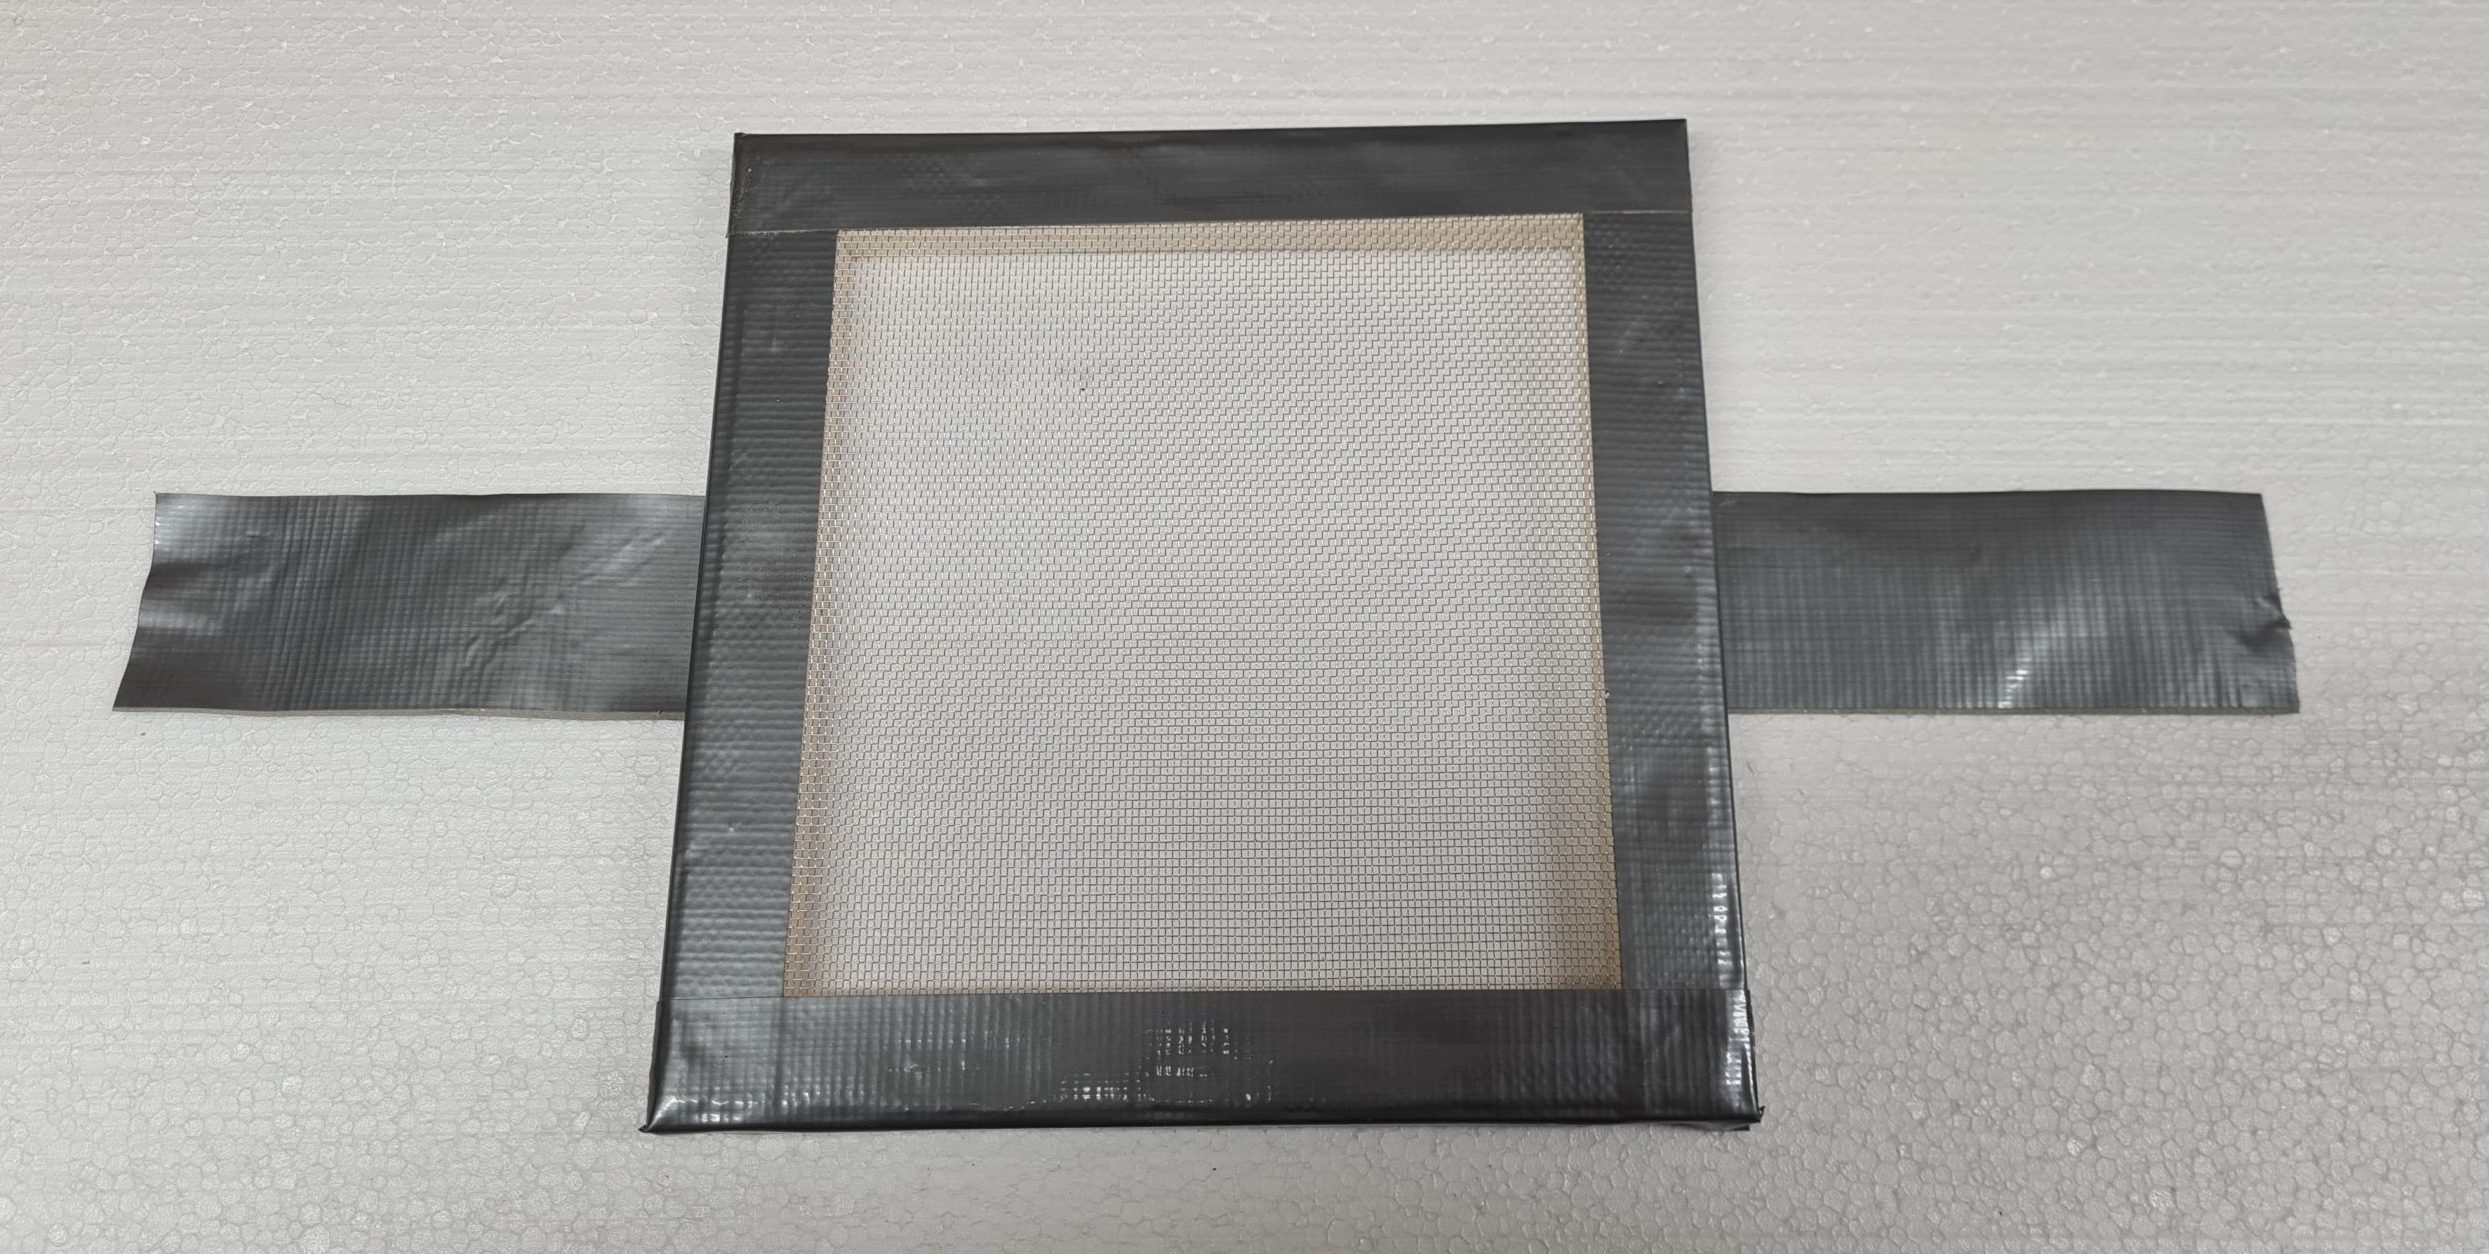
The edges of the frame are covered with “silver tape for everything.” You won’t get hurt when handling it – neither you nor the bumblebees
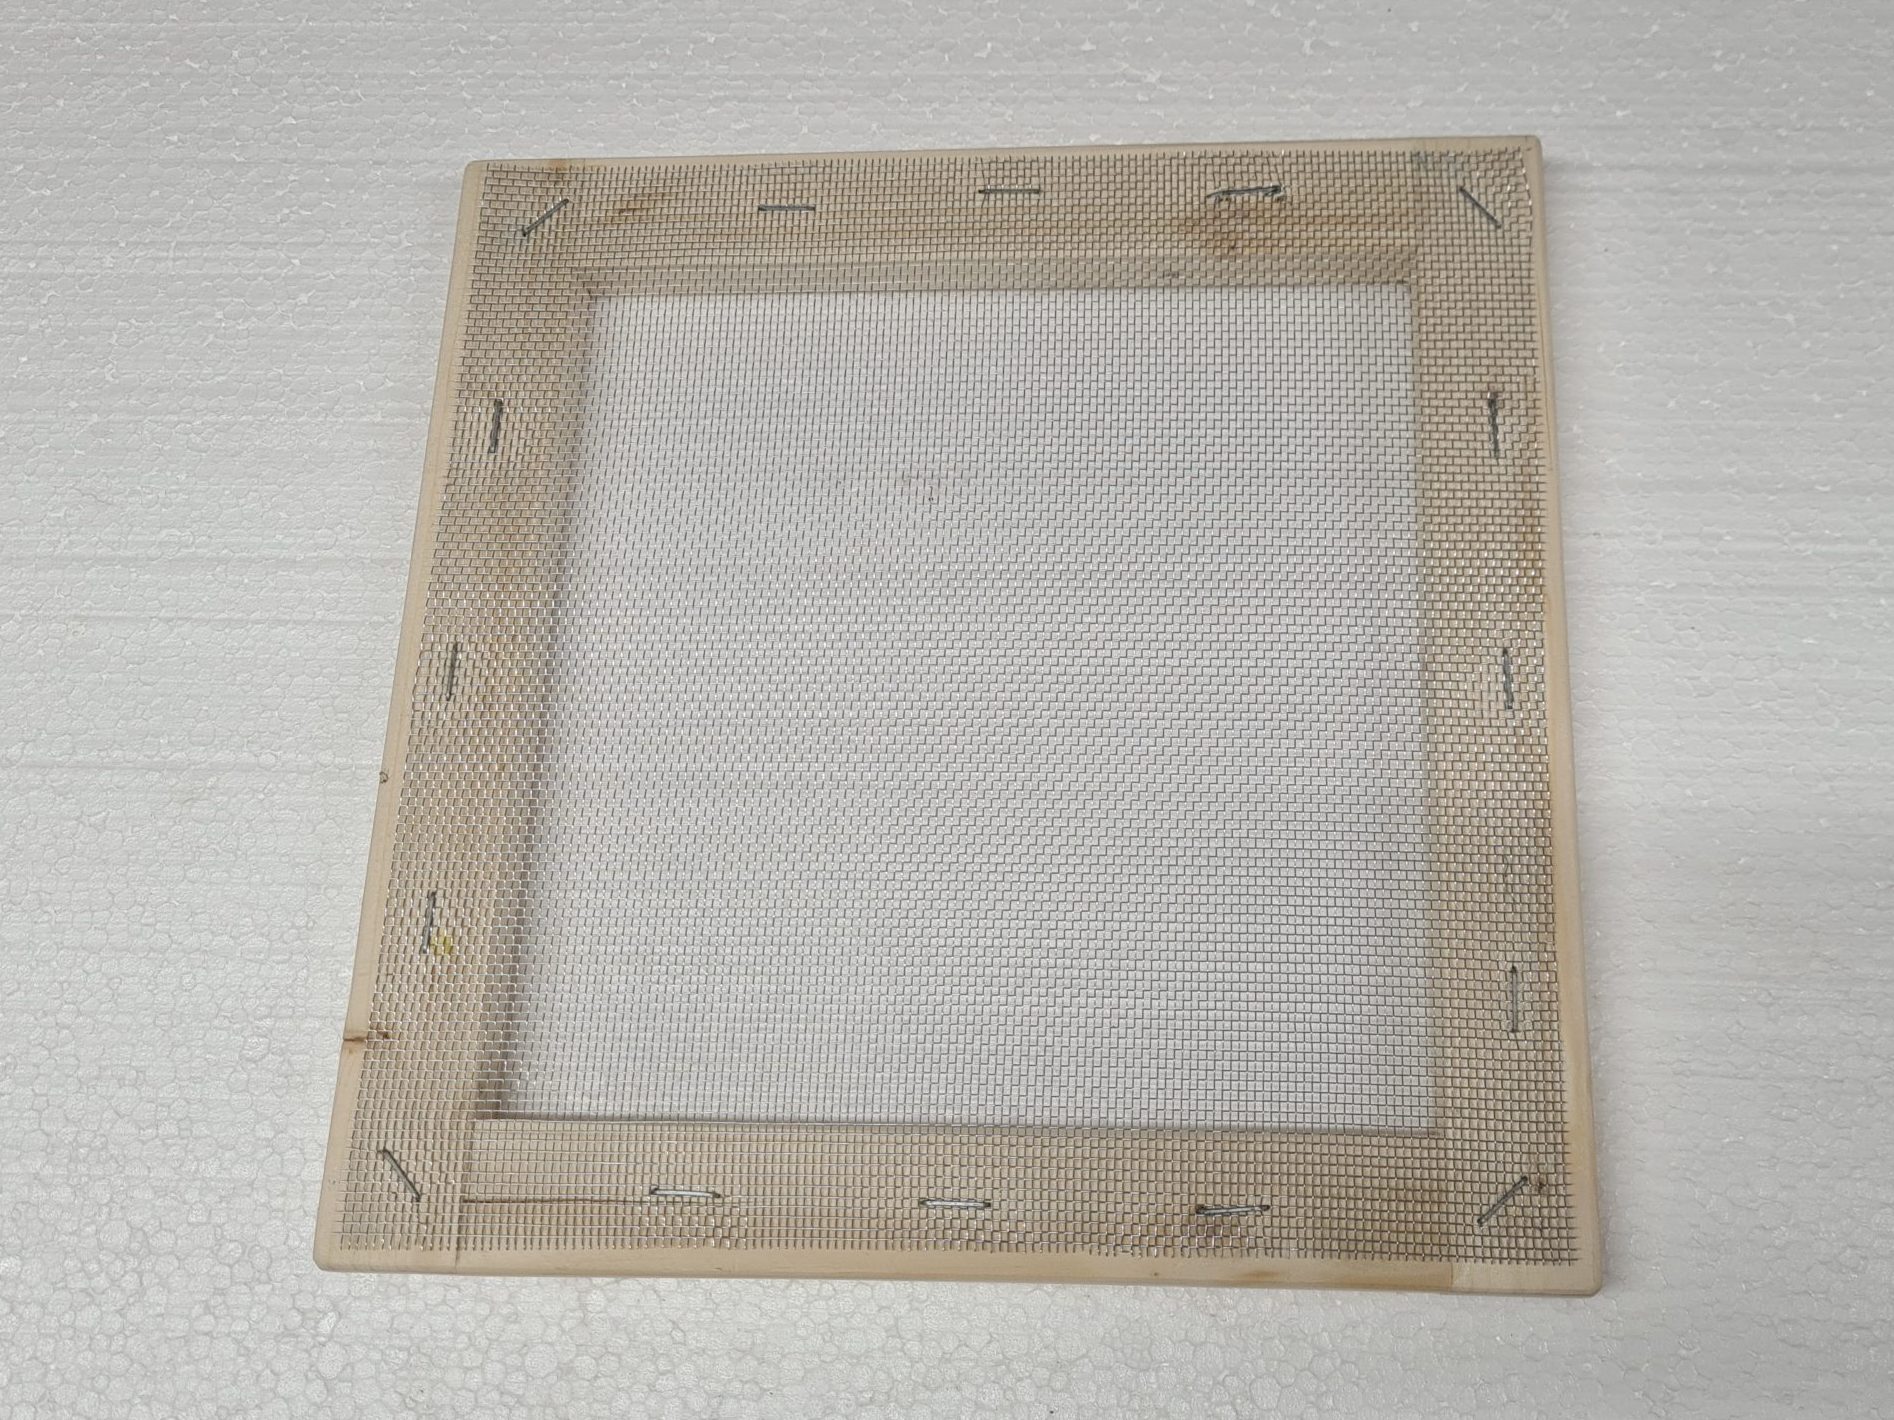
Net under the nest - frame with net - upper side
Photo: O. Hercog 3/2022

Net under the nest - frame with net - underside
Photo: O. Hercog 3/2022
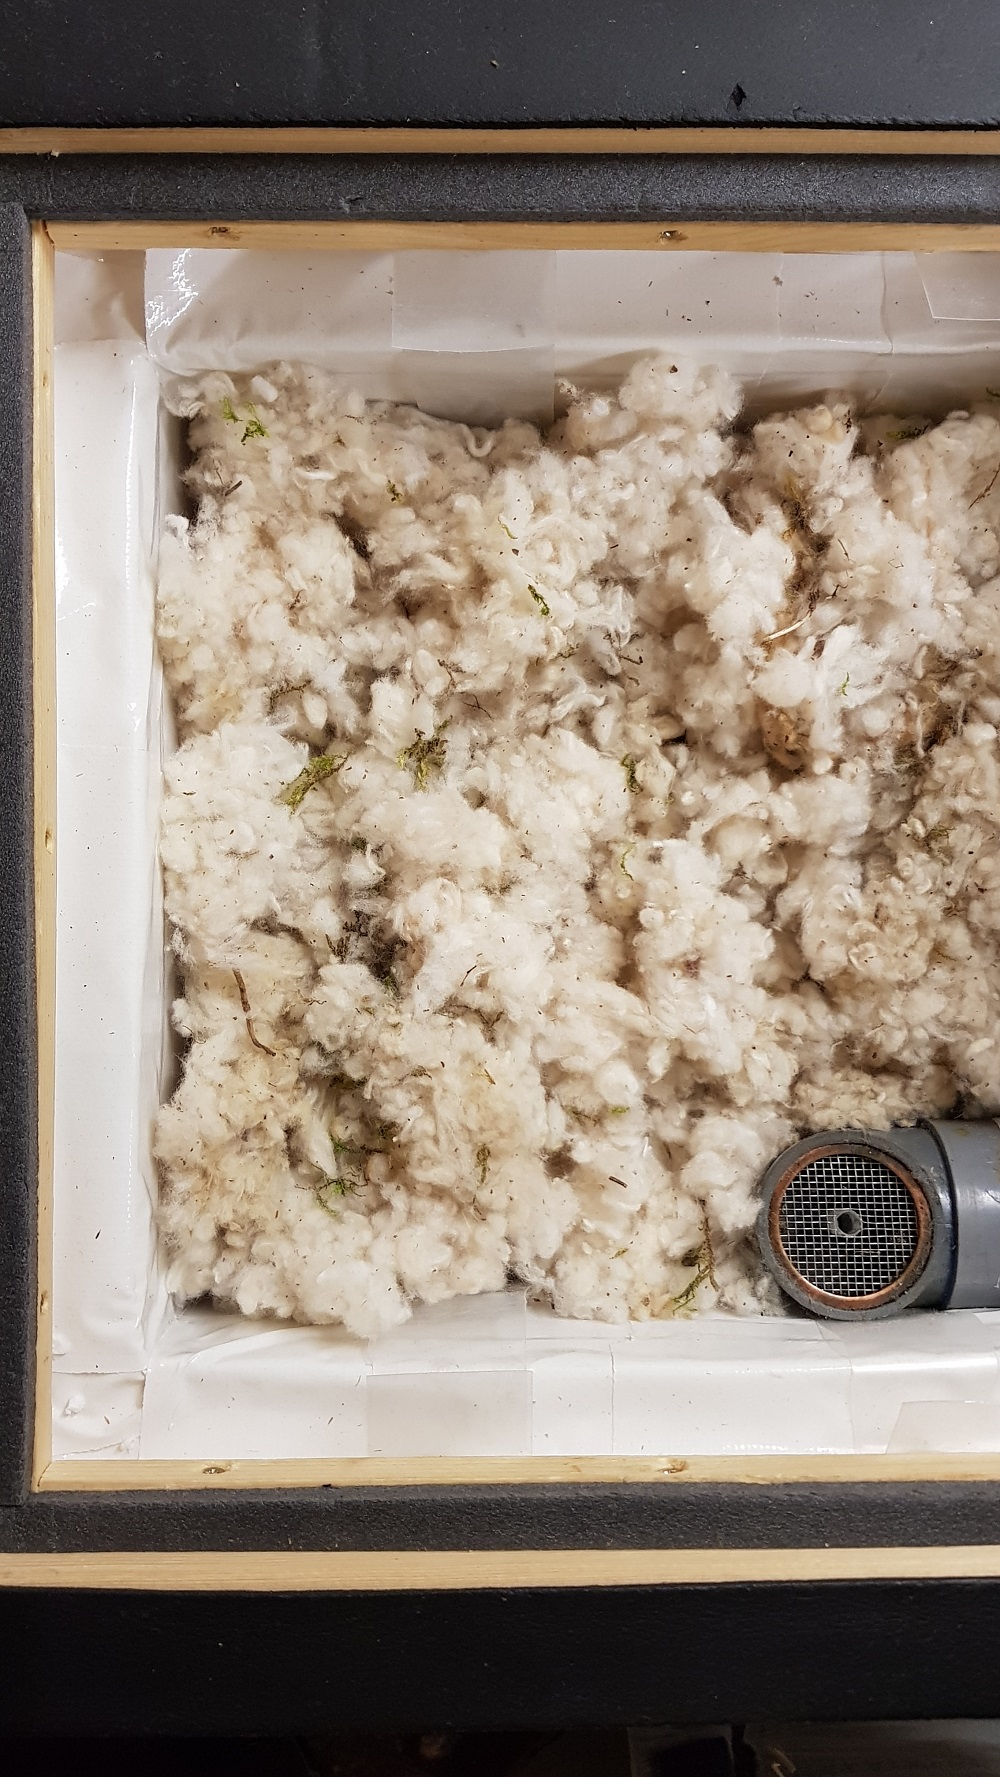
The separation mesh is in place. The clearance that allows the mesh to be inserted and removed is important. A clearance of 5 mm is sufficient.
In the second picture, the corridor (here the black pipe) is installed. The bumblebee elevator is reduced in size so that water can pass around it under the mesh.
PLUS bees – Net under the nest – frame with net – placement in the hive – Photo: O. Hercog 3/2022
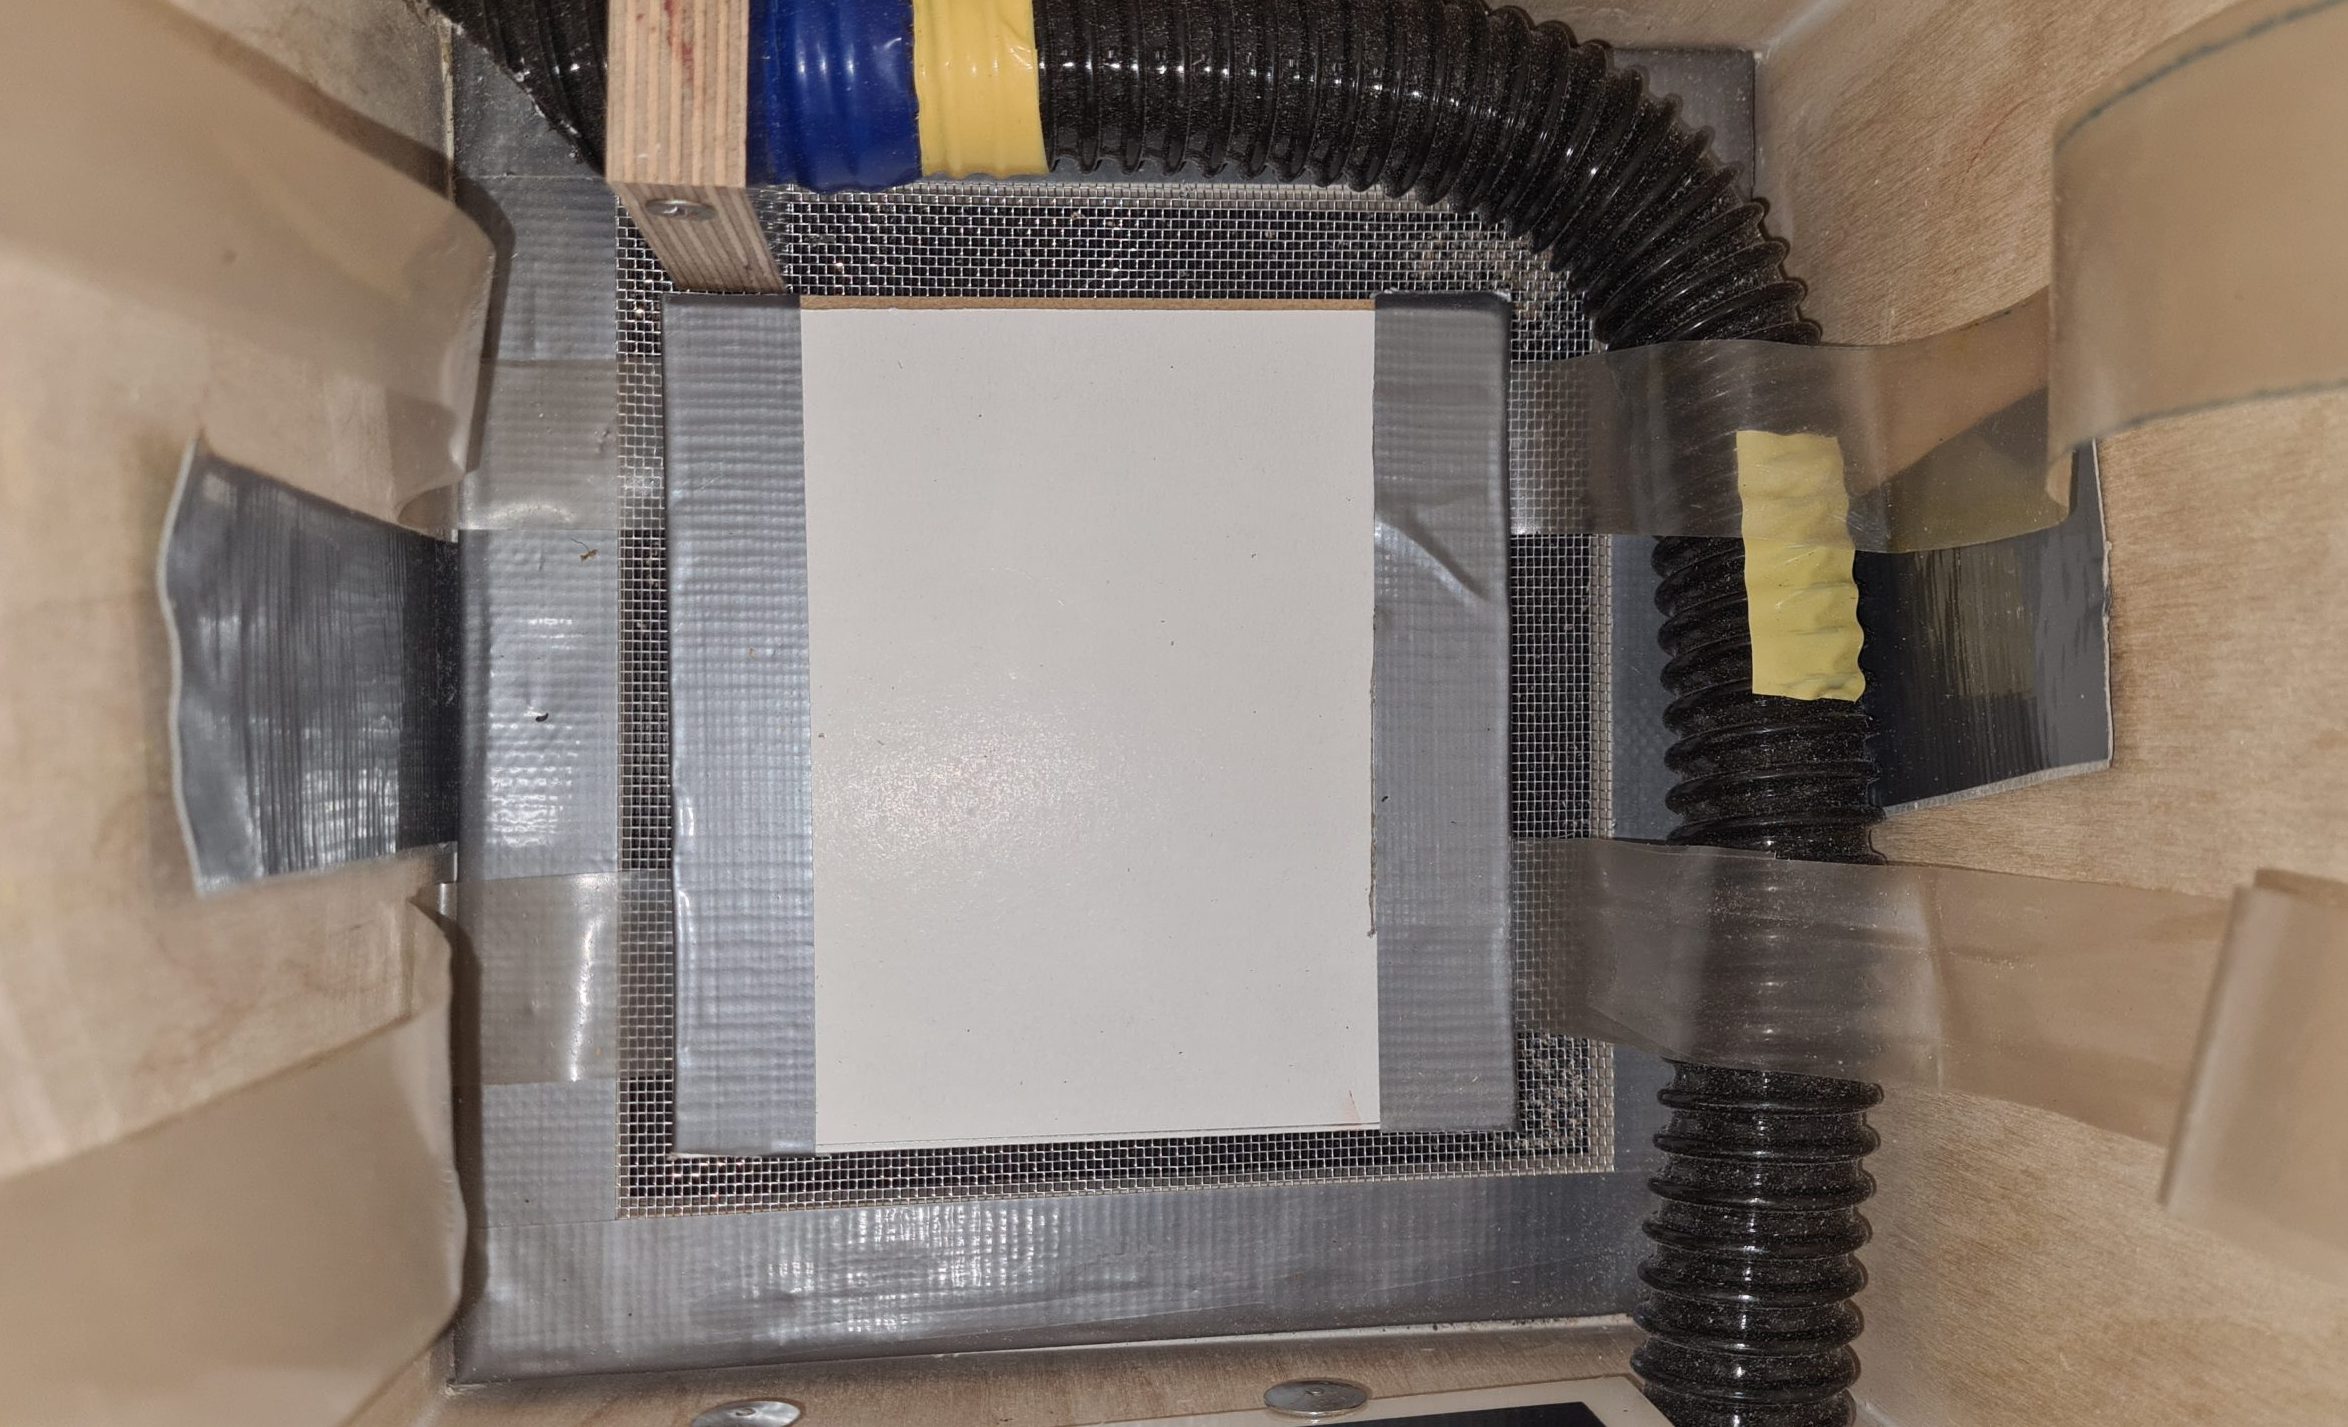
Net under the nest - frame with net and bumblebee elevator Photo: O. Hercog 3/2022
Conclusion
If you have your own proven solutions, please write to us. We will be happy to share functional solutions so that other breeders can use them as well.