Experienced bumblebee keepers recommend creating a so-called " bumblebee elevator ".
This is a solution designed by Mr. Miroslav Stuchl, which you can find on some websites, but without pictures. We tried to make such a bumblebee elevator a few years ago, tested it and have been using it ever since.
Thanks to this solution, it is possible to easily remove the nest when you need to perform some intervention, or when you want to remove an intact nest from the hive at the end of the season and photograph it whole and undamaged.
From our own experience , we can confirm that it works great and gives you the option of working with a bumblebee nest without endangering their nest in any way.
Therefore, we dedicate a separate chapter to this solution.
Solution:
- Once you have an entrance passage/tube established in your hive (see Corridor in a Bumblebee Hive) , you can easily create an elevator.
- Create a second bottom from a stronger base.
You can use thick, sturdy cardboard (not cellular), thin waterproof plywood, or a piece of plastic. You can successfully use a 5 mm thick polystyrene board.
Be careful – do not create a bottom from a material that softens or collapses when soaked with moisture. - the shape of the second bottom so that it can be inserted and removed = the inlet tube and its bend must not interfere (therefore, we create the bottom only after the tube is attached).
- cover the second bottom from the top as you used to cover the walls of the hive.
We recommend using white cardboard from pastry boxes and securing it to the second bottom with adhesive tape (for details, see the chapter on preparing the hive - we are finishing - the hinges to the underside of this second bottom , which you will use to lift the bottom. Create 4 hinges, preferably so that they are continuous and run under the second bottom.
You can use, for example, 2-3 cm wide strips of sturdy plastic bag, fabric, or string to create 4 hinges. - We recommend placing the hinges on the bottom of the bumblebee lift so that the lift can be easily pulled out when in use.
- Then place the second bottom on the bottom of the hive
- Try how you will lift the second bottom using the hinges and adjust the shape of the second bottom or hinges if necessary.
- Adjust the curtains so that they run along the walls of the hive, attach the clothespins at the top and cut off the excess parts of the curtain.
To create a bumblebee elevator, use our photo tutorial , which will show you everything.
Control:
- We recommend trying out the bumblebee lift before you settle down!
- The entrance corridor or other elements must not interfere with the removal of the second bottom and, in the future, with the removal of the entire nest from the hive.
Using the bumblebee elevator
A description of the inspection and intervention in the nest can be found in the chapter<PŘIPRAVUJEME> , here only briefly for the sake of context:
- Bring the fear indoors
- Remove bumblebees from the nest
- Remove excess padding
- Loosen the hinges and carefully pull out the second bottom with the contents of the hive.
- Use both hands when pulling the nest out of the hive – the nest will not get crushed
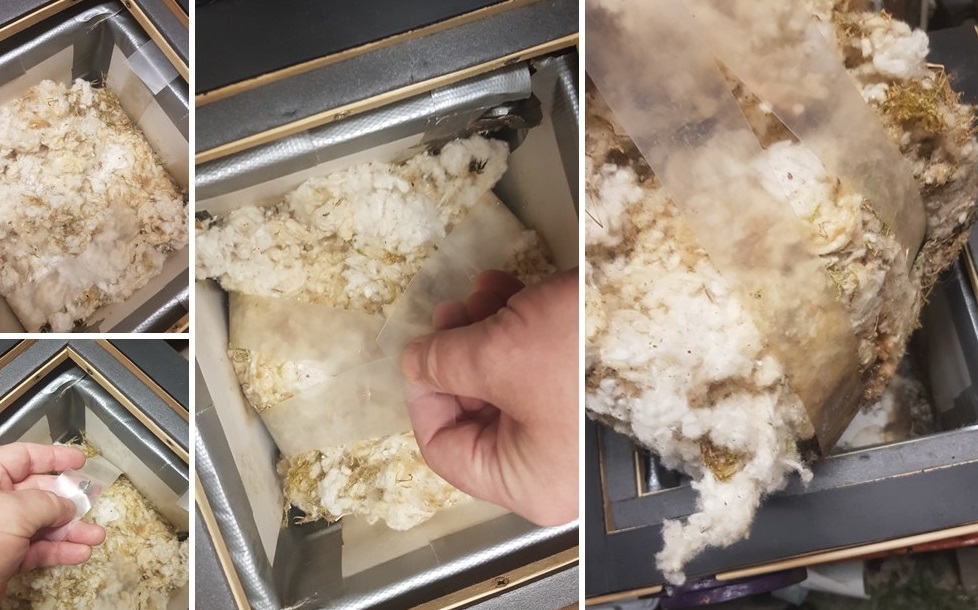
Bumblebee lift in action
Photo O. Hercog – he only had 2 hands and needed to take pictures 😀
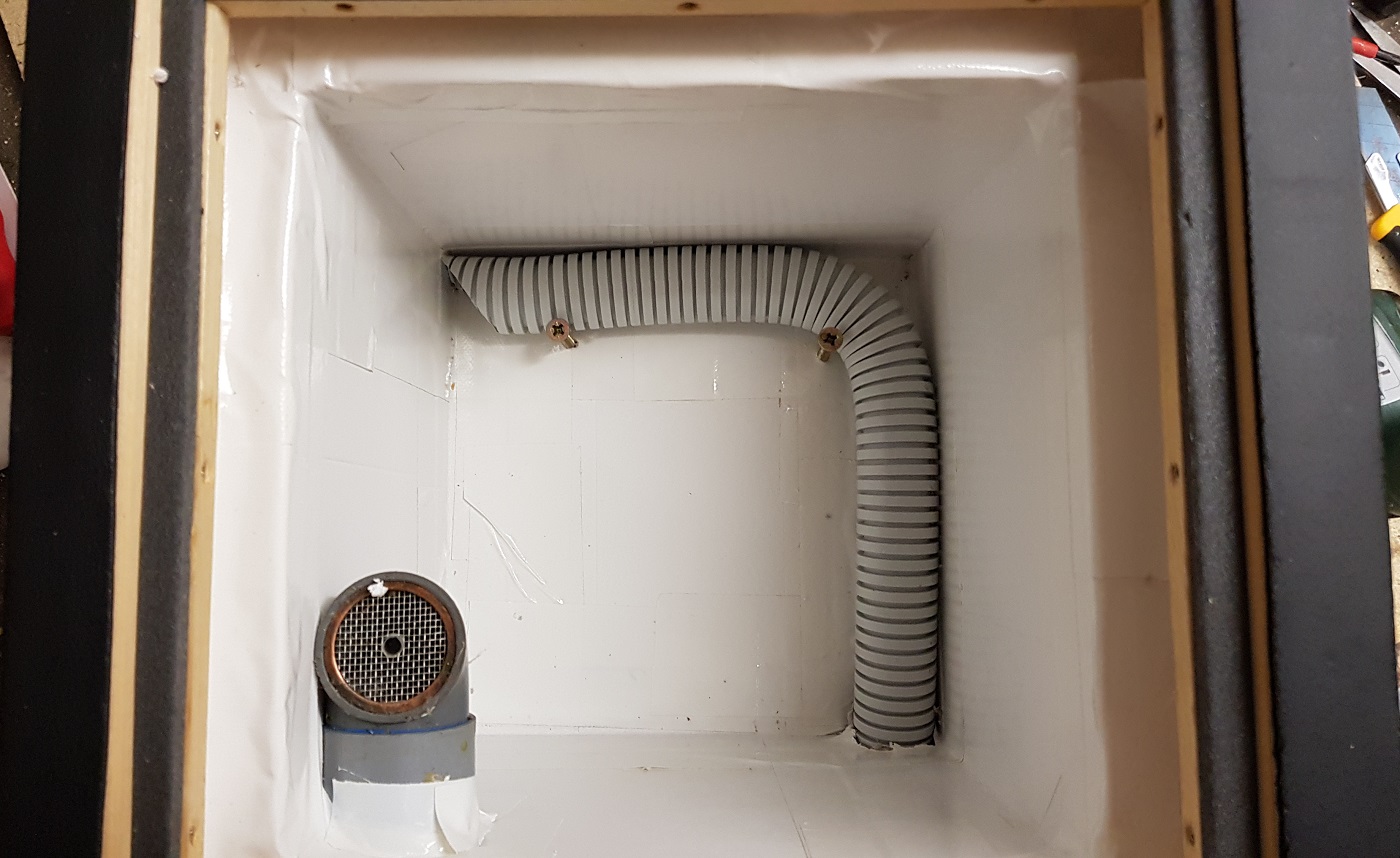
1. First place the entrance run in the hive, then create a second bottom for the bumblebee elevator accordingly
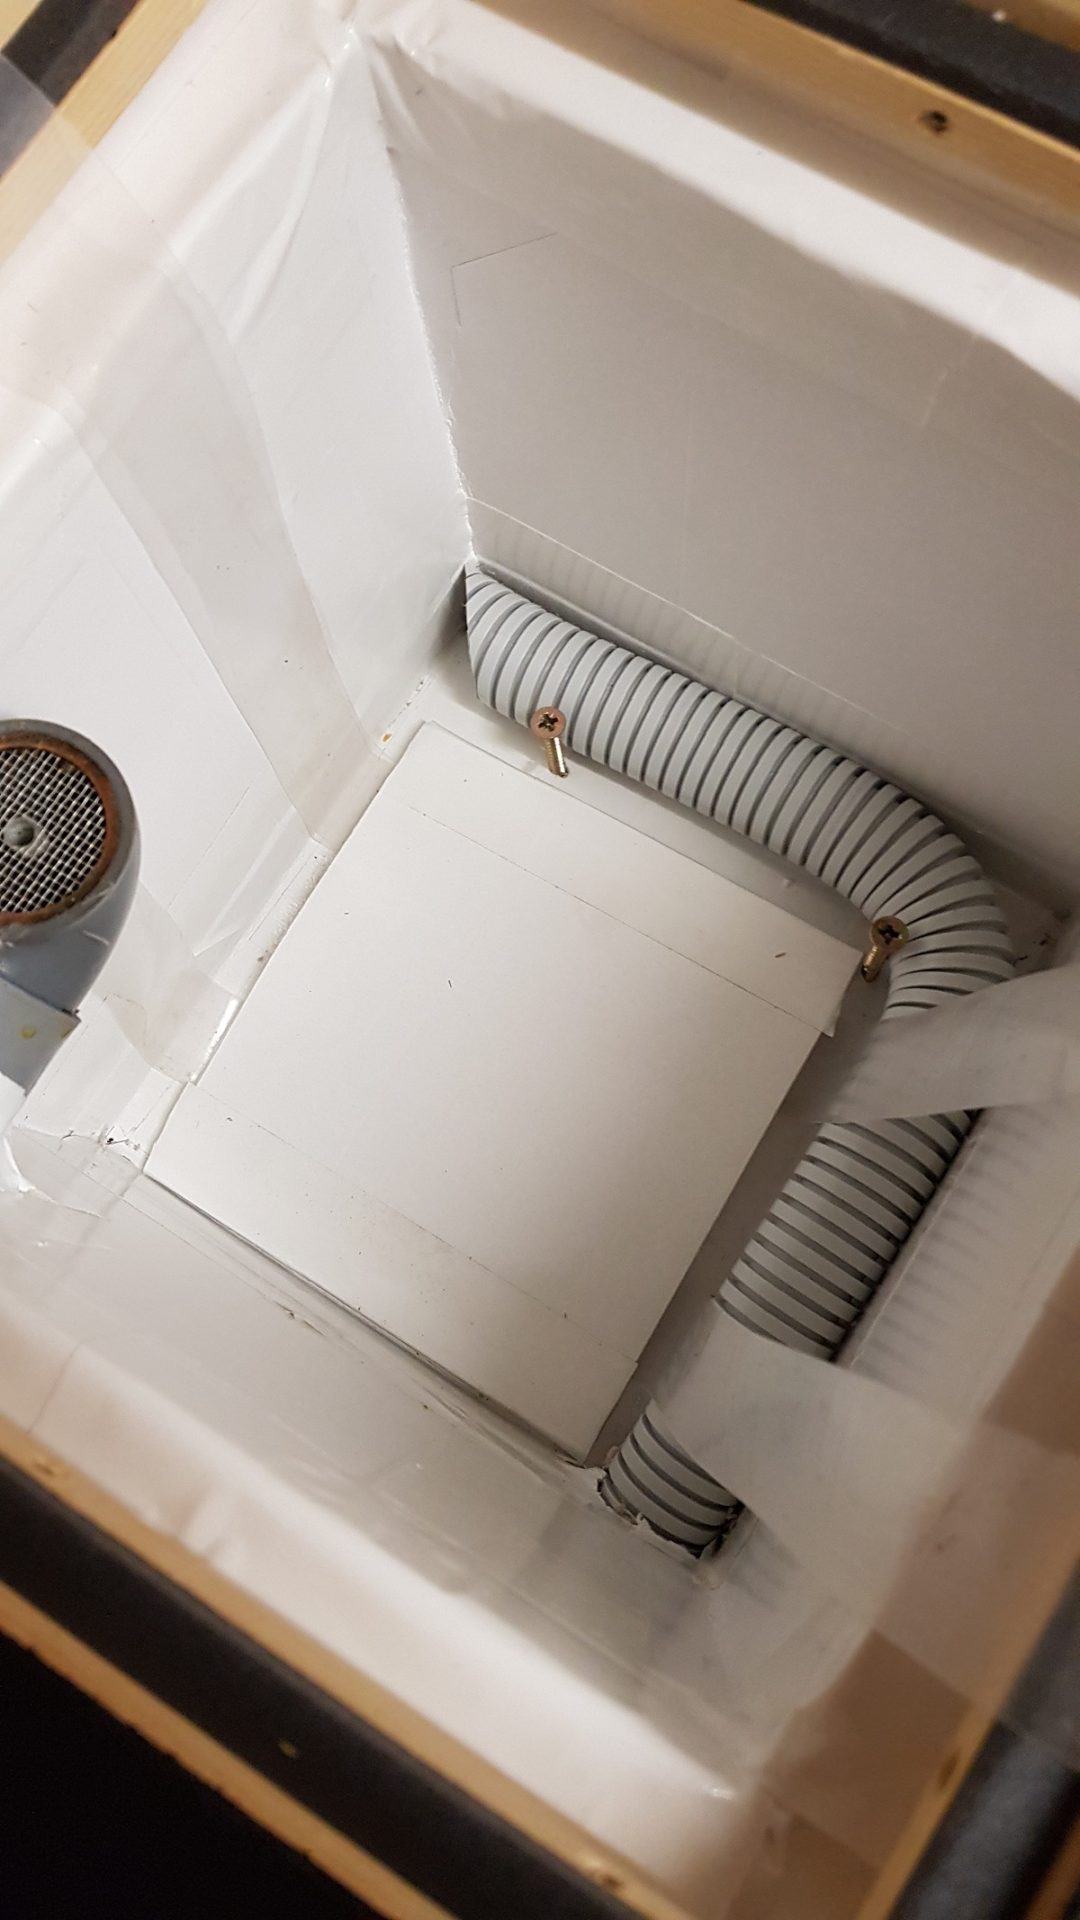
2. Adjust the shape of the second bottom so that it can be inserted and removed
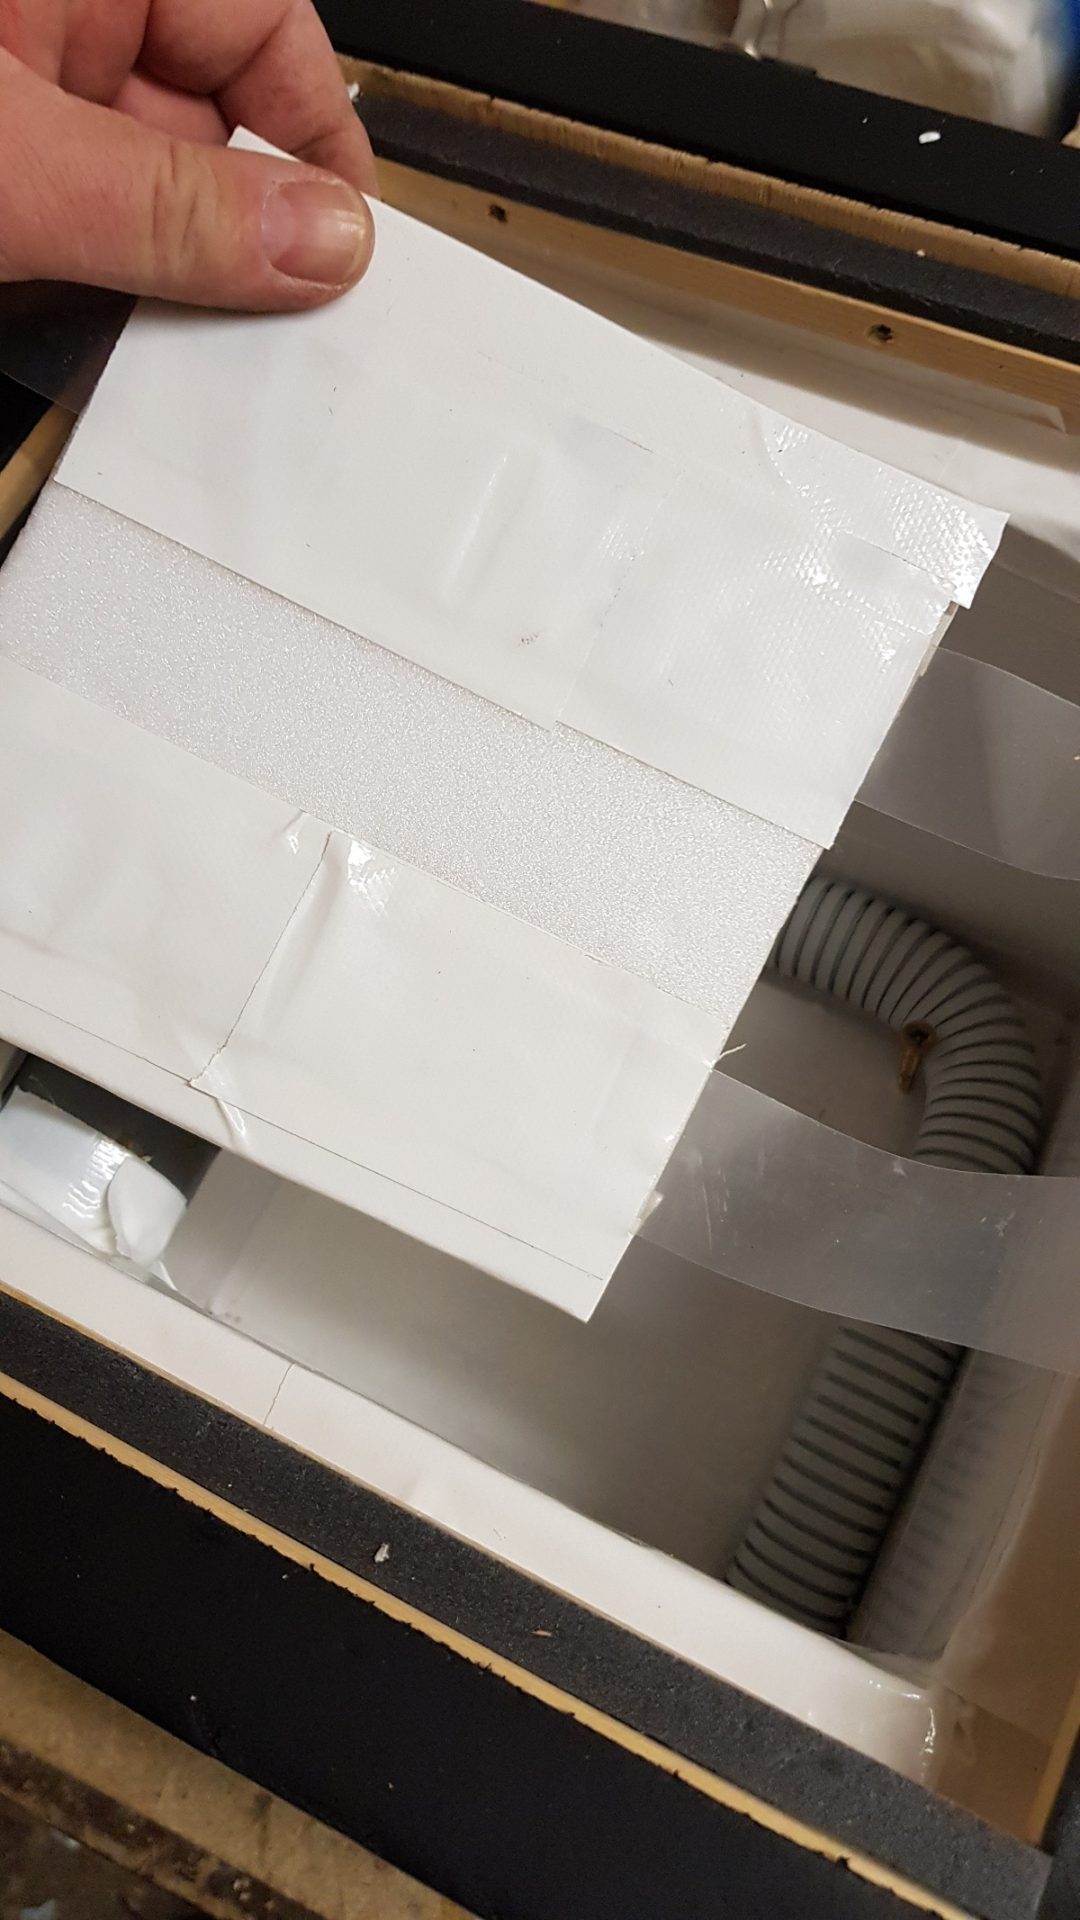
3. Attach the hinges to the underside of this second bottom
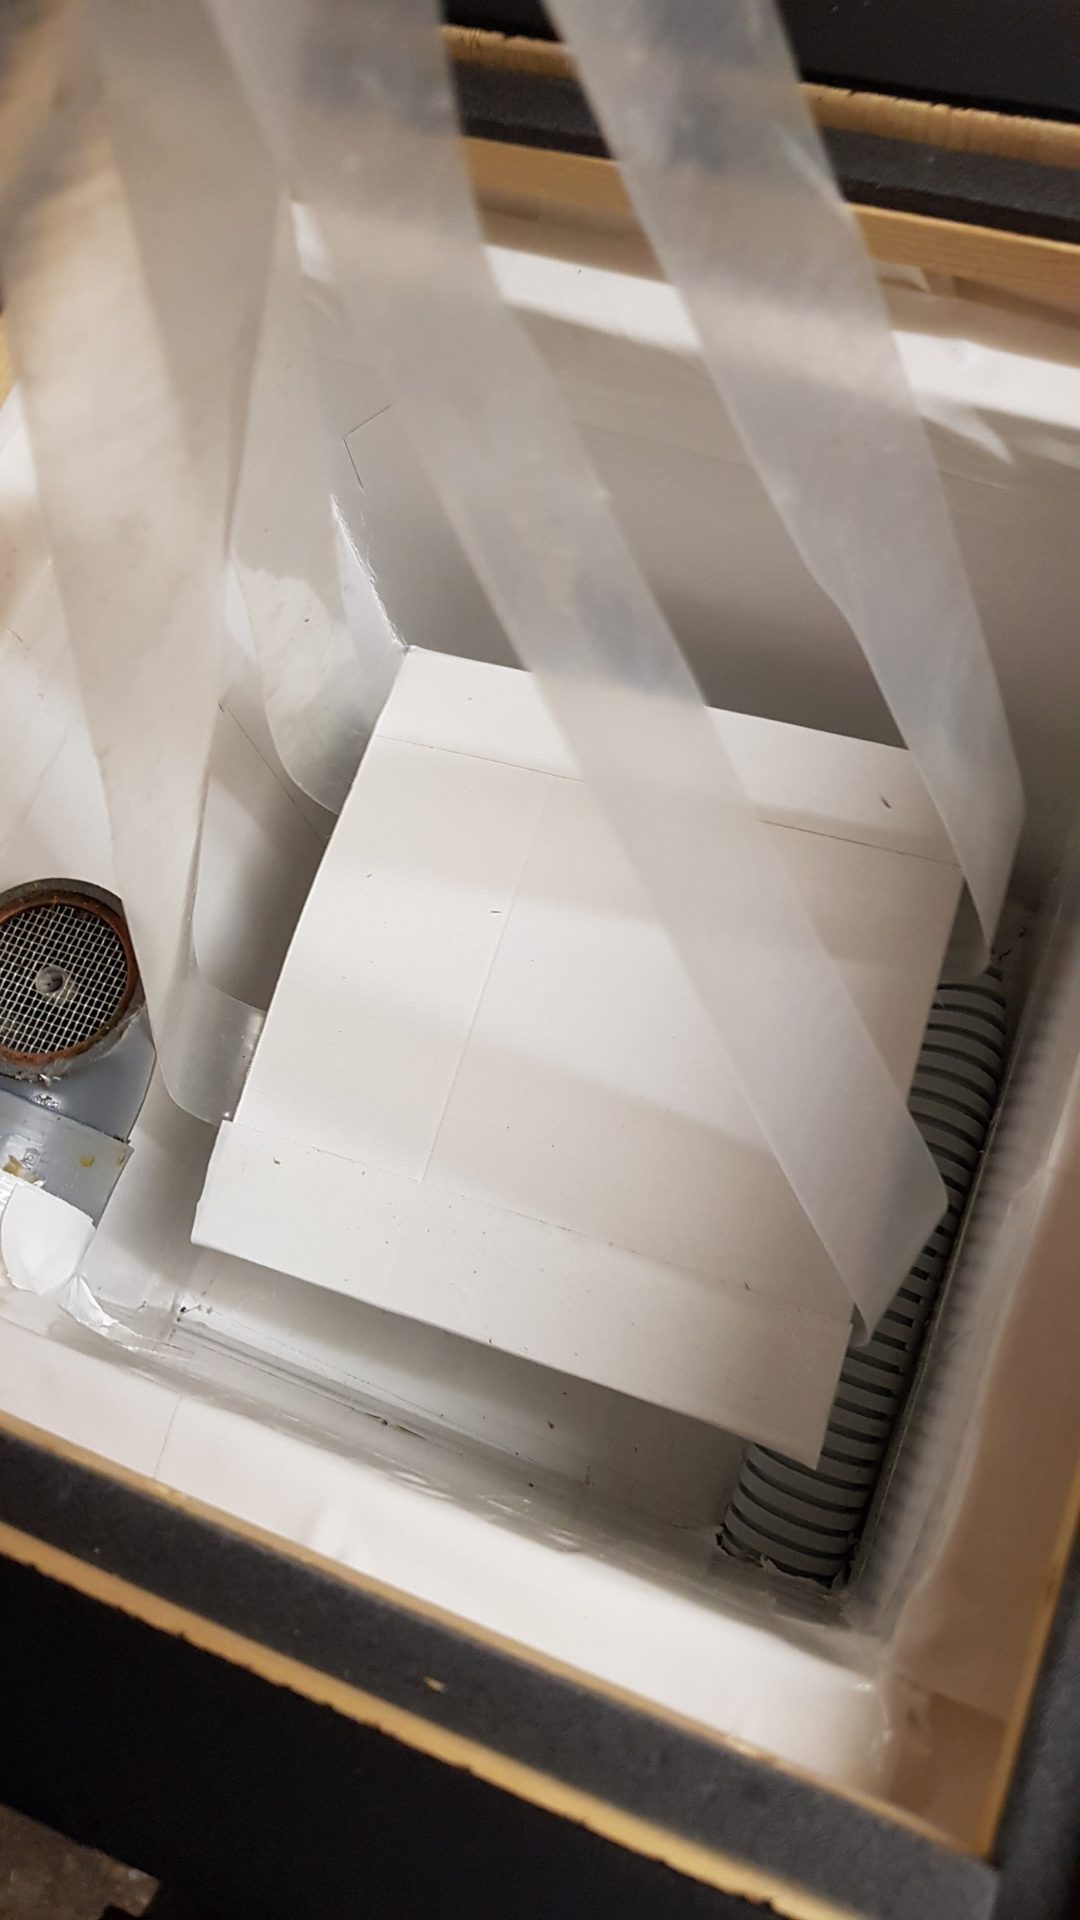
4. Try lifting the second bottom using the hinges

5. Adjust the curtains so that they run along the walls of the hive
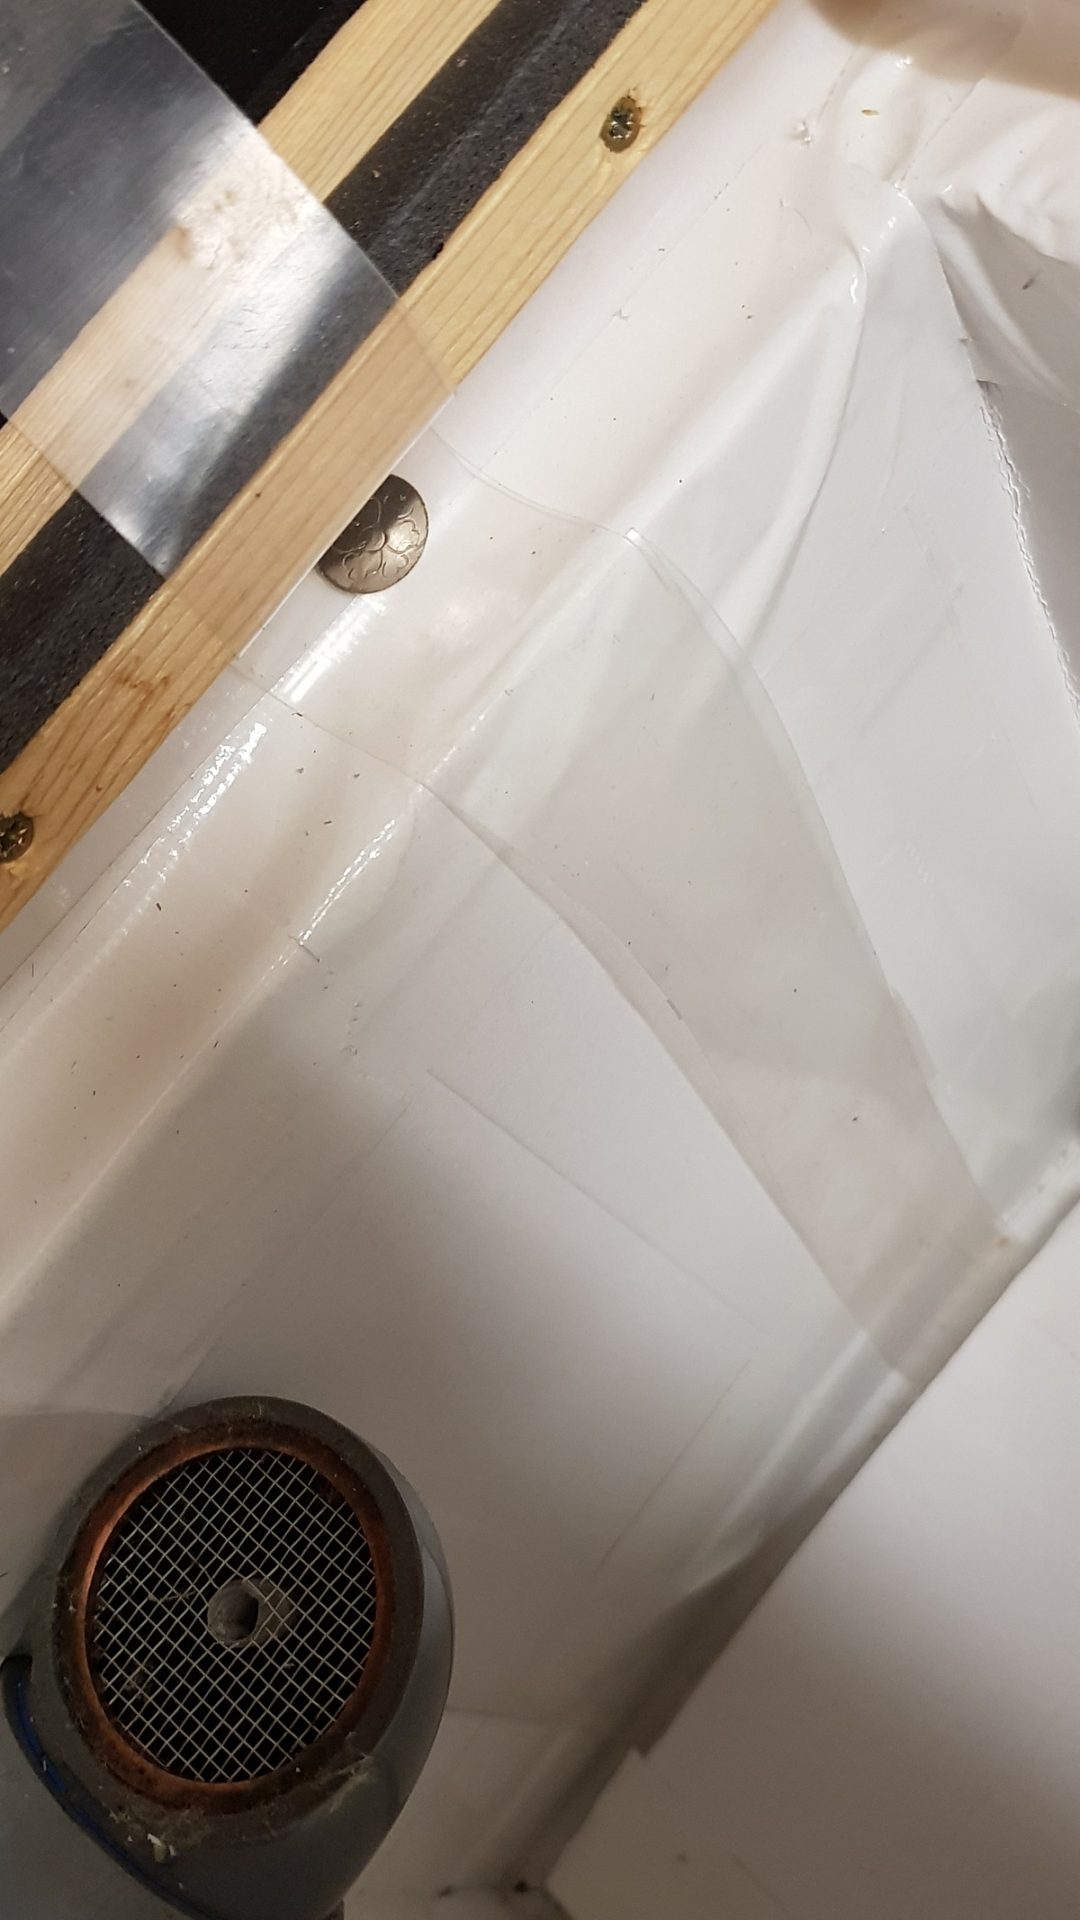
6. Attach the curtains at the top with clothespins and cut off the excess parts of the curtain