How to fix improper ventilation in commercial hives
Author of the solution (idea): Ondřej Hercog and Karel Kučera
Tested in practice: YES since the 2020 season on a total of 8 hives
Testing results : safe when following the production recommendations and usage methodology
Group of keepers for whom the tool is suitable: without restrictions
Justification : Easy to manufacture if the procedure is followed. Use on the hive temporarily / permanently. An element increasing the overall safety of the hive.
In the instructions for preparing hives (bumblebees) before the season, we showed you simple ventilation adjustments so that they also serve as a trap in case parasites penetrate through the ventilation, see HERE
If you did not prepare your hives in this way before the season, the adjustment after the hive is occupied is more complicated.
Therefore, we have prepared several tips for you on how to solve such an adjustment additionally , even for commercially available hives. These adjustments are non-invasive and can easily be added to populated hives.
practically the same solution in our own hives – just built in as part of preparation for the season.
The modification will not take much time and will increase the safety of your hive inhabitants :
- will carry the smell of the nest away from the hive
- will create a sticky layer to trap parasites that might find such a place
- creates a sticky layer for the larvae from the eggs that parasites sometimes lay in such a place
Most of the components you purchase for this modification can be used after the season for the final modification of the hive
We used the plastic waste pipes of the HT system, which Karel Kučera discovered and has been successfully using in his hives for years.
A commercially sold ventilation cap (HT System), which I describe here in the 2020 season. It serves very well as a cap/lid, it will let small parasites into the trap, but will not let large individuals of the beekeeper into the trap .
Therefore, we recommend such a cap primarily for the inner part of the hive together with a UHELON 53S net. For the outer part, it is better to use a cap with a hole with a height of 2.5 - 3 mm and a width of 20-25 mm

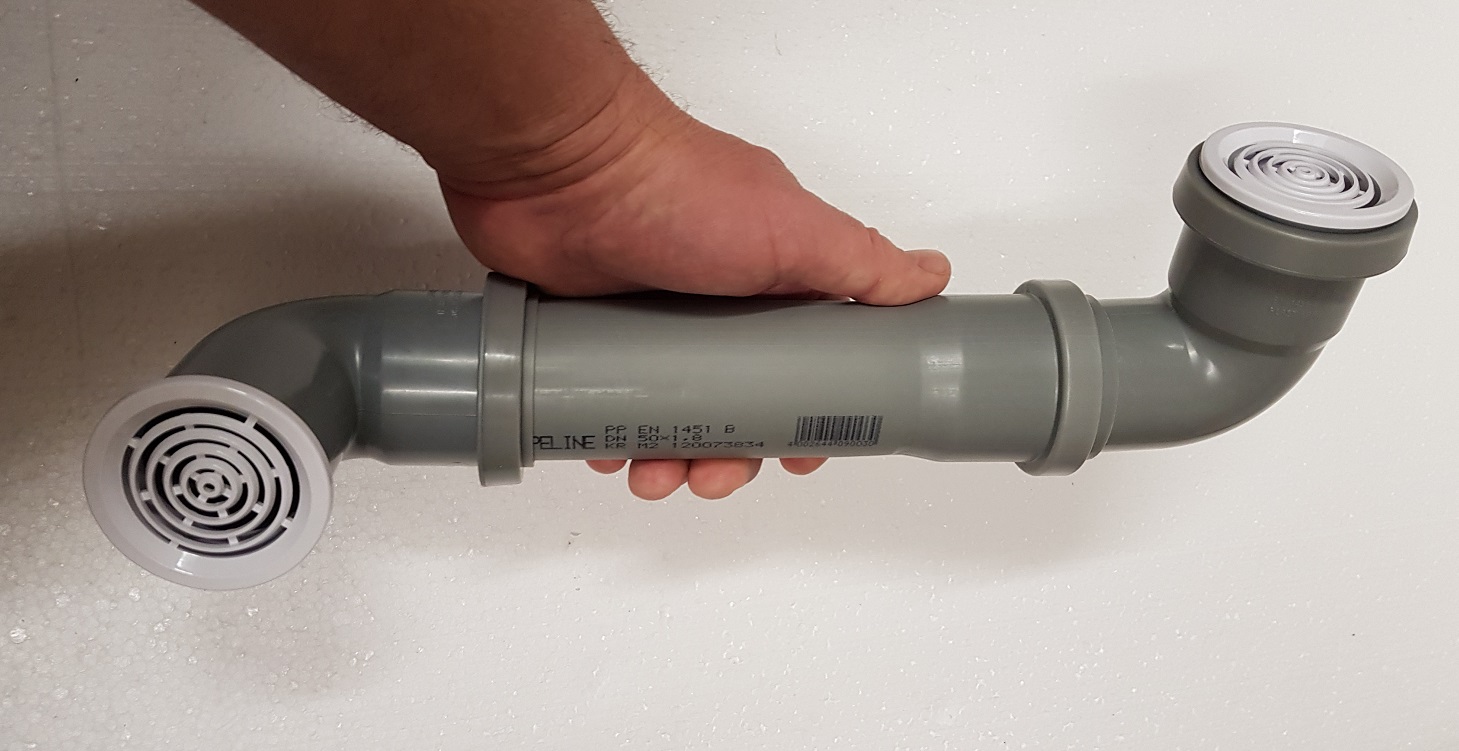
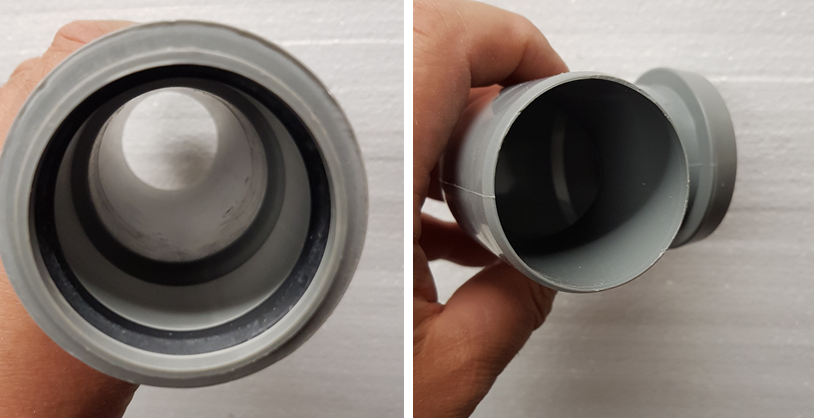
Ventilation from HT waste pipes – kit
Photo O. Hercog (4/2020)
Components / Parts
- HT pipes DN 50 (outer diameter 50mm):
– elbow with HTB socket for waste pipes, DN 50
– plastic waste pipe HTEM DN 50 - Ventilation grille HACO VM50B
- Aluminum mesh insect screen
- Wooden board to create the flange, at least 15 mm thick
- UHELON53S
sieve Note: this density is important, Uhelon from beekeeping is intended for filtering honey and is not dense enough - Screws
- Sealing tape
- Silicone sealant
- Chemstop/insect tape/fly trap
Note.
- Most components can be found at hardware stores, plumbing supplies stores, or hobby stores
- Uhelon53S for example here: https://www.silkandprogress.cz/cs/sita-technicka-data

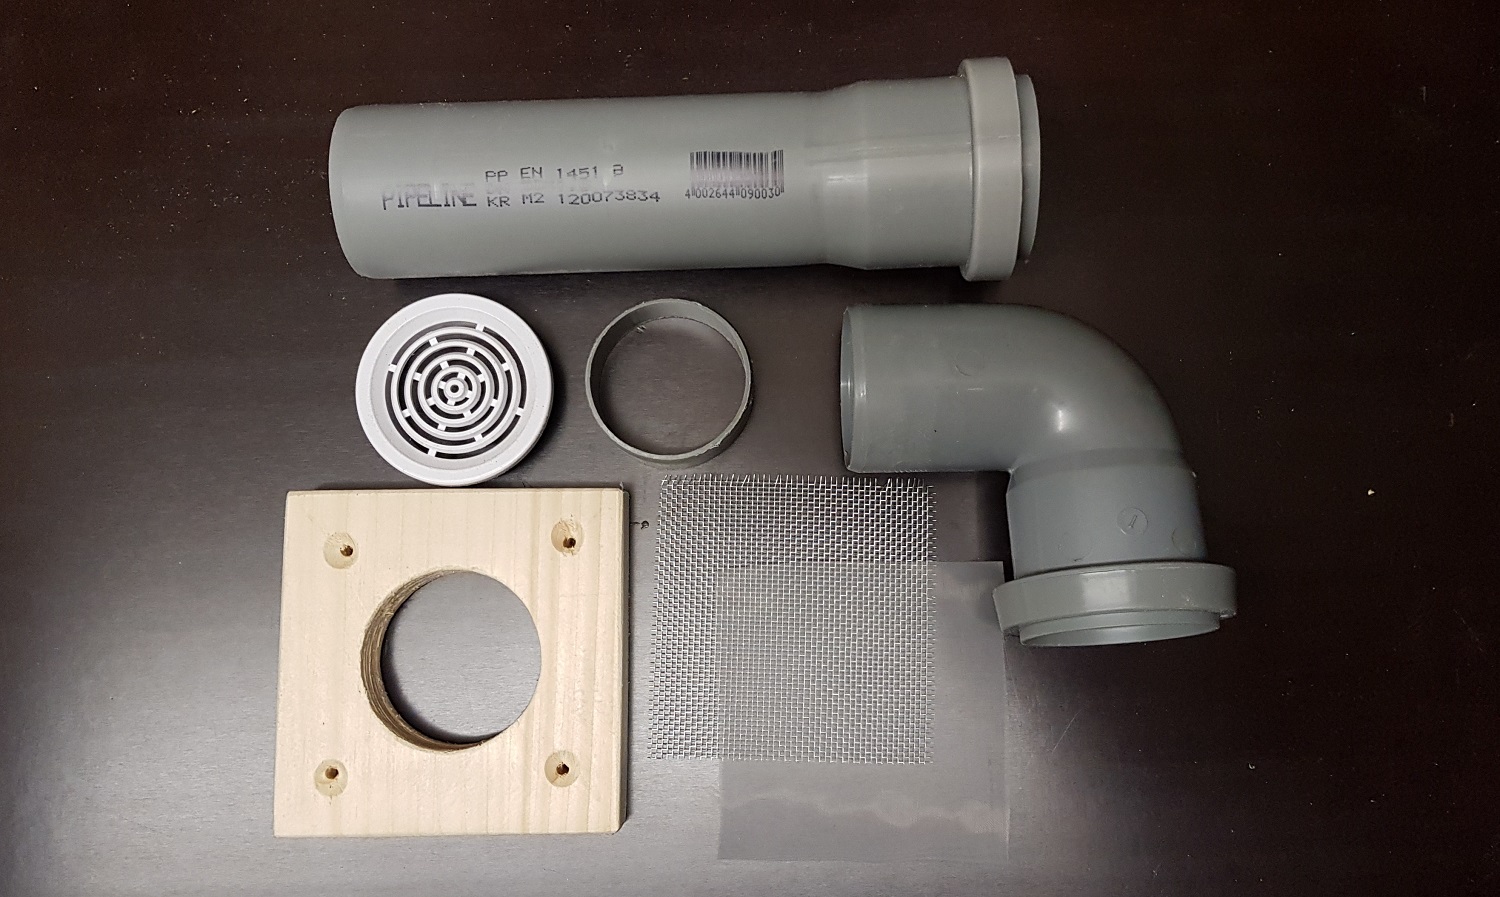
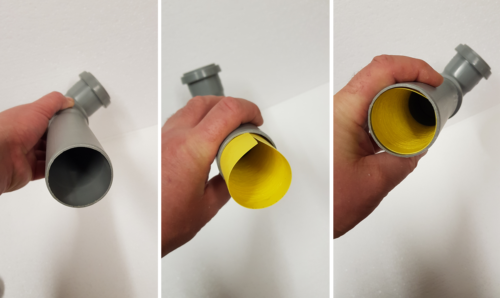
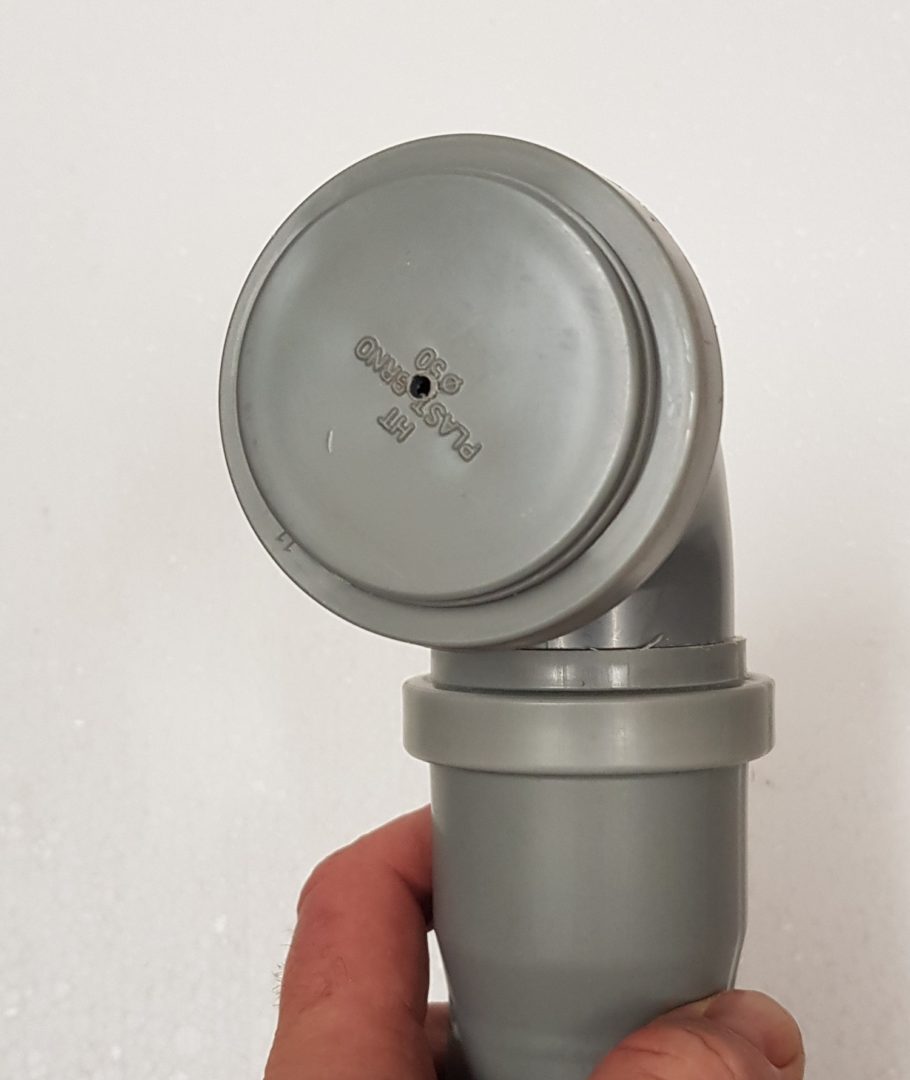
Ventilation modification of commercially available hives – components
Photo O. Hercog (4/2020)
Production process
- Cut a square/rectangle from a wooden board large enough to create a hole with a diameter of 50 mm in the center
- You drill a hole with a diameter of 50 mm - this creates a so-called flange
- Adjust the hole in the flange so that the HT pipe
- Remove the ventilation cap on the hive
- Adjust the size of the flange so that it can be installed in place of the original ventilation cap
- The size and shape should not interfere with the roof closing (landing)
- Drill screw holes in the flange
- Place the flange on the original ventilation hole symmetrically = along the axis of the ventilation hole and pre-drill a hole for the screws in the hive body
- Cover the original ventilation hole on the hive with aluminum mesh ( bumblebees will not penetrate it)
. Note: not necessary if the aluminum mesh is already attached to the inside of the hive (only some commercially available hives have this). - Cover the aluminum mesh with a mesh made of UHELON53S
- Attach the nets to the hive body with a flange and screws
- Cut a ring from the HT pipe with a height of approximately 20 mm
- Wrap the ventilation cap with several turns of adhesive tape to seal it and insert it into the ring
- Insert the ring into the neck of the HT pipe elbow
- Wipe the inner circumference of the knee with Chemstop , or line it with adhesive tape/fly catcher.
- If necessary, cut a straight piece from the HT pipe to extend the ventilation – as needed (do not increase the length of the pipe unnecessarily, so that the attic can ventilate)
- Create a sticky layer even when extending the pipe
- Fold the HT pipe parts into the desired shape
- Wrap the end of the pipe that will be inserted into the flange with several turns of adhesive tape so that the pipe seals well and holds firmly. We recommend sealing it perfectly with silicone or other flexible sealant

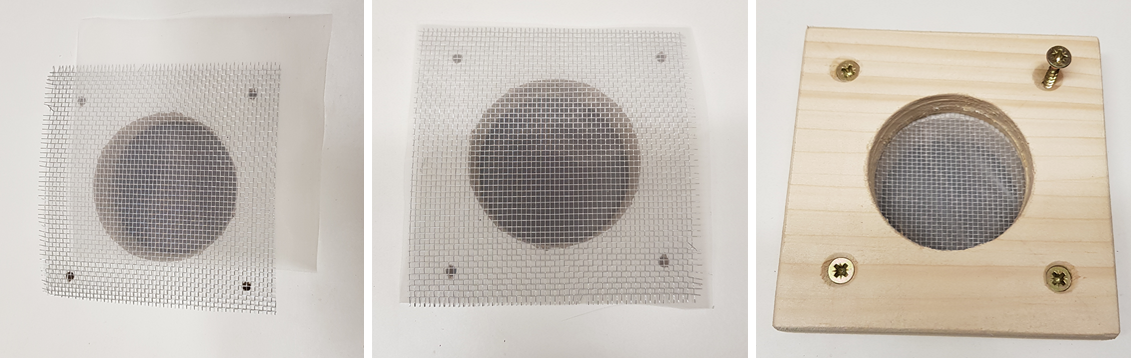
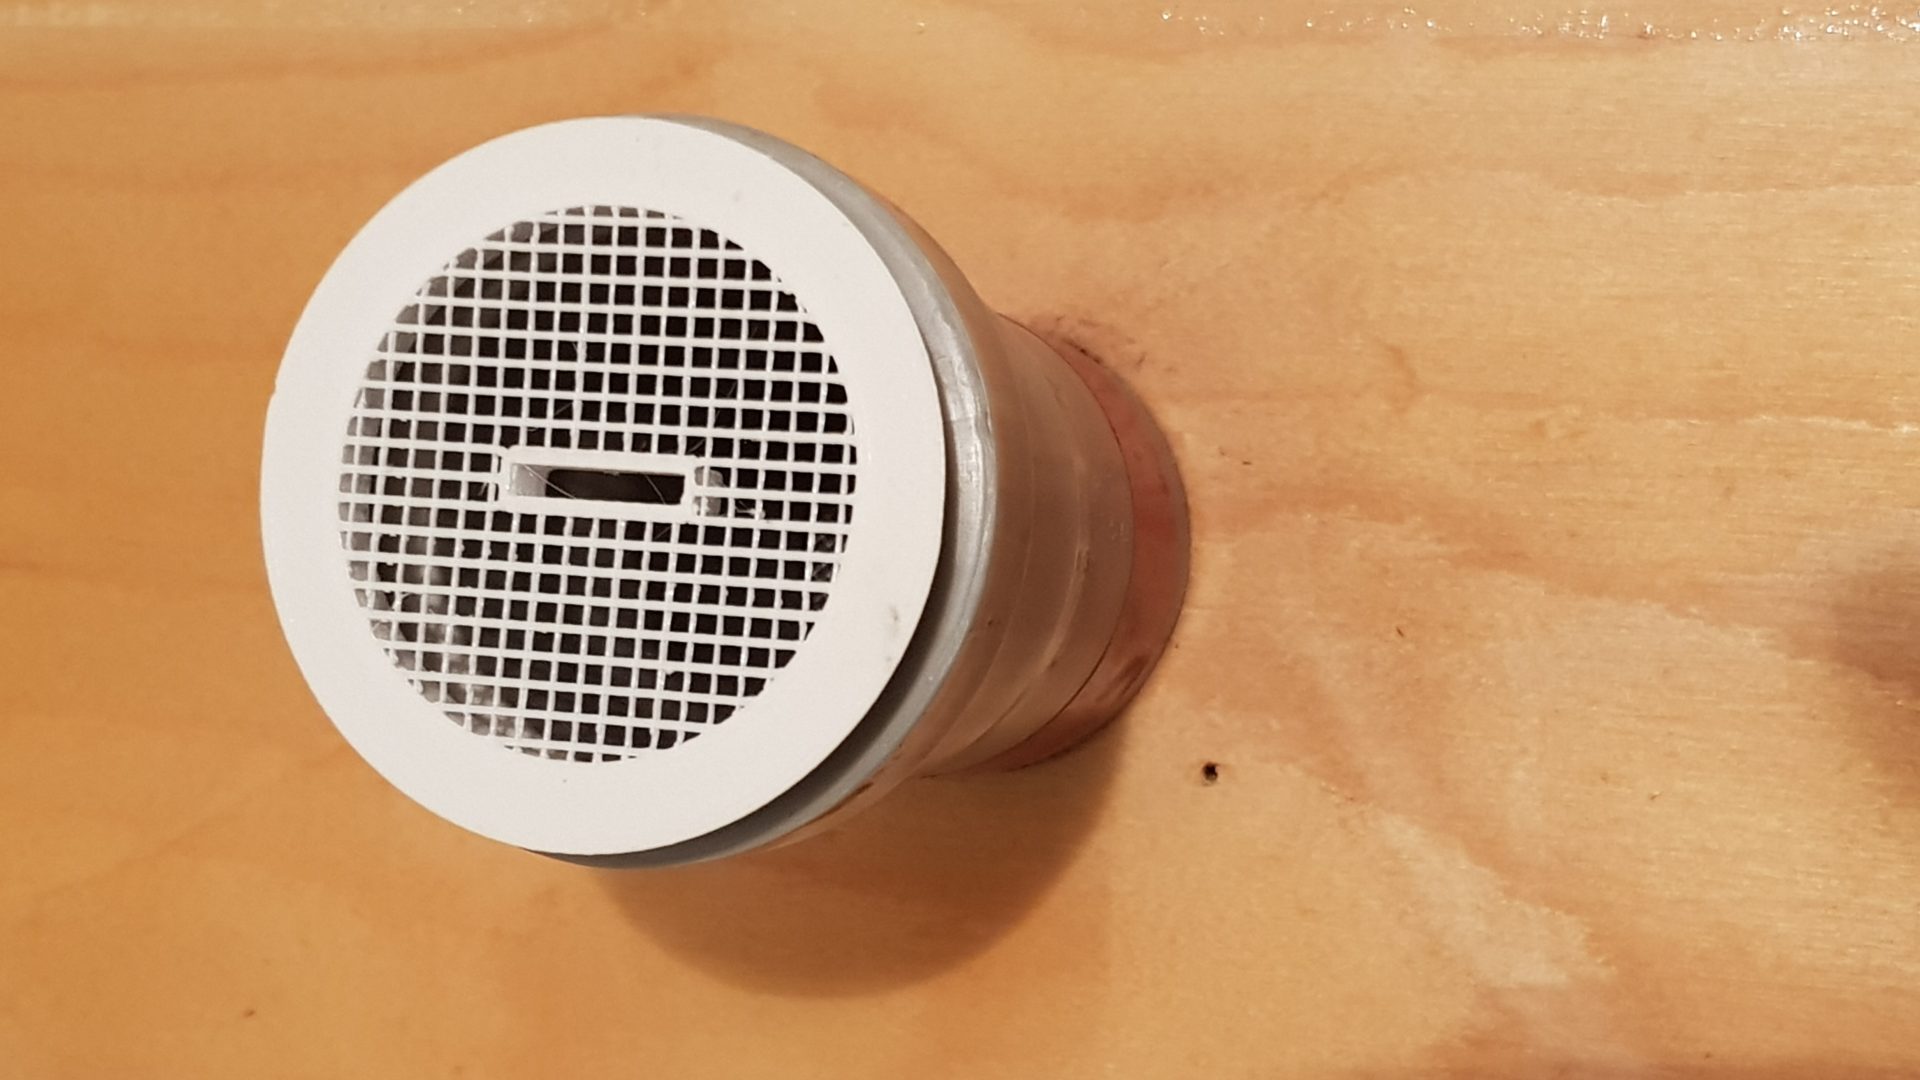
Ventilation modification of commercially available hives – protective net and flange
Photo O. Hercog (4/2020)

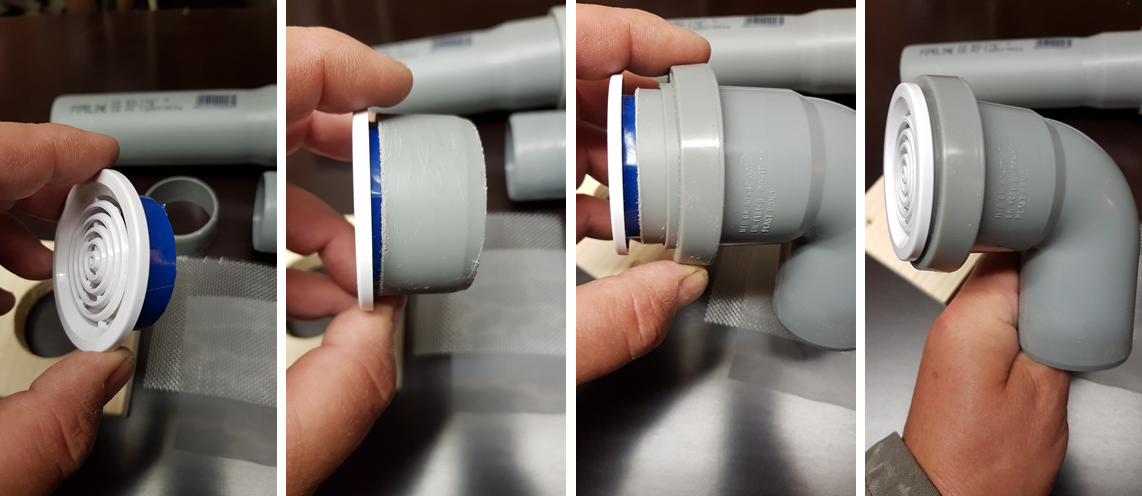
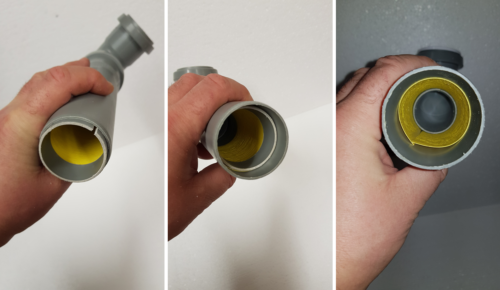
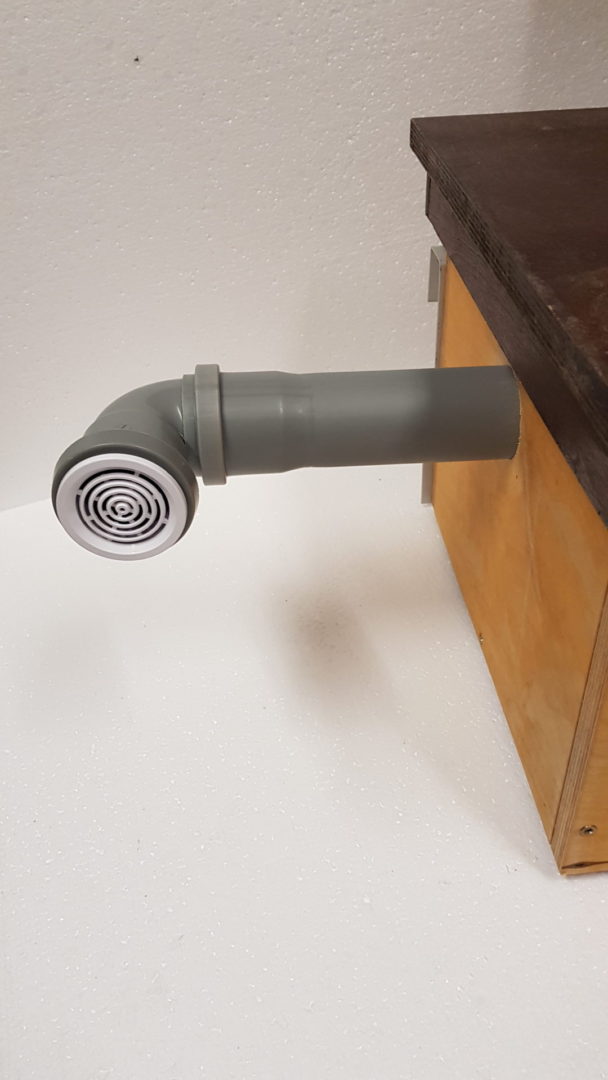
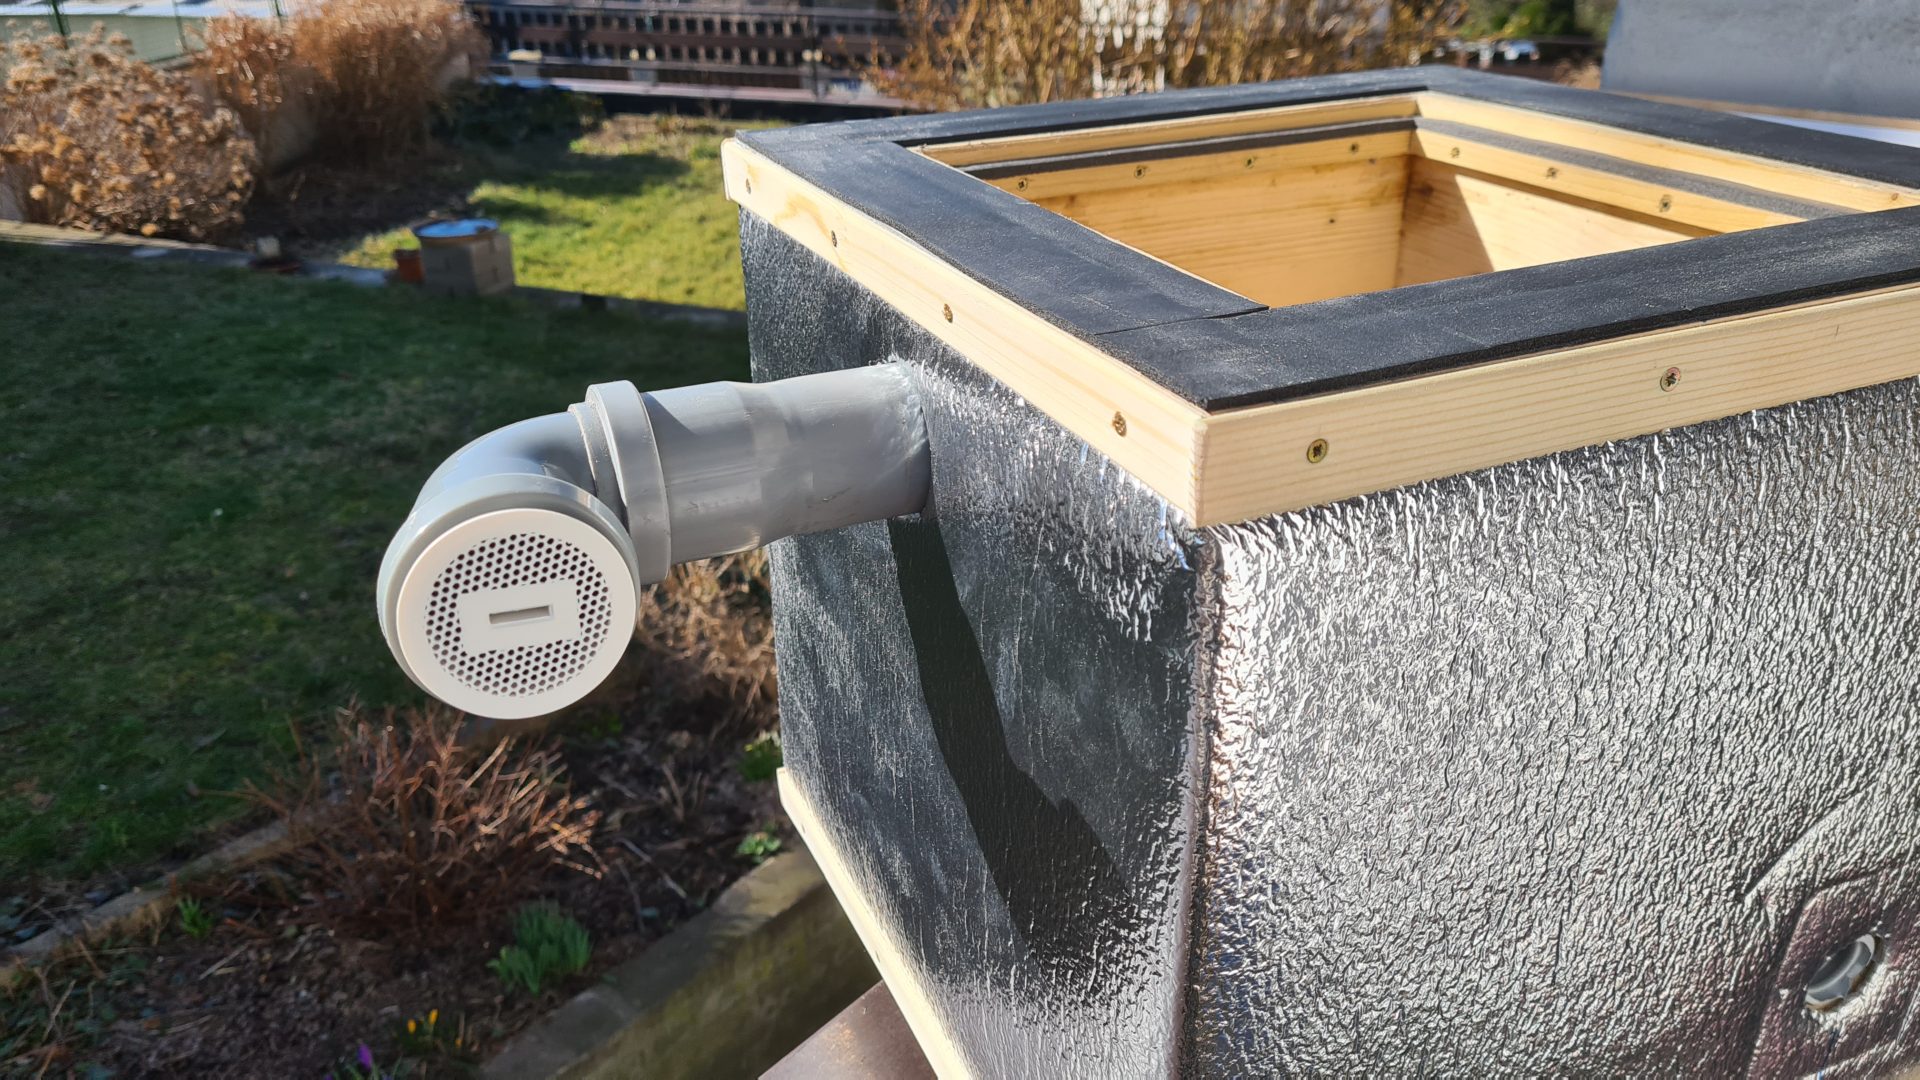
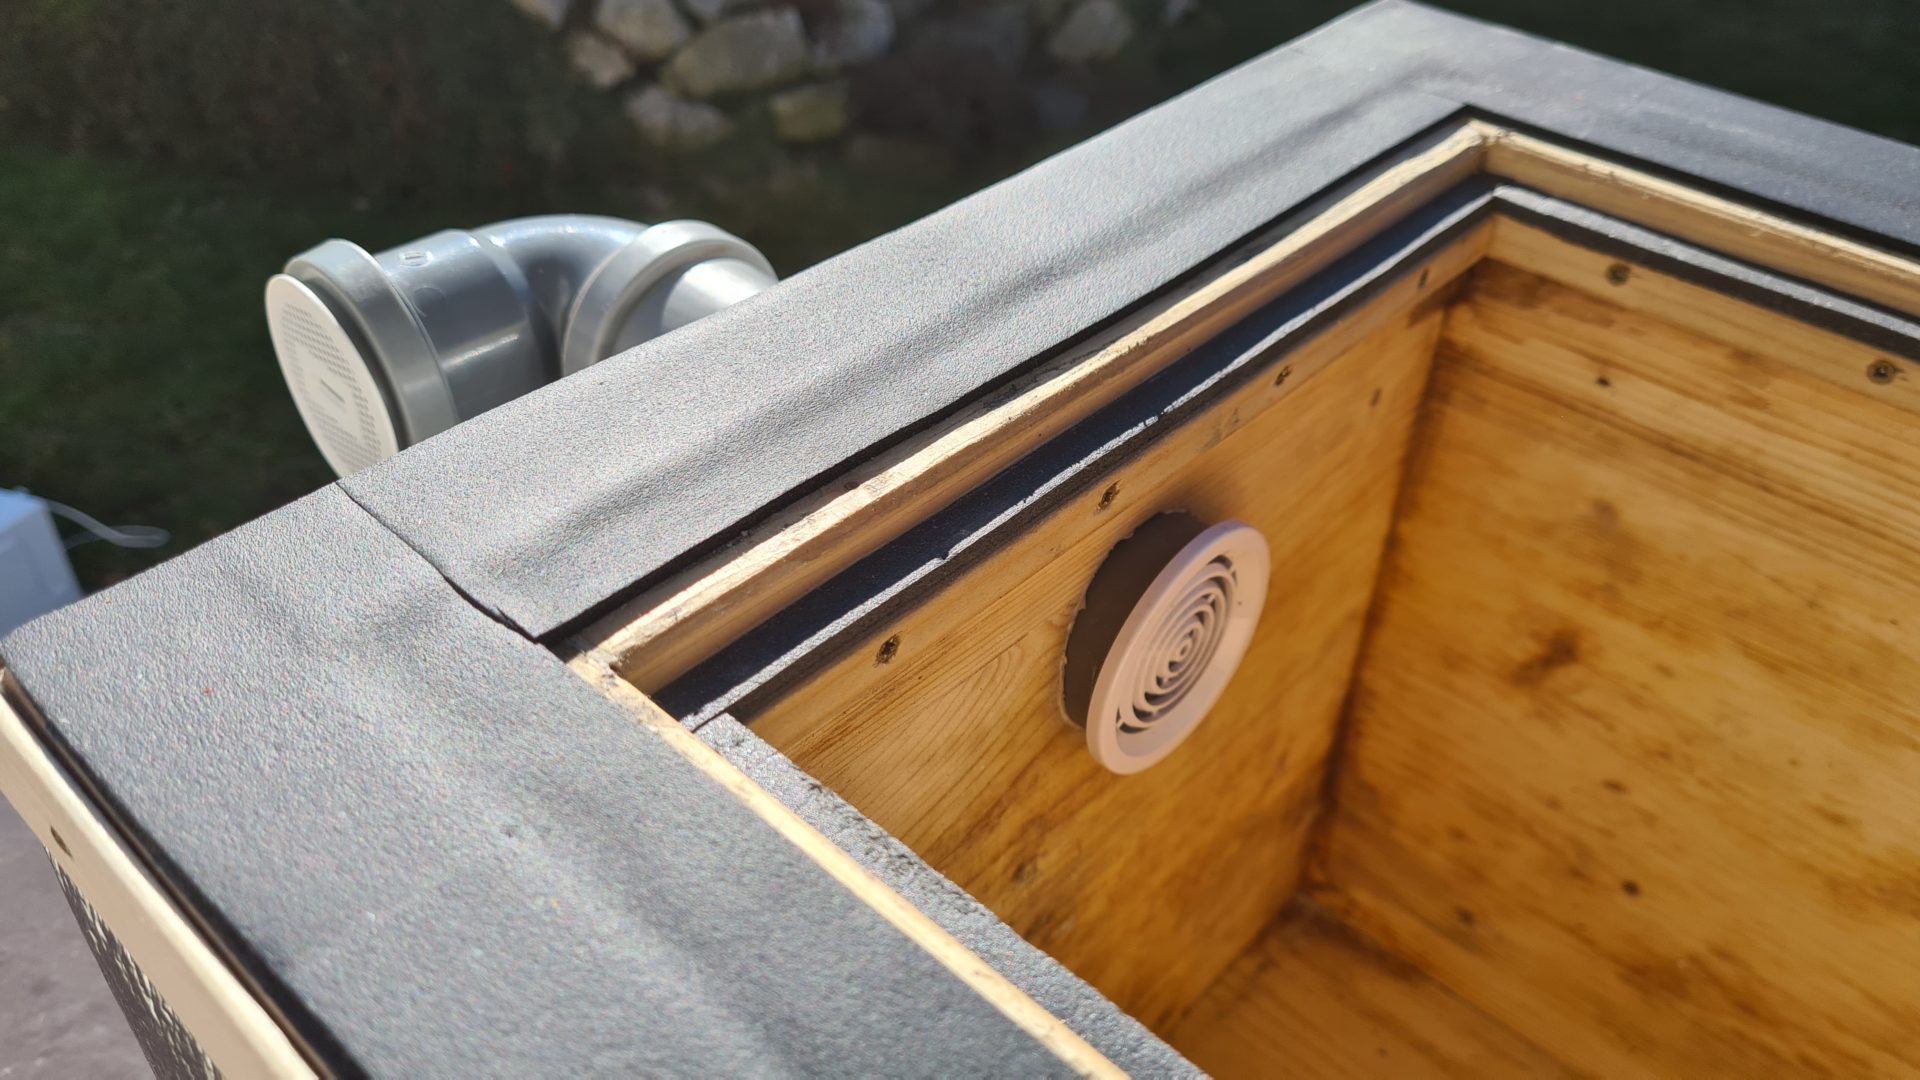
Ventilation modification of commercially available hives - elbow and ventilation grid
Photo O. Hercog (4/2020)

Ventilation modification of commercially available hives – space for adhesive layer
Photo O. Hercog (4/2020)

Instead of erasing the space in the hive, you can also use sticky insect tape
Photo O. Hercog (1/2020)

Ventilation of the alley from HT pipes – the adhesive strip can be secured with a ring from HT pipe
Photo O. Hercog

Ventilation modification of commercially available hives – elbow inserted into flange – model situation
Photo O. Hercog

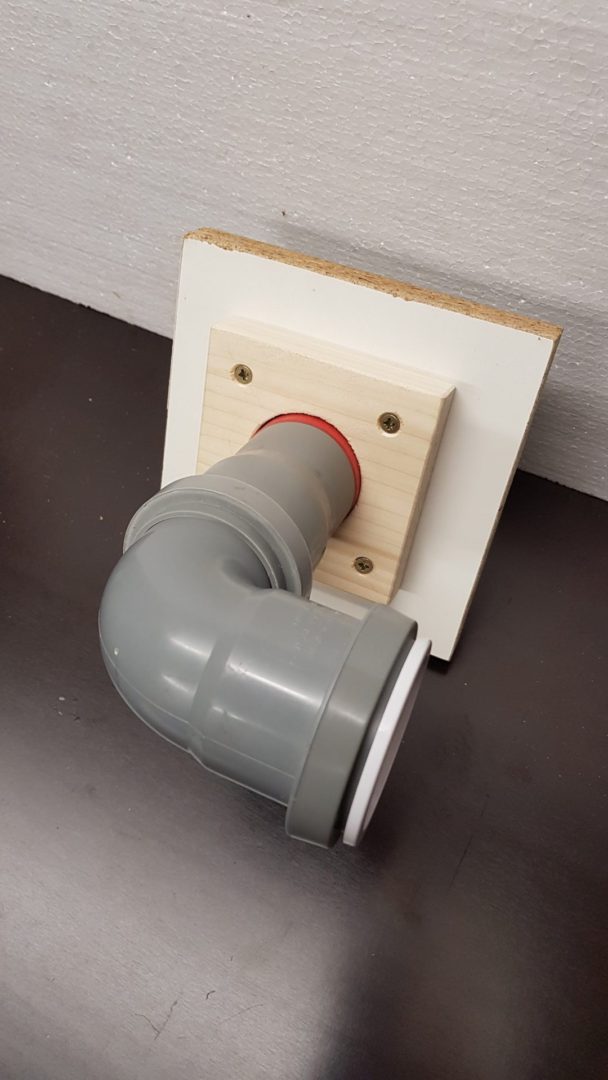
Ventilation modification of commercially available hives – elbow + extension fitted in the flange (model situation)
Photo O. Hercog
If you don't want to waste time making a wooden part, you can find a commercially available " ventilation hole extension " part on the internet.
It has a 50mm diameter hole and can easily be used for the modification I'm describing.

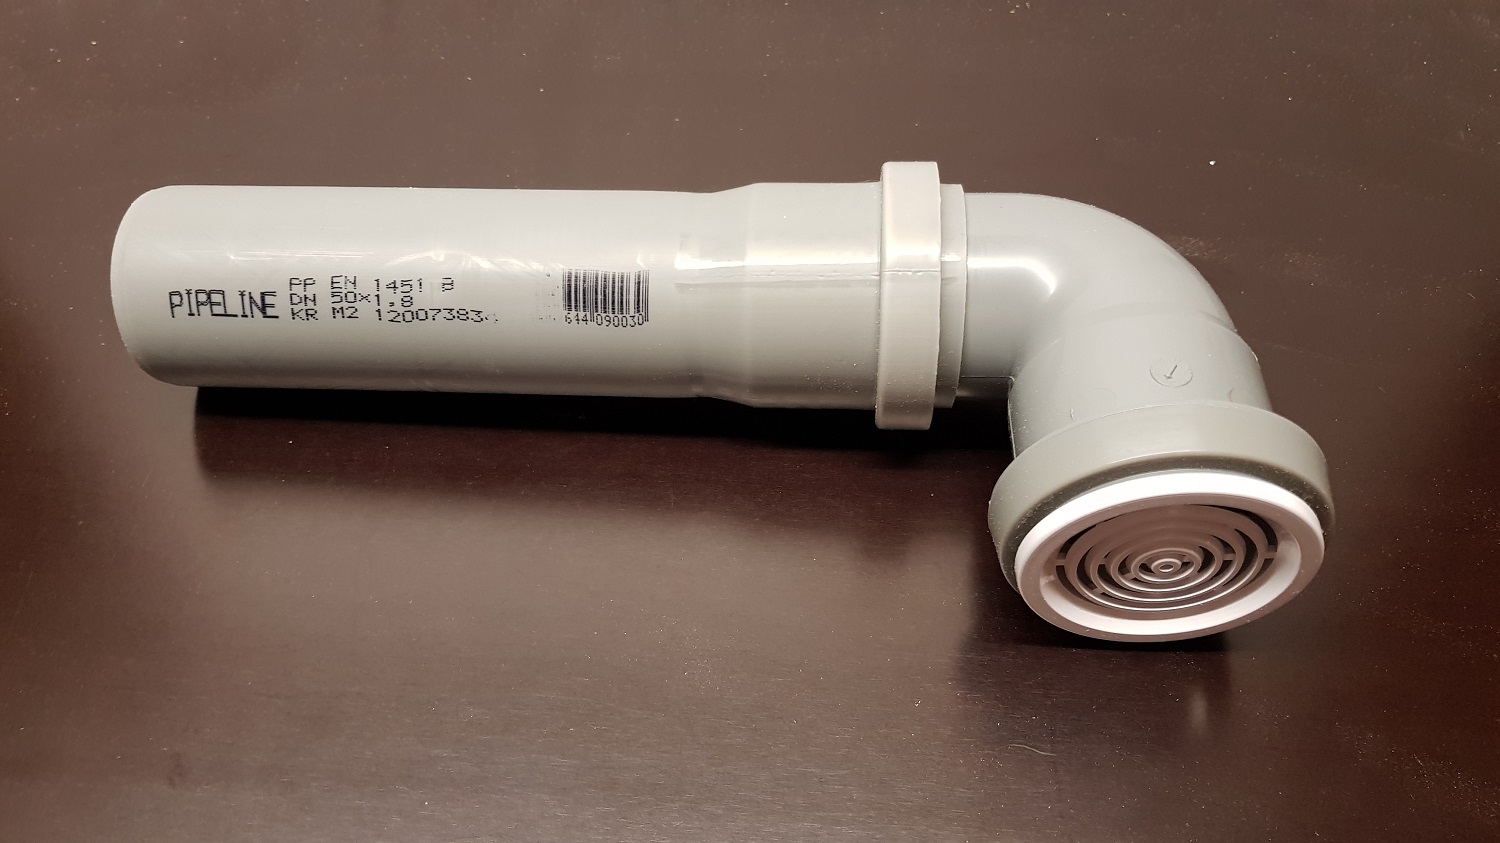
Ventilation modification of commercially available hives - elbow with extension
Photo O. Hercog (4/2020)

Modifying the ventilation of commercially available hives - a lid made from a blanking plate.
Just drill a hole up to 2 mm in diameter.
Photo O. Hercog (5/2020)
How does it all work?
- The nest emits an intense scent that bumblebee parasites seek out – the scent attracts them to the mouth of the ventilation duct
- Parasites will pass through the grid but not bumblebees
- Here, the parasites will try to penetrate the hive and get trapped on the sticky layer.
- If they do get through (they won't fly in the knee, but they will crawl = stick), the UHELON53S net will stop them
- If you use the extension to move the ventilation opening further away from the hive, you will lure a significant portion of the parasites away from the flap and thus increase the chance that the parasites will not penetrate the hive, and the parasites will not be as intensively looking for a leak in the hive.
Another effect
Thanks to the fact that the ventilation is bent at the knee, less light shines through the hive . New workers, mothers and males will then not have to "struggle" unnecessarily with the ventilation and will find their way out of the hive more quickly.
This will also reduce the risk of incest (males try to mate with their mothers in the light, regardless of kinship...)

Modification of ventilation of commercially available hives - example
. It is not necessary to use additional nets or a flange.
Photo O. Hercog (2019)

Ventilation modification of commercially available hives – example
Photo O. Hercog (2019)

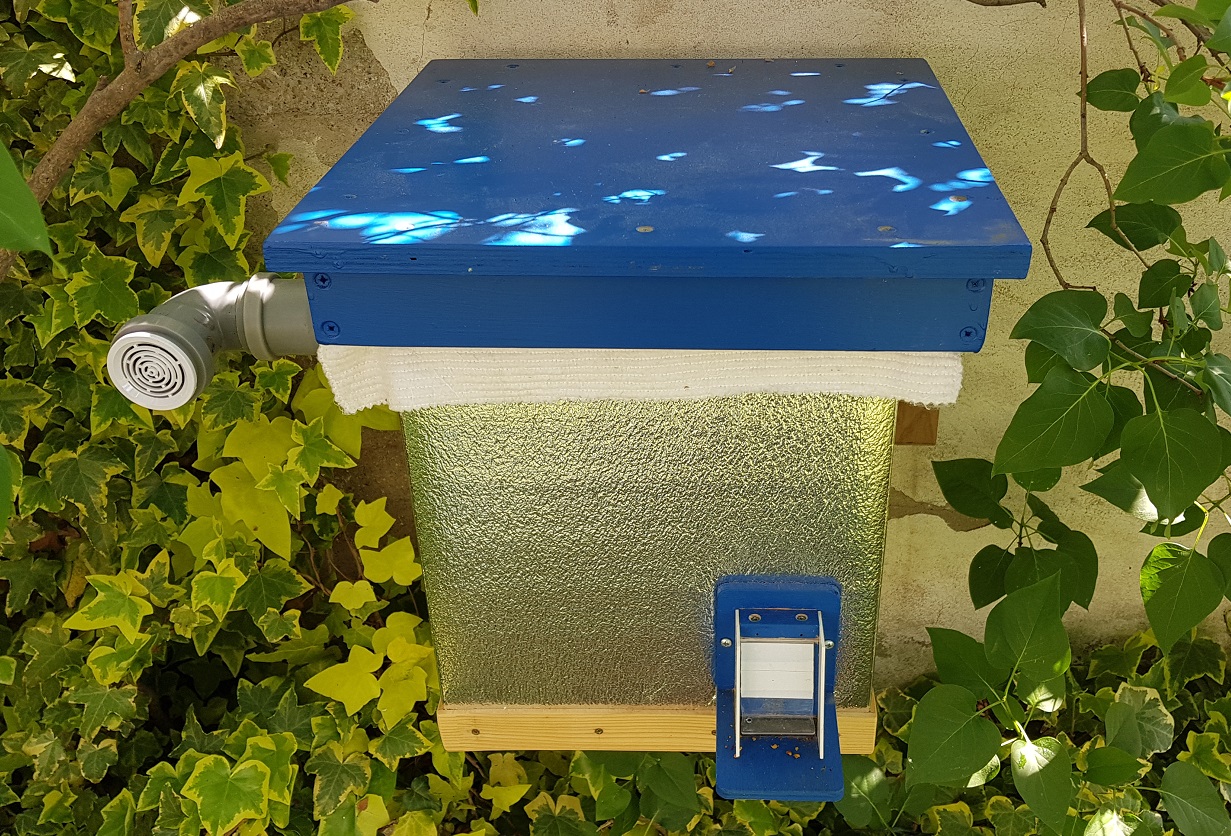
Awning with ventilation from a HT pipe
Photo O. Hercog (5/2020)

Ventilation with a cap - trap - outer cap from a 3D printer (behind it in the pipe is a bonding layer from Chemstop)
Photo O. Hercog (3/2021)

Ventilation with cover - trap - inner side with ventilation cover for HT System (UHELON 53S mesh is hidden under the cover)
Photo O. Hercog (3/2021)
