Introduction
Mr. Miroslav Stuchl, a well-known bumblebee guru (now unfortunately already in bumblebee heaven), designed and described ventilation with a parasite trap.
This solution has developed into several variants, which we describe. As the Čmeláci PLUS group, we pay attention to this important part of the hive (the bumblebee), because a good solution will significantly reduce the threat of parasites entering the hive.
We are also glad that some manufacturers listened to us, modified the ventilation holes according to our recommendations (UHELON53S and aluminum mesh) and that the mentioned modifications are useful to you.
Although the largest beehive manufacturer in the Czech Republic does not list us as the authors, it uses these solutions and that is essential. Other manufacturers also use them and so beehives for bumblebees are gradually being improved.
We do not copyright our improvements and we make them available for free. We consider it polite to list the authors and we are glad that at least some manufacturers consider it normal.
Ventilation principle with protection against parasites
The principle proposed by Mr. Miroslav Stuchl is that the best way to create ventilation in the hive is as a tube that connects the interior of the hive with the surrounding environment.
Close the tube at the ends with a grid/net so thick that even small bumblebee workers cannot get through.
You make a hole in the net on the outside (outside the hive) and insert a tube (straw) into it. large enough for parasites to pass through when they are looking for a way into the hive. Parasites that enter the hive are stopped by the inner net. Thanks to the tube in the outer net, they cannot find a way out.
Mr. Stuchl also described the possibility of using bumblebee honey as an attractant and at the same time as glue for small larvae inside the trap.
The original scheme was described in the book "Breeding and Support of Bumblebees in Gardens and in the City" (collective of authors) and is presented here with the author's permission.
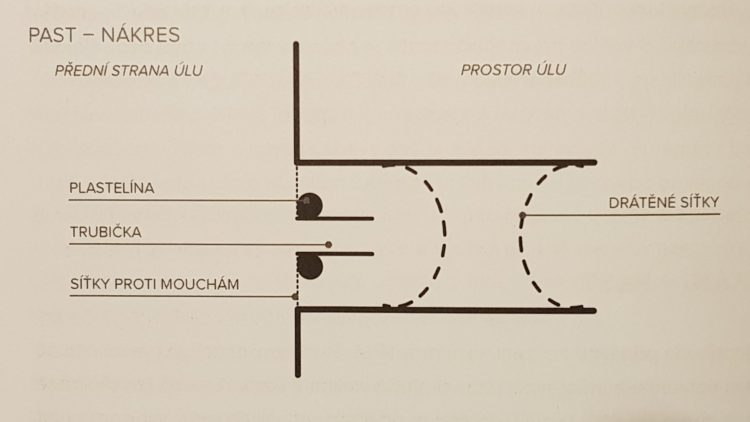
Ventilation protection according to M. Stuchl
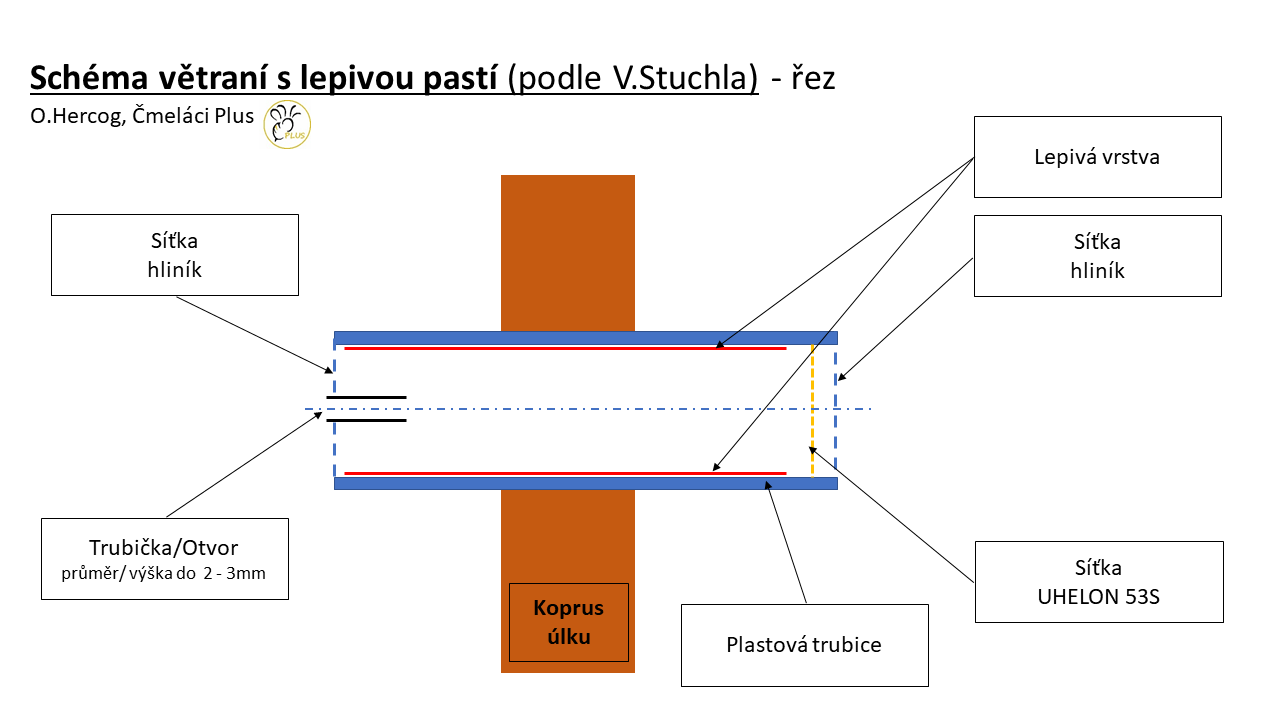
Ventilation with a sticky trap
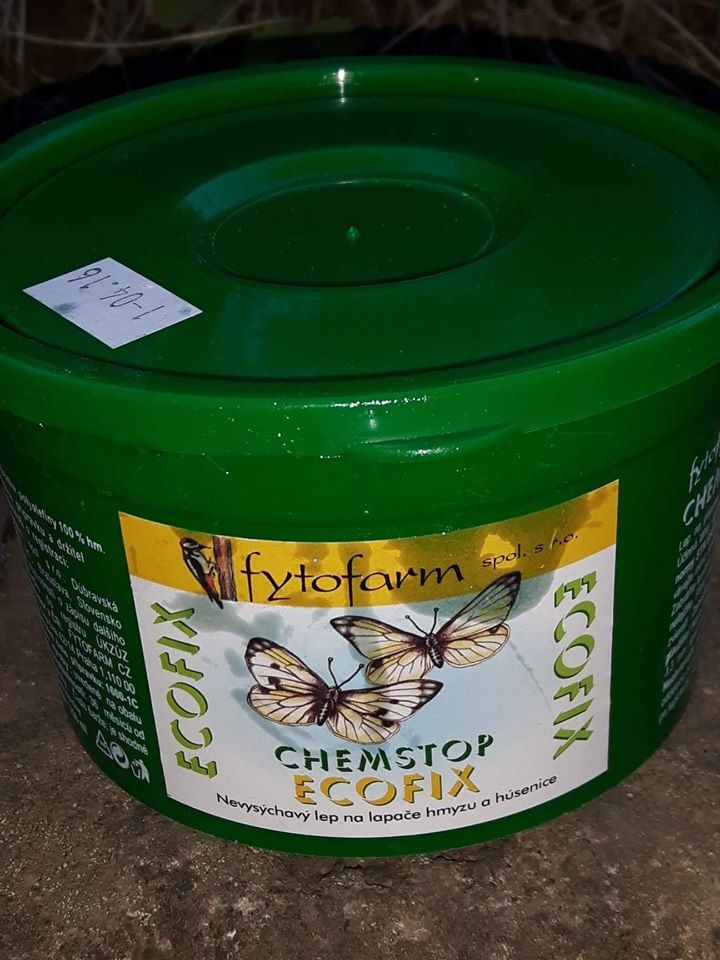
Material for creating an adhesive layer – Chemstop
Protection of hive ventilation (bumblebee)
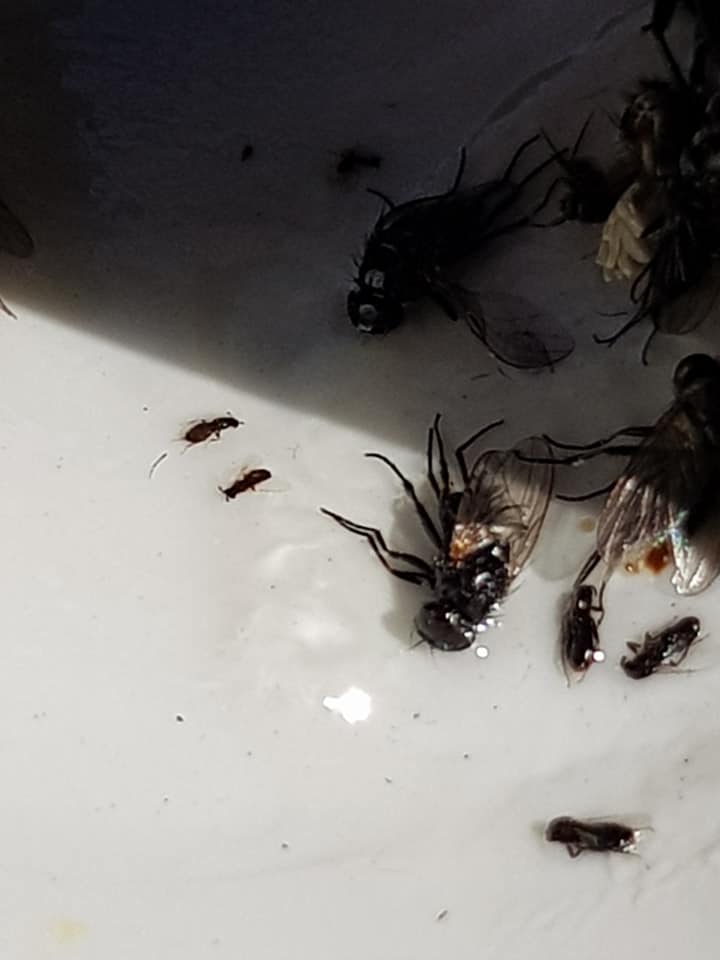
Trapped parasites – flies and Melittobia acasta
A) Basic adjustments for beginners
The modifications were described HERE
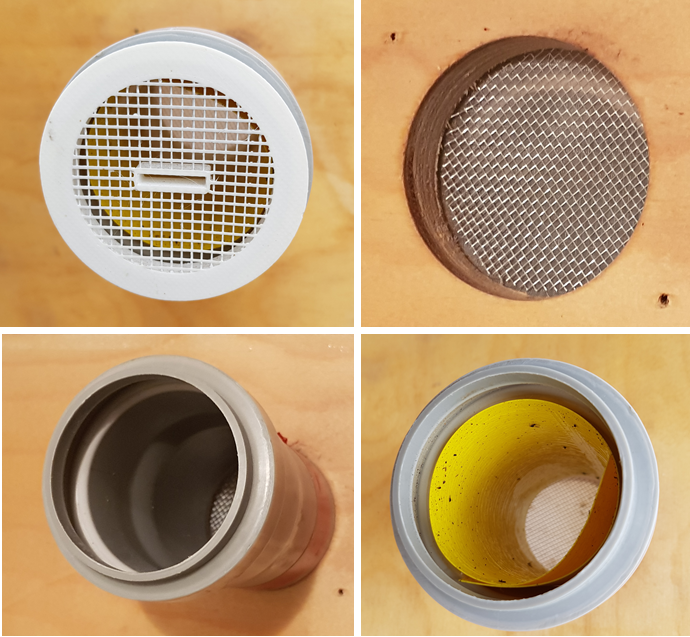
Hive ventilation – outer mesh with a hole for trapping parasites and closing the ventilation.
A hole is cut out in the outer mesh and there is a sticky layer inside the ventilation.
Photo O. Hercog
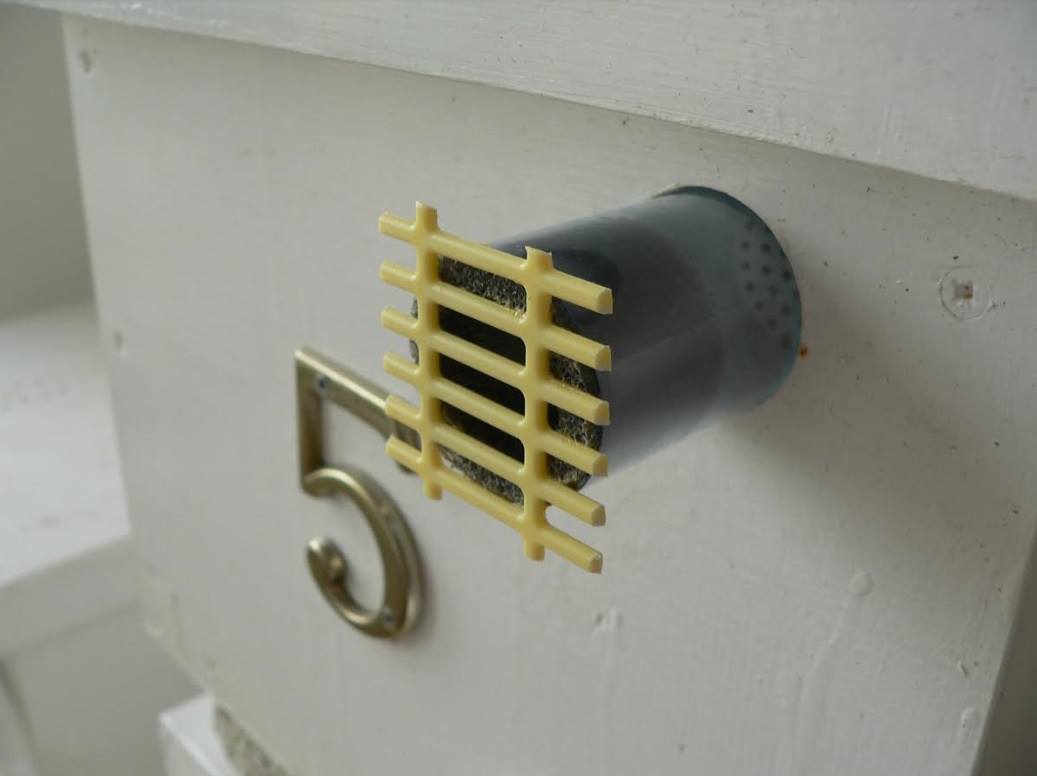
Protection of hive ventilation (bumblebee) according to Jaromír Čížek
Forum J. Čížek

Hive ventilation protection
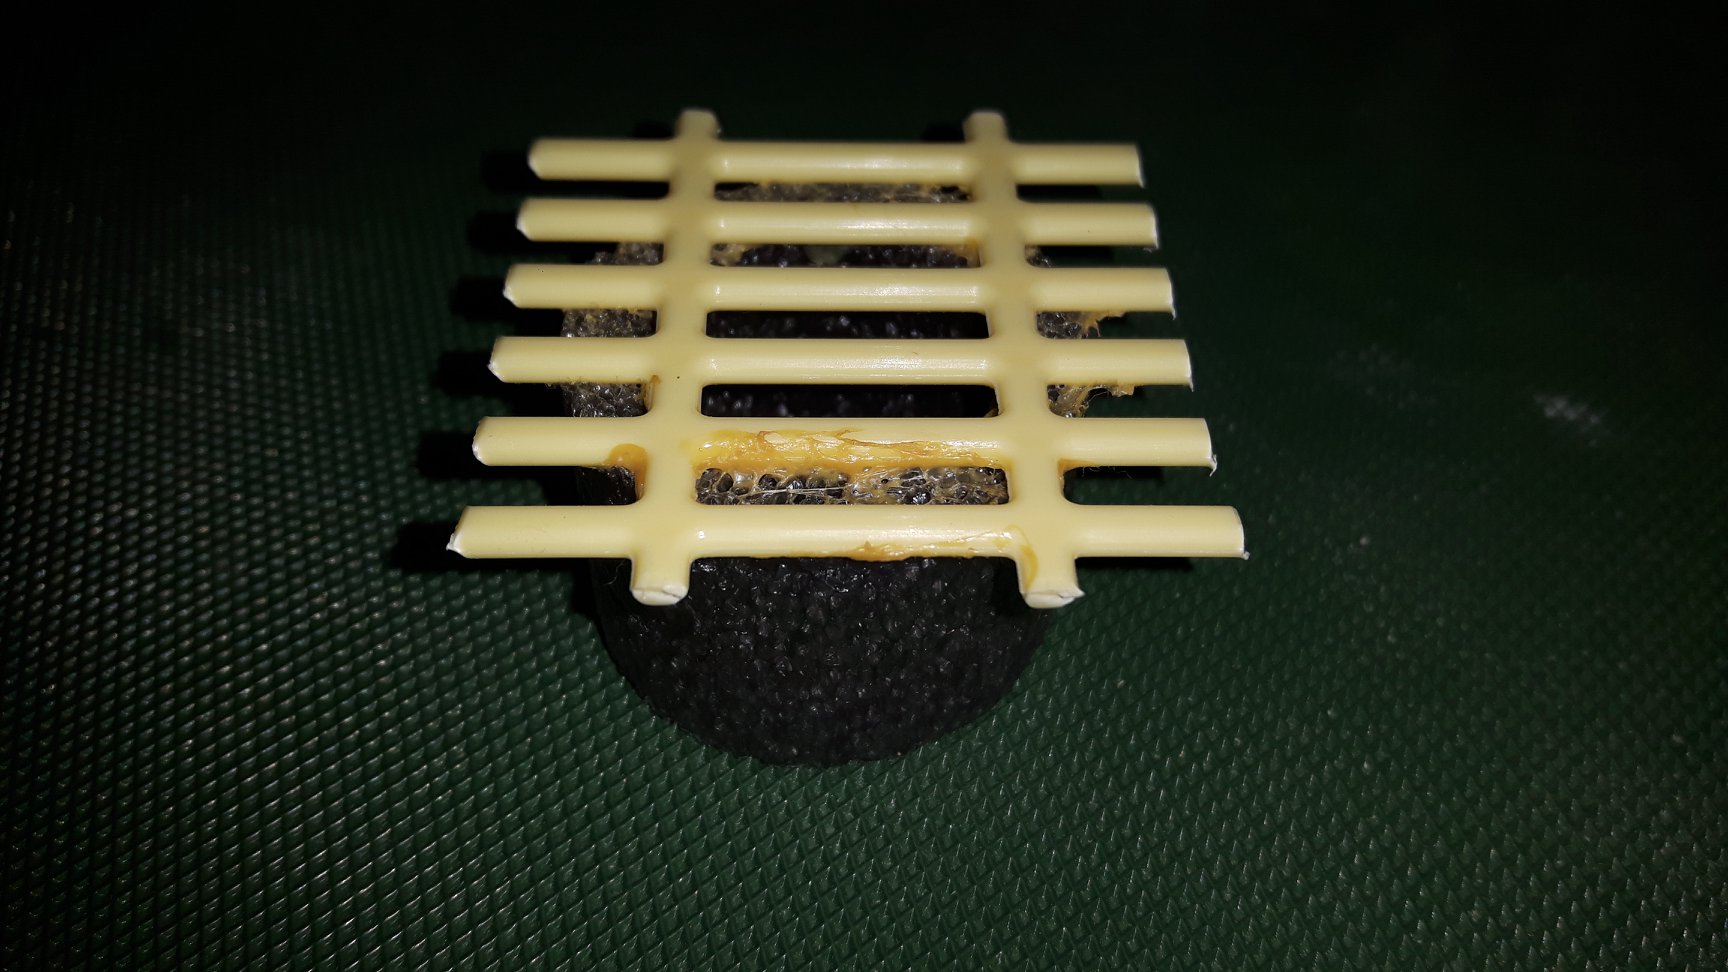
Grid glued to foam insulation tube insert
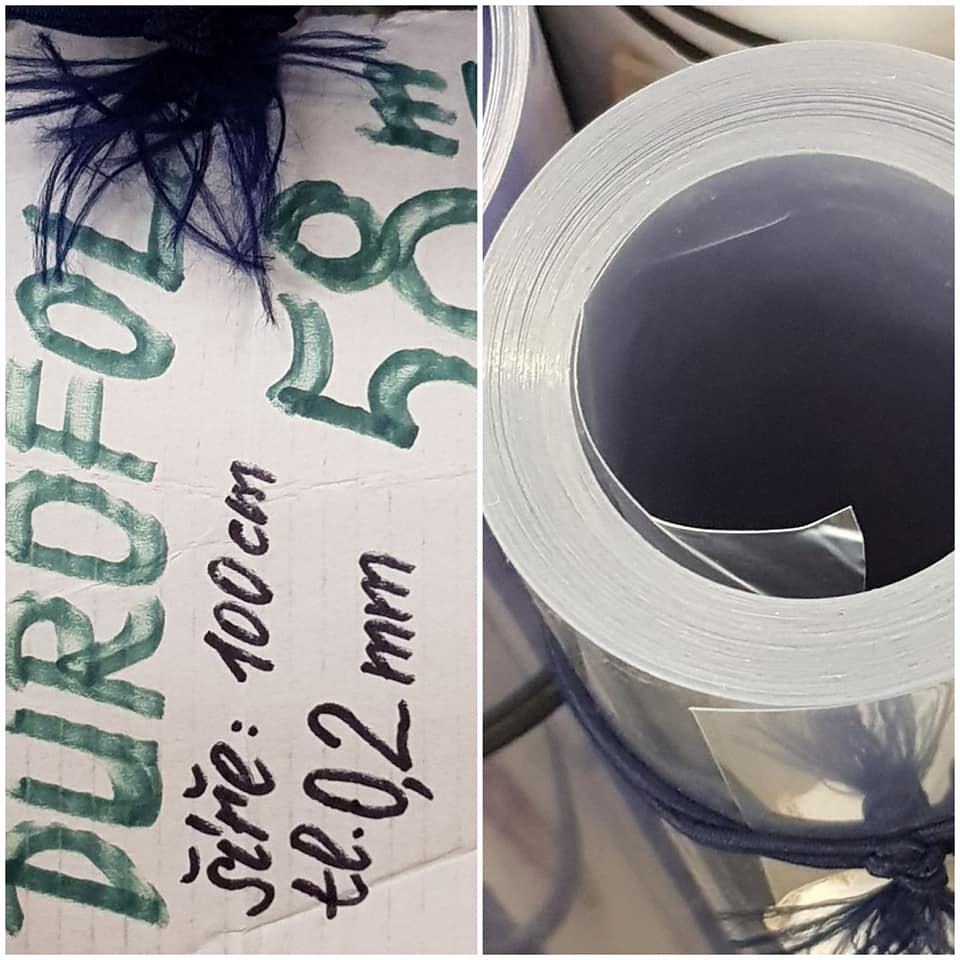
Roll of plastic film wiped with Chemstop
Protection of hive ventilation
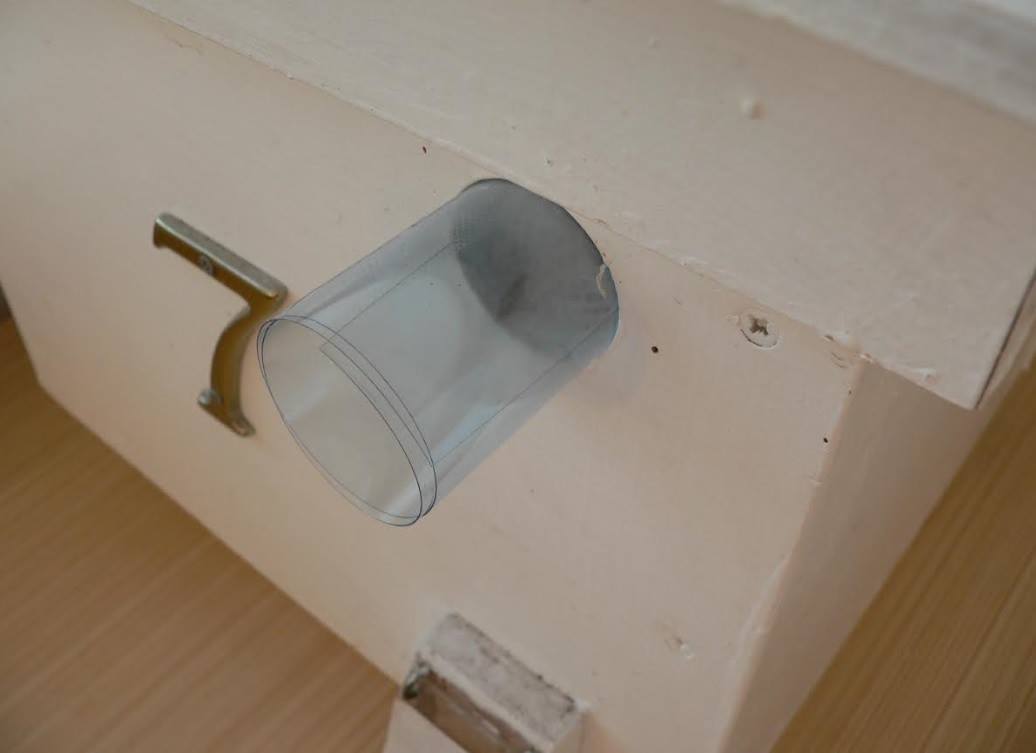
Cut a strip of foil of such dimensions that a tube can be conveniently rolled out of it, which will protrude about 5 cm after being inserted into the hive.
Protection of the hive ventilation
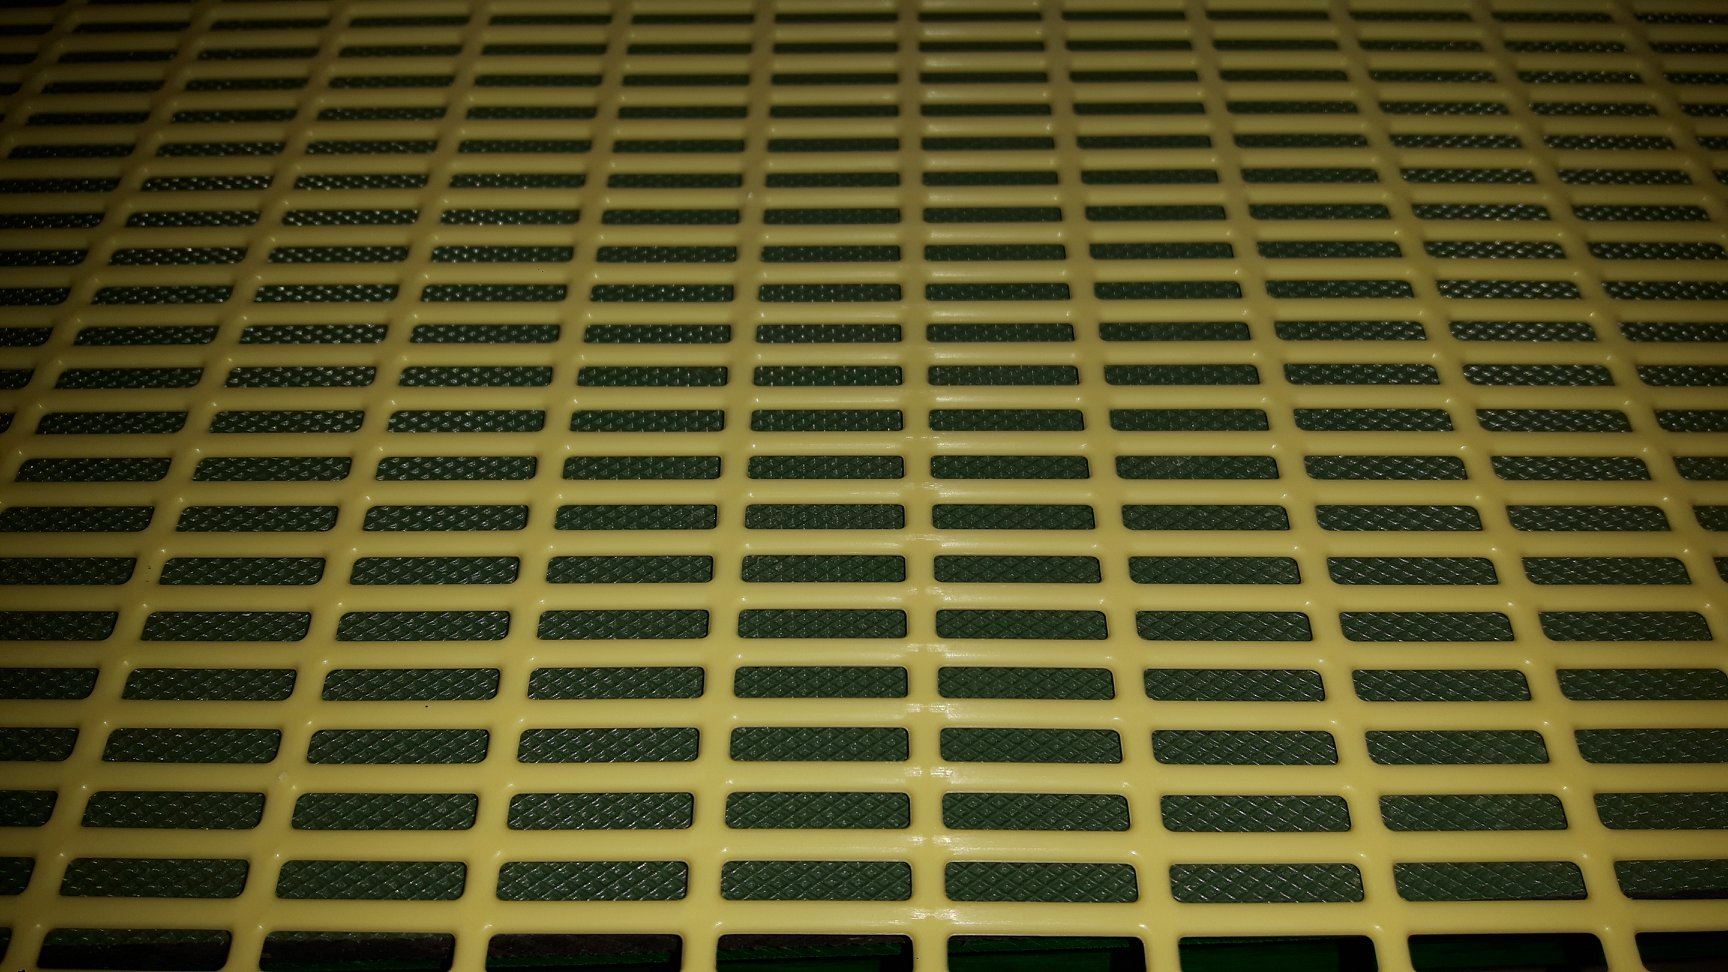
Beekeeping queen screen – do not use a larger mesh size, workers could get into the ventilation
Hive ventilation protection
Glue the grid to the foam insulation tube
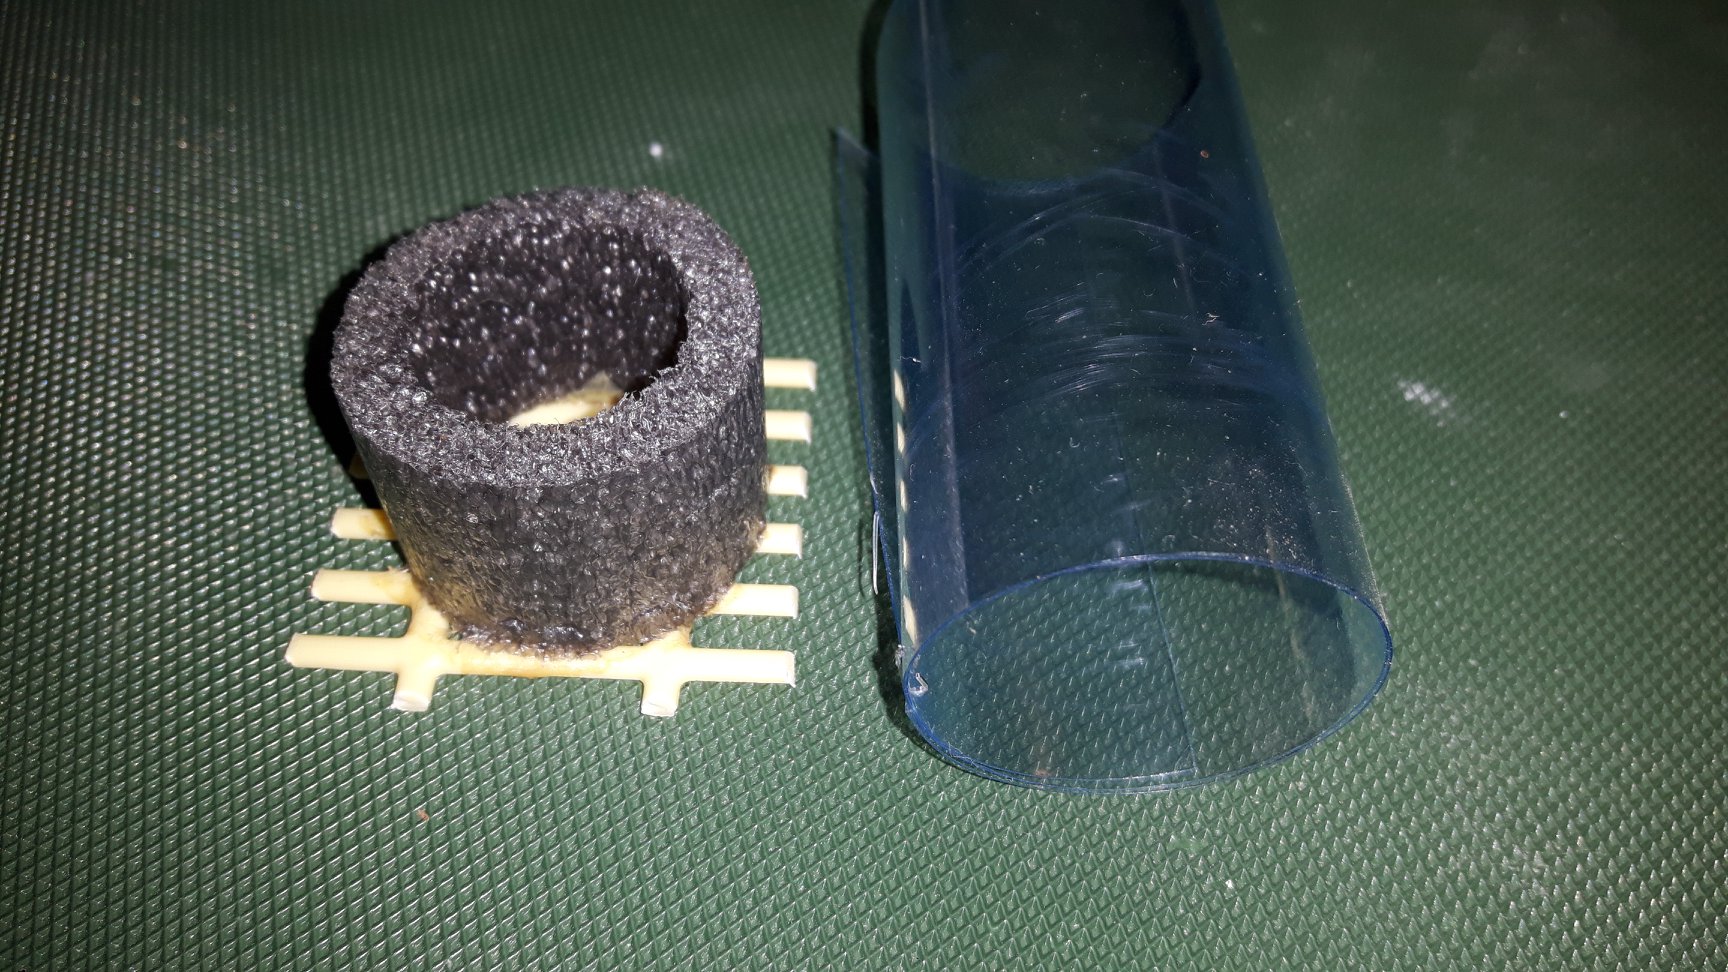
Hive ventilation protection Grid
on insulation pipe and roll of plastic foil
It is very important that the foil insert fits well in the ventilation hole.
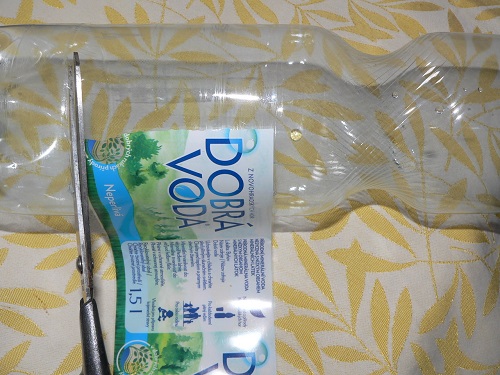
Jaromír therefore uses a PET bottle, from which he twists a "tube" of several turns of foil. After inserting it into the ventilation hole, he sews it with a small stapler (on the part that is not inserted). Thanks to the expansion of the free part, the tube holds well in the ventilation.
Bumblebees PLUS – Protection of hive ventilation (bumblebee hive) according to Jaromír Čížek
Hive ventilation protection
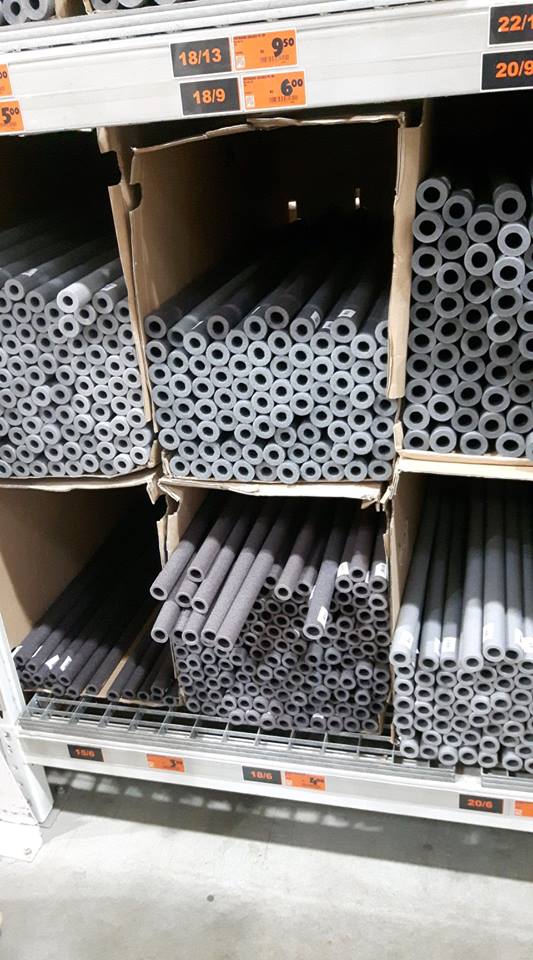
Foam insulation pipes (hobby market) – choose according to the diameter of the hive ventilation hole
Hive ventilation protection
Durofol foil (ŘEMPO)
However, straight parts of PET bottles can also be used
What material to use
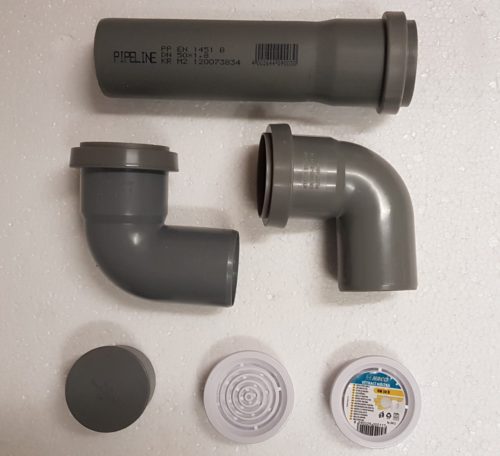
Karel Kučera described the solution for long corridors and ventilation
Karel writes there: " We recommend the HT sewerage system (HTEM PP pipe). This is a water supply waste pipe system used, for example, to drain waste water from household sanitary equipment (sinks, etc.). The pipes have male-female ends, secured with a rubber band. HT fittings are available - elbows at angles of 15°, 30°, 45°, 67° and 87°, as well as couplings and blinds. The system allows for easy cleaning of both the corridor, the hive and the flap. It is also easy to store the components after the season ."
My colleague Karel has been using this system for several years and it has worked very well for him.
I had a similar solution for the entire 2019 season in a test hive and was satisfied.
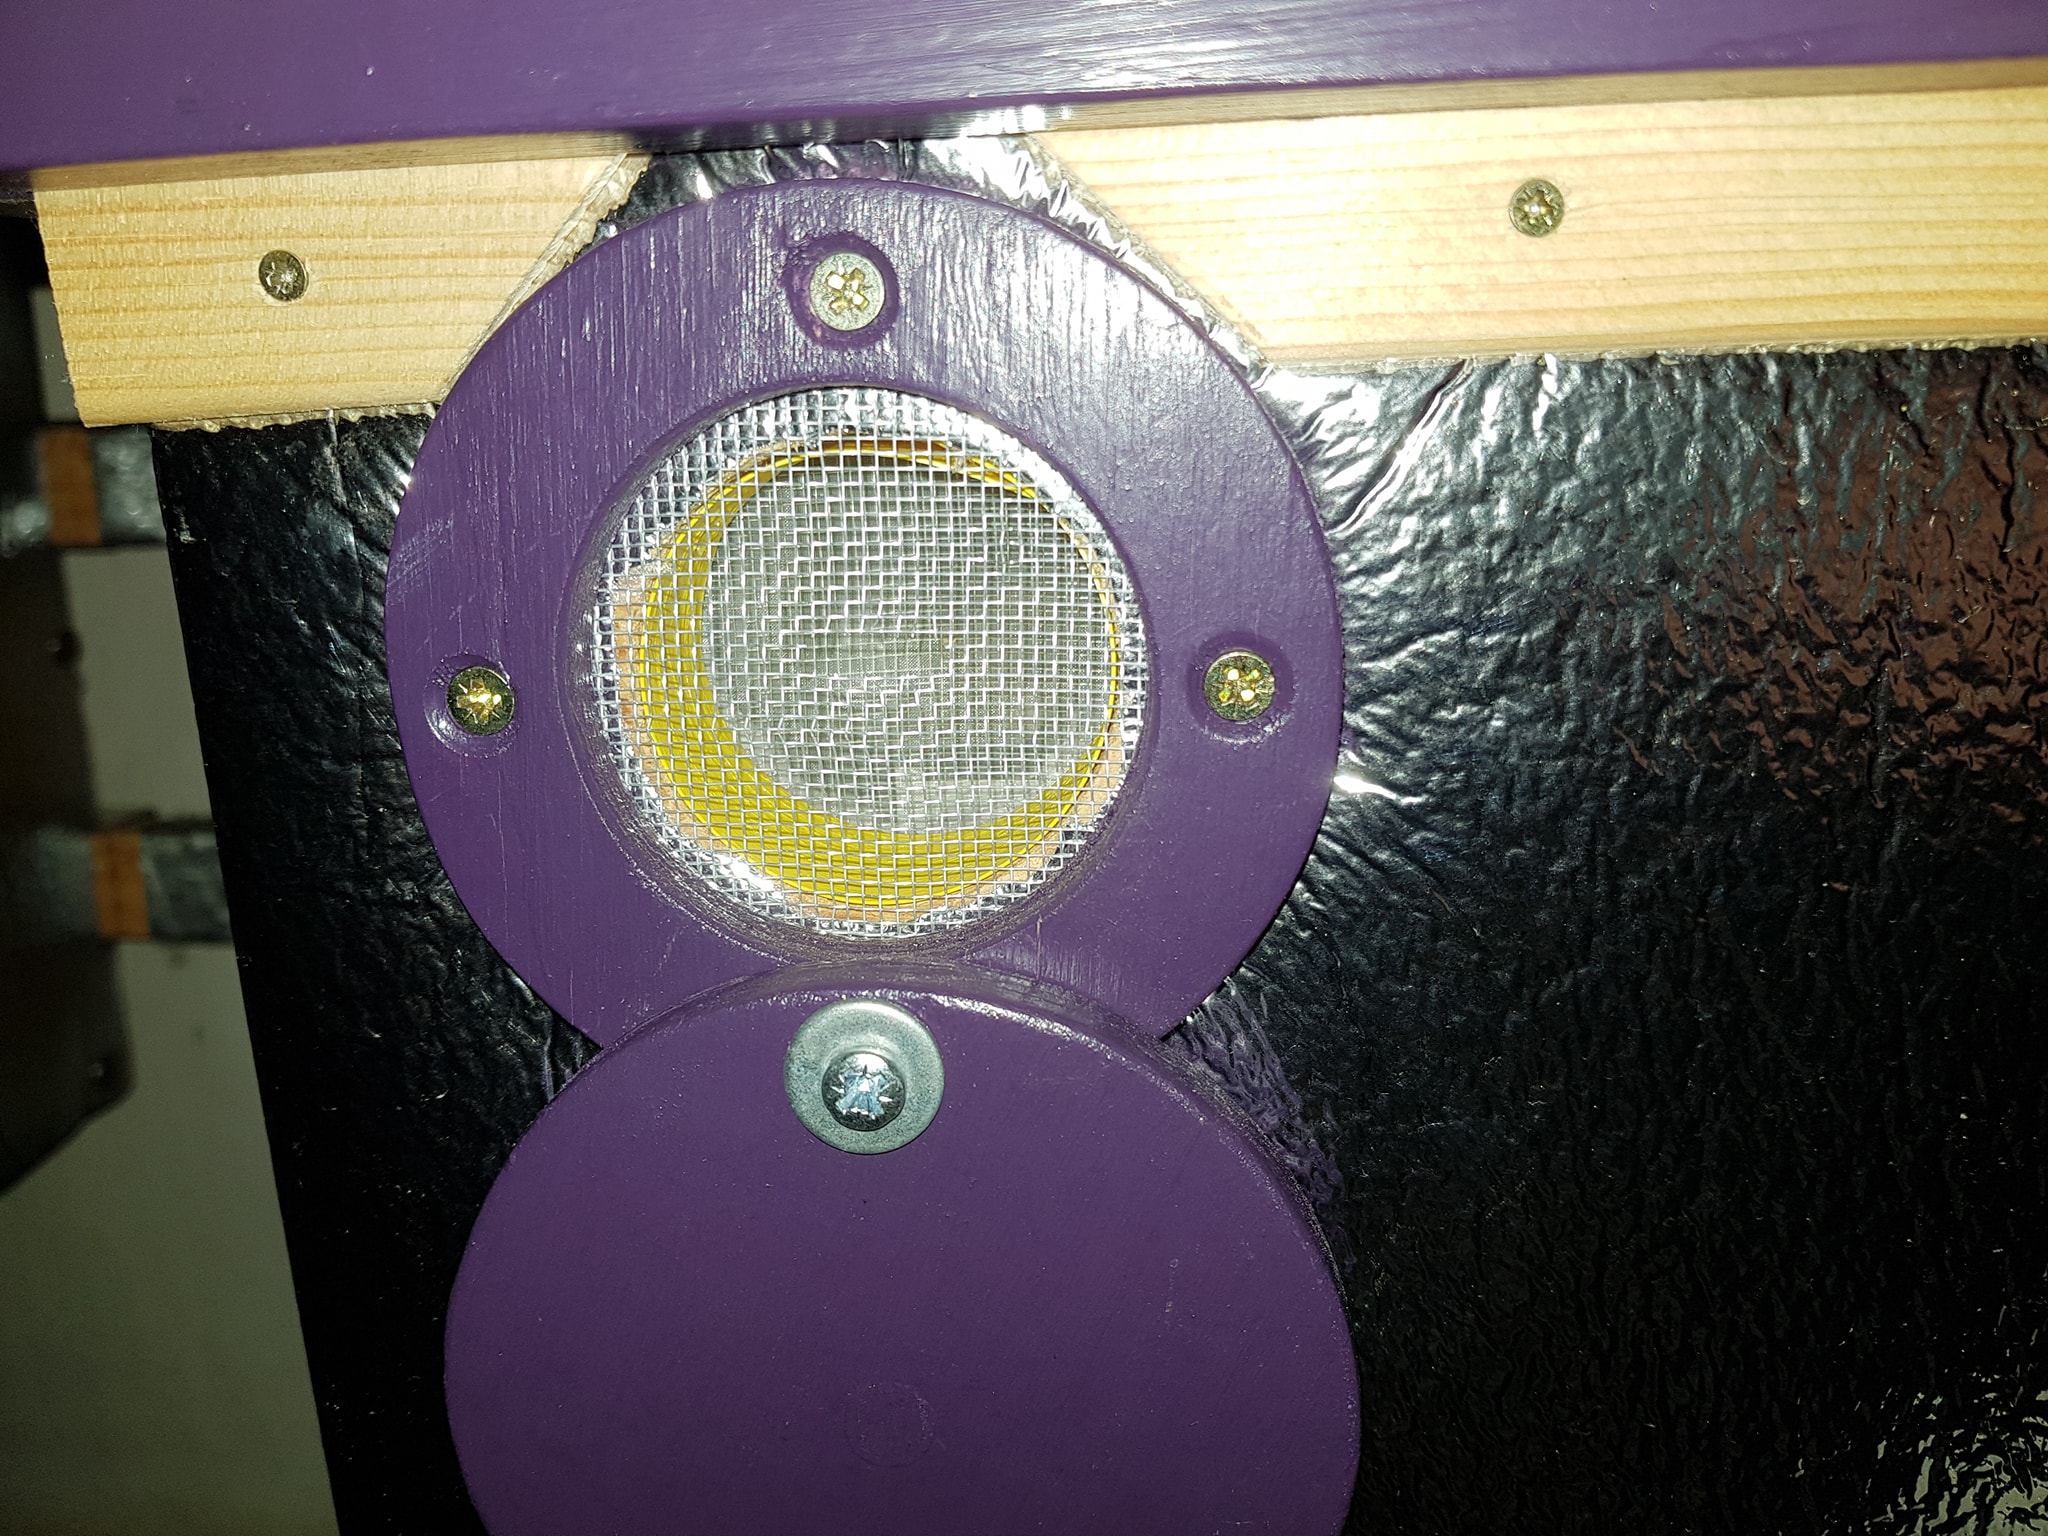
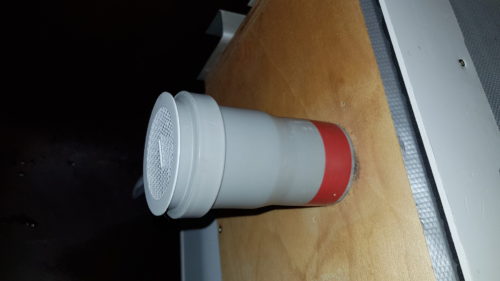
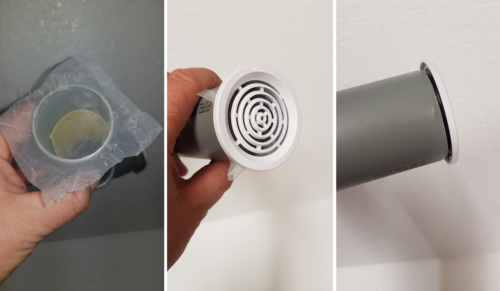
I used a straight piece of PP pipe. The hole in the hive was finished with a combination of UHELON53S and aluminum mesh. The outer part of the pipe was closed with a lid from a 3D printer. The inside of the pipe was lined with sticky insect tape.
Bumblebees PLUS – Ventilation from PP pipes – simple
Photo O. Hercog
Ventilation from PP pipes – simple
Photo O. Hercog
L
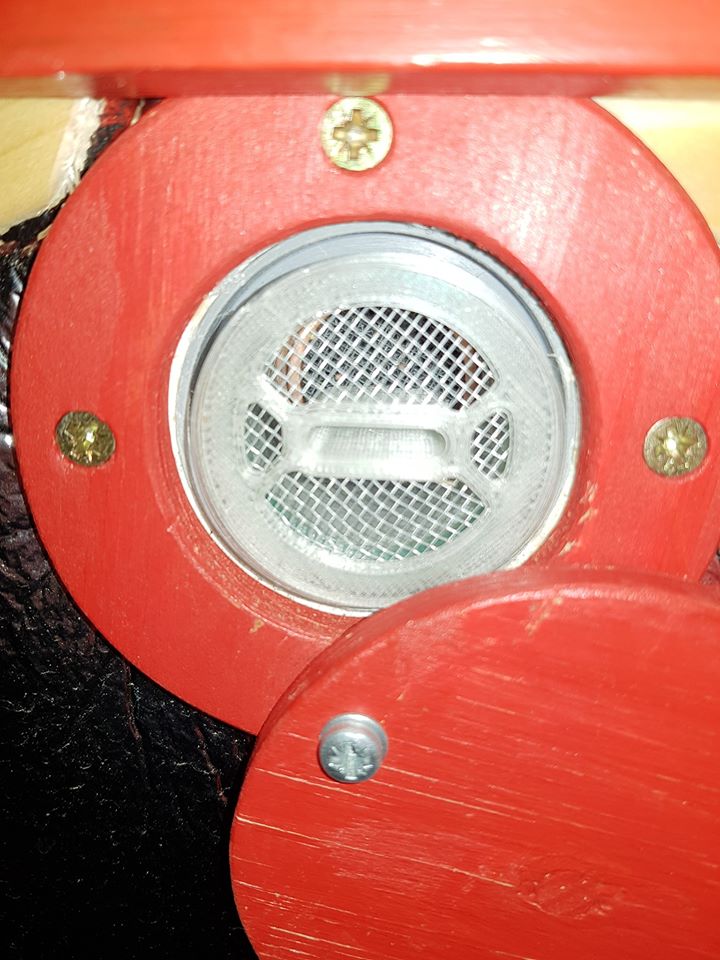
Hive ventilation - external protection with a penetration trap Cover created on a 3D printer
Photo O Hercog
Ventilation of the hive from PP pipes
Required parts (one elbow is enough) < br /> Photo: Hercog
Ventilation of a hive made of PP pipes
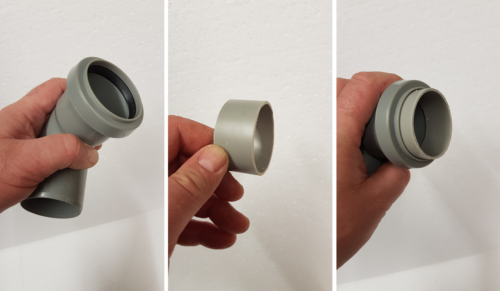
Insert one ring into the elbow as a reducer - it should fit well and tightly thanks to the seal
Ventilation of a PP pipe
hive Insert the cap into the reducer. If it does not fit securely in the reducer, remove it and seal it with tape
Ventilation of a hive made of PP pipes
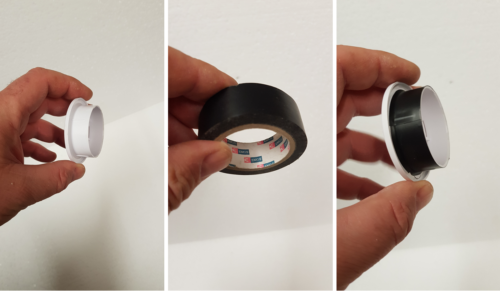
Once you have placed the adhesive strip in place, secure it with a modified second ring (insert).
Procedure for inserting the strip and insert - for a better understanding of the principle
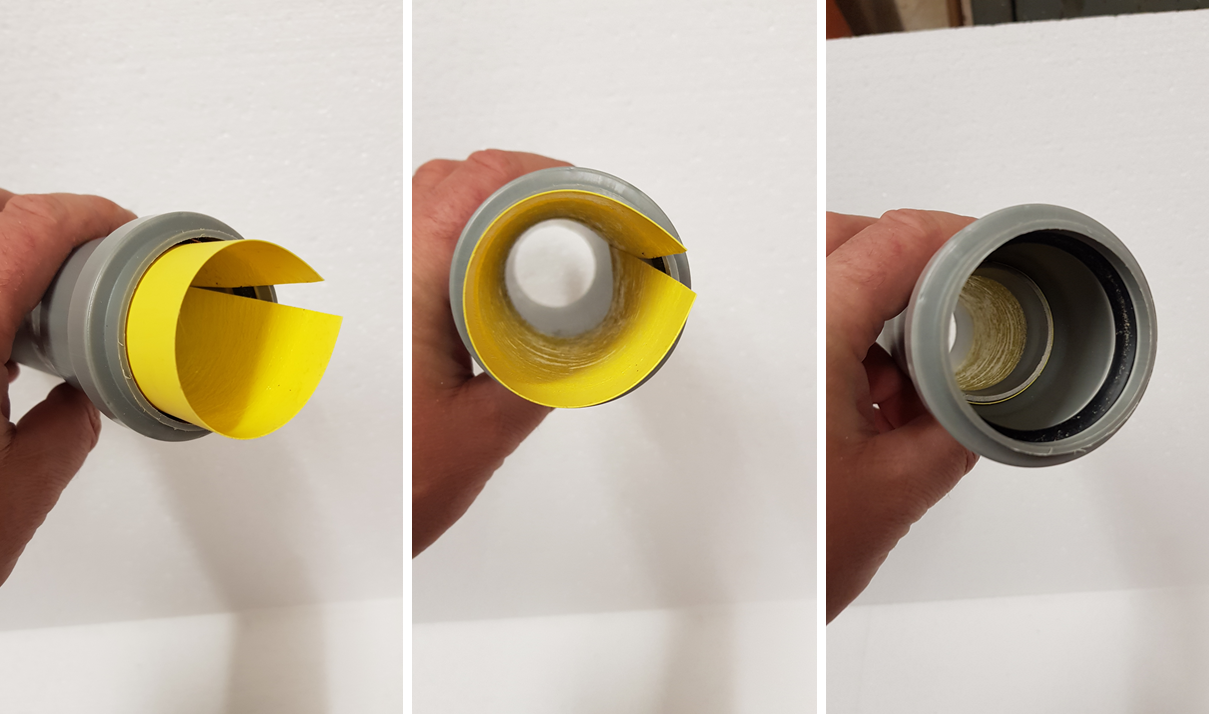
Ventilation of a hive made of PP pipes
Place the adhesive strip in place from the side of the knee and secure it with the second ring (insert) adjusted.
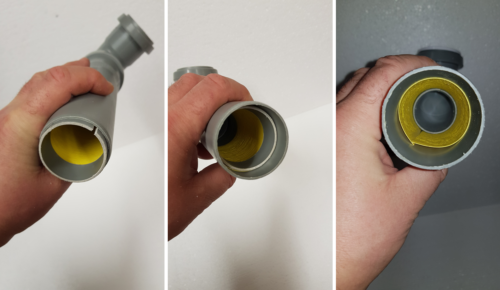
Hive ventilation made of PP pipes
After fixing the ventilation to the hive wall, cover the inner mouth of the tube with a piece of UHELON53S and insert the ventilation grid into the tube
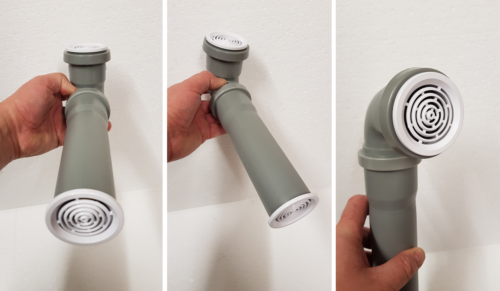
Ventilation of the hive from PP pipes
Put the elbow with the second cap on the straight piece

Ventilation of a hive made of PP pipes
Drill a 2-3 mm hole in the plug. The plug is used to close the ventilation from the outside (instead of the ventilation grid), for example in cold weather.
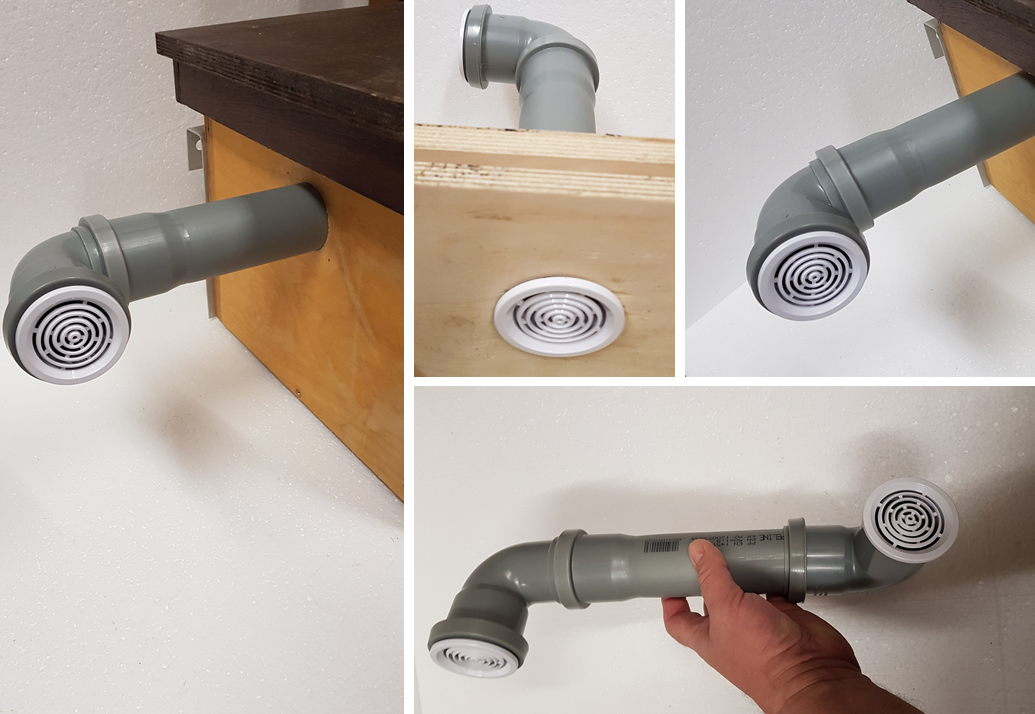
Hive ventilation made of PP pipes
Examples of installing ventilation in a hive
If you need a more complex shape – it's up to you (see example)
The ventilation is made of PP pipes, aluminum mesh and other parts.
Inside there is a sticky layer of Chemstop.
The entrance to the trap is double-sided from a plastic tube.
UHELON is not used.
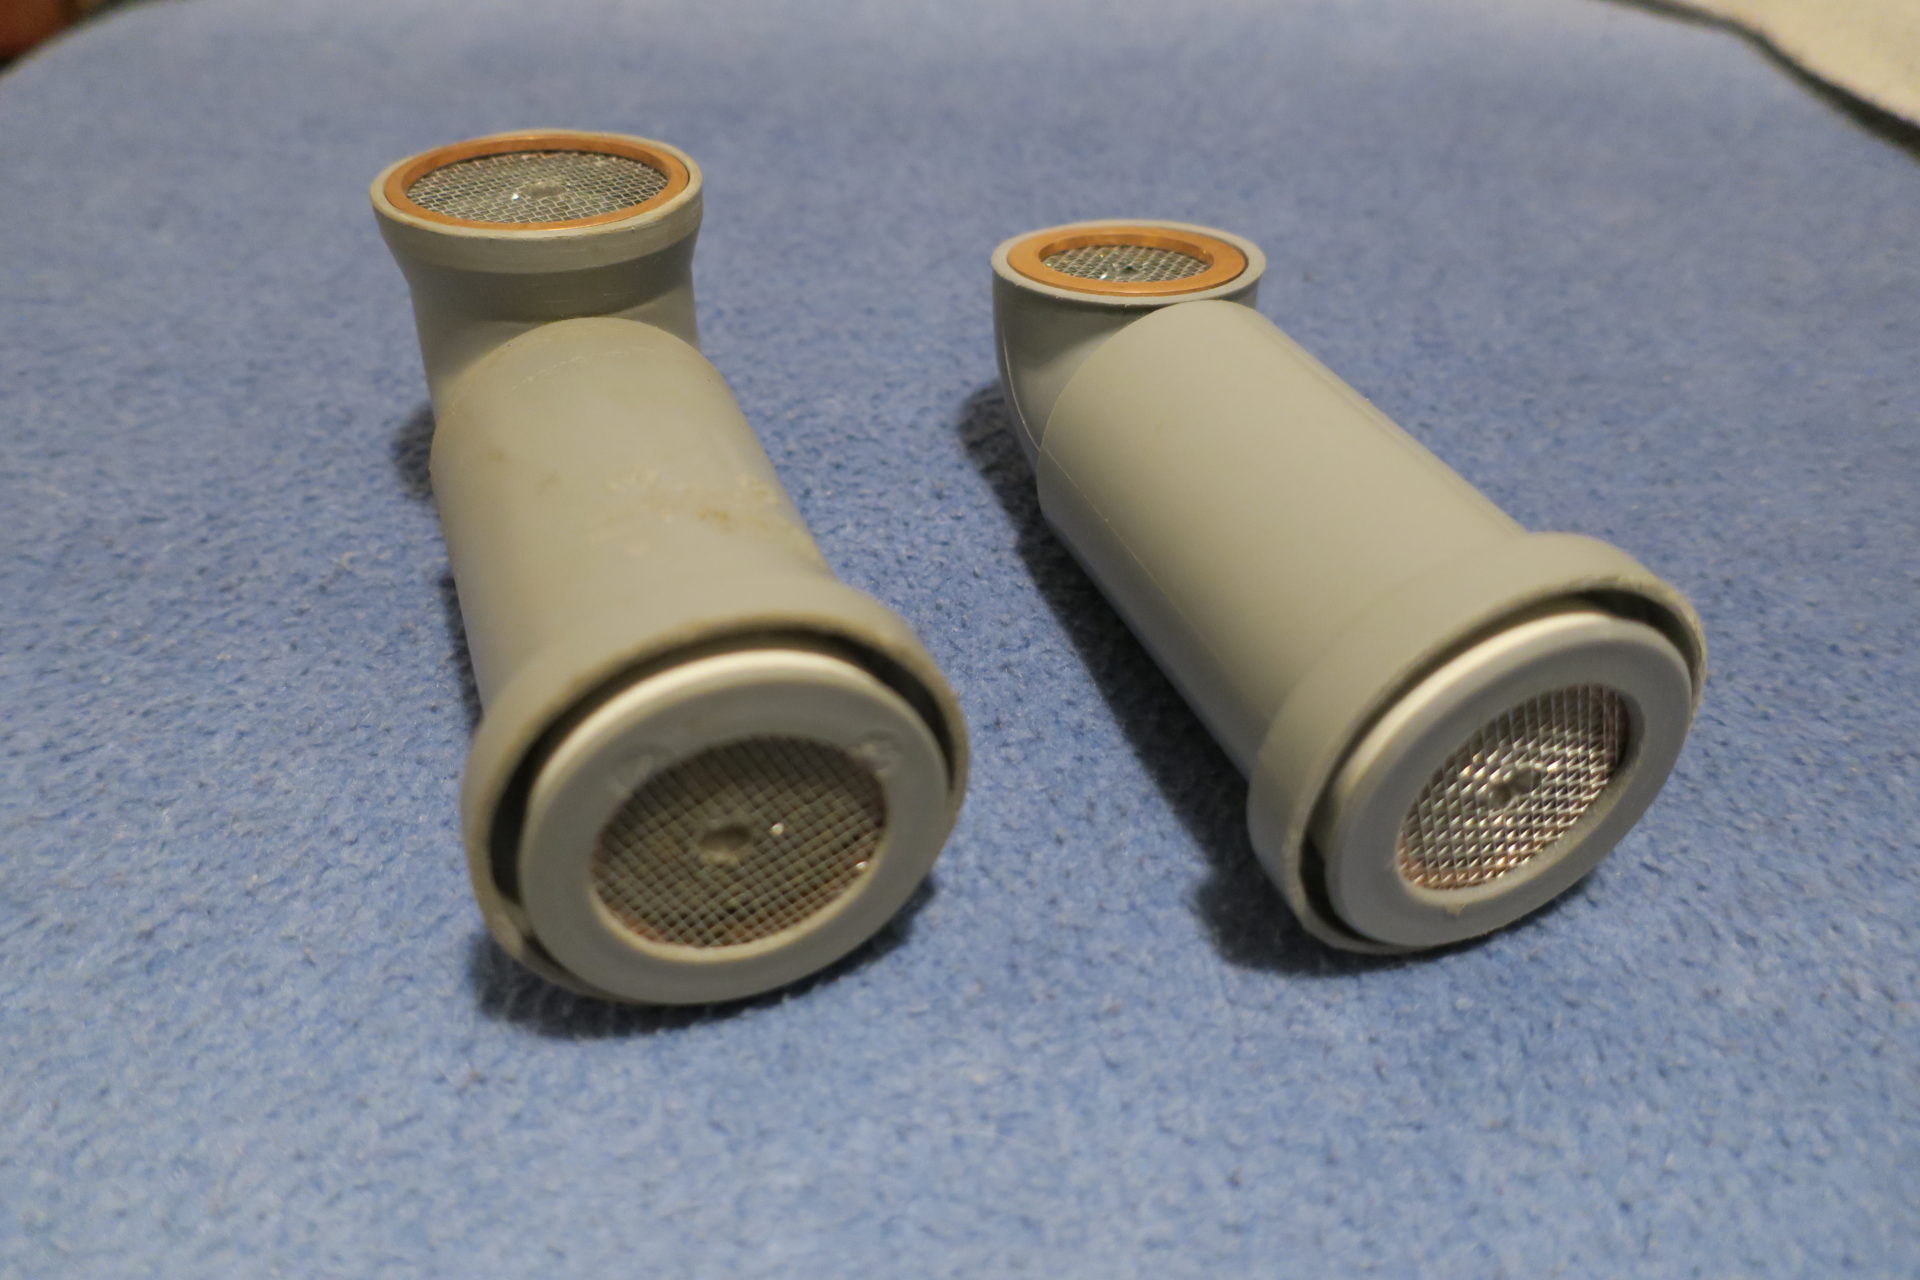
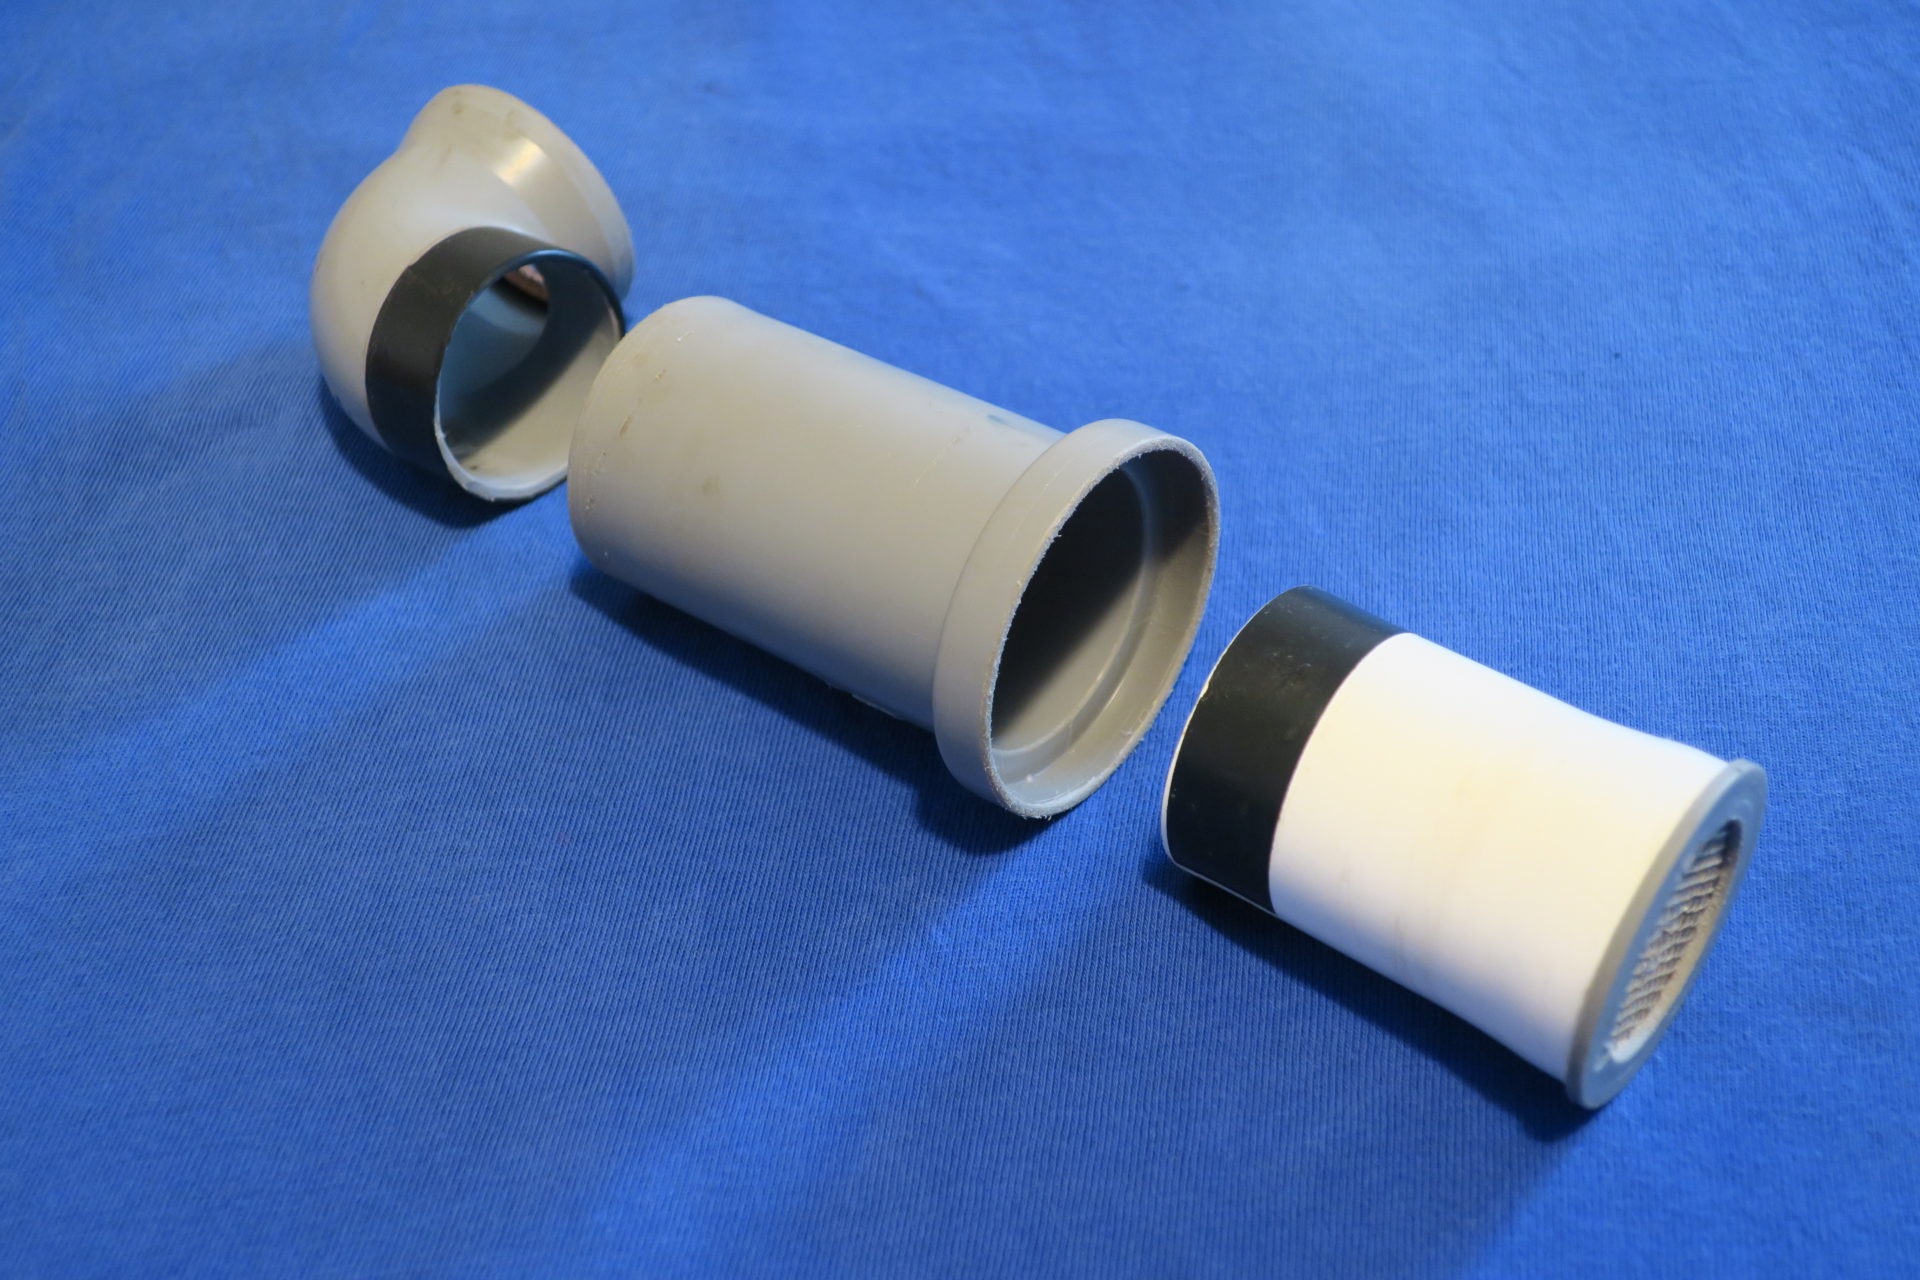
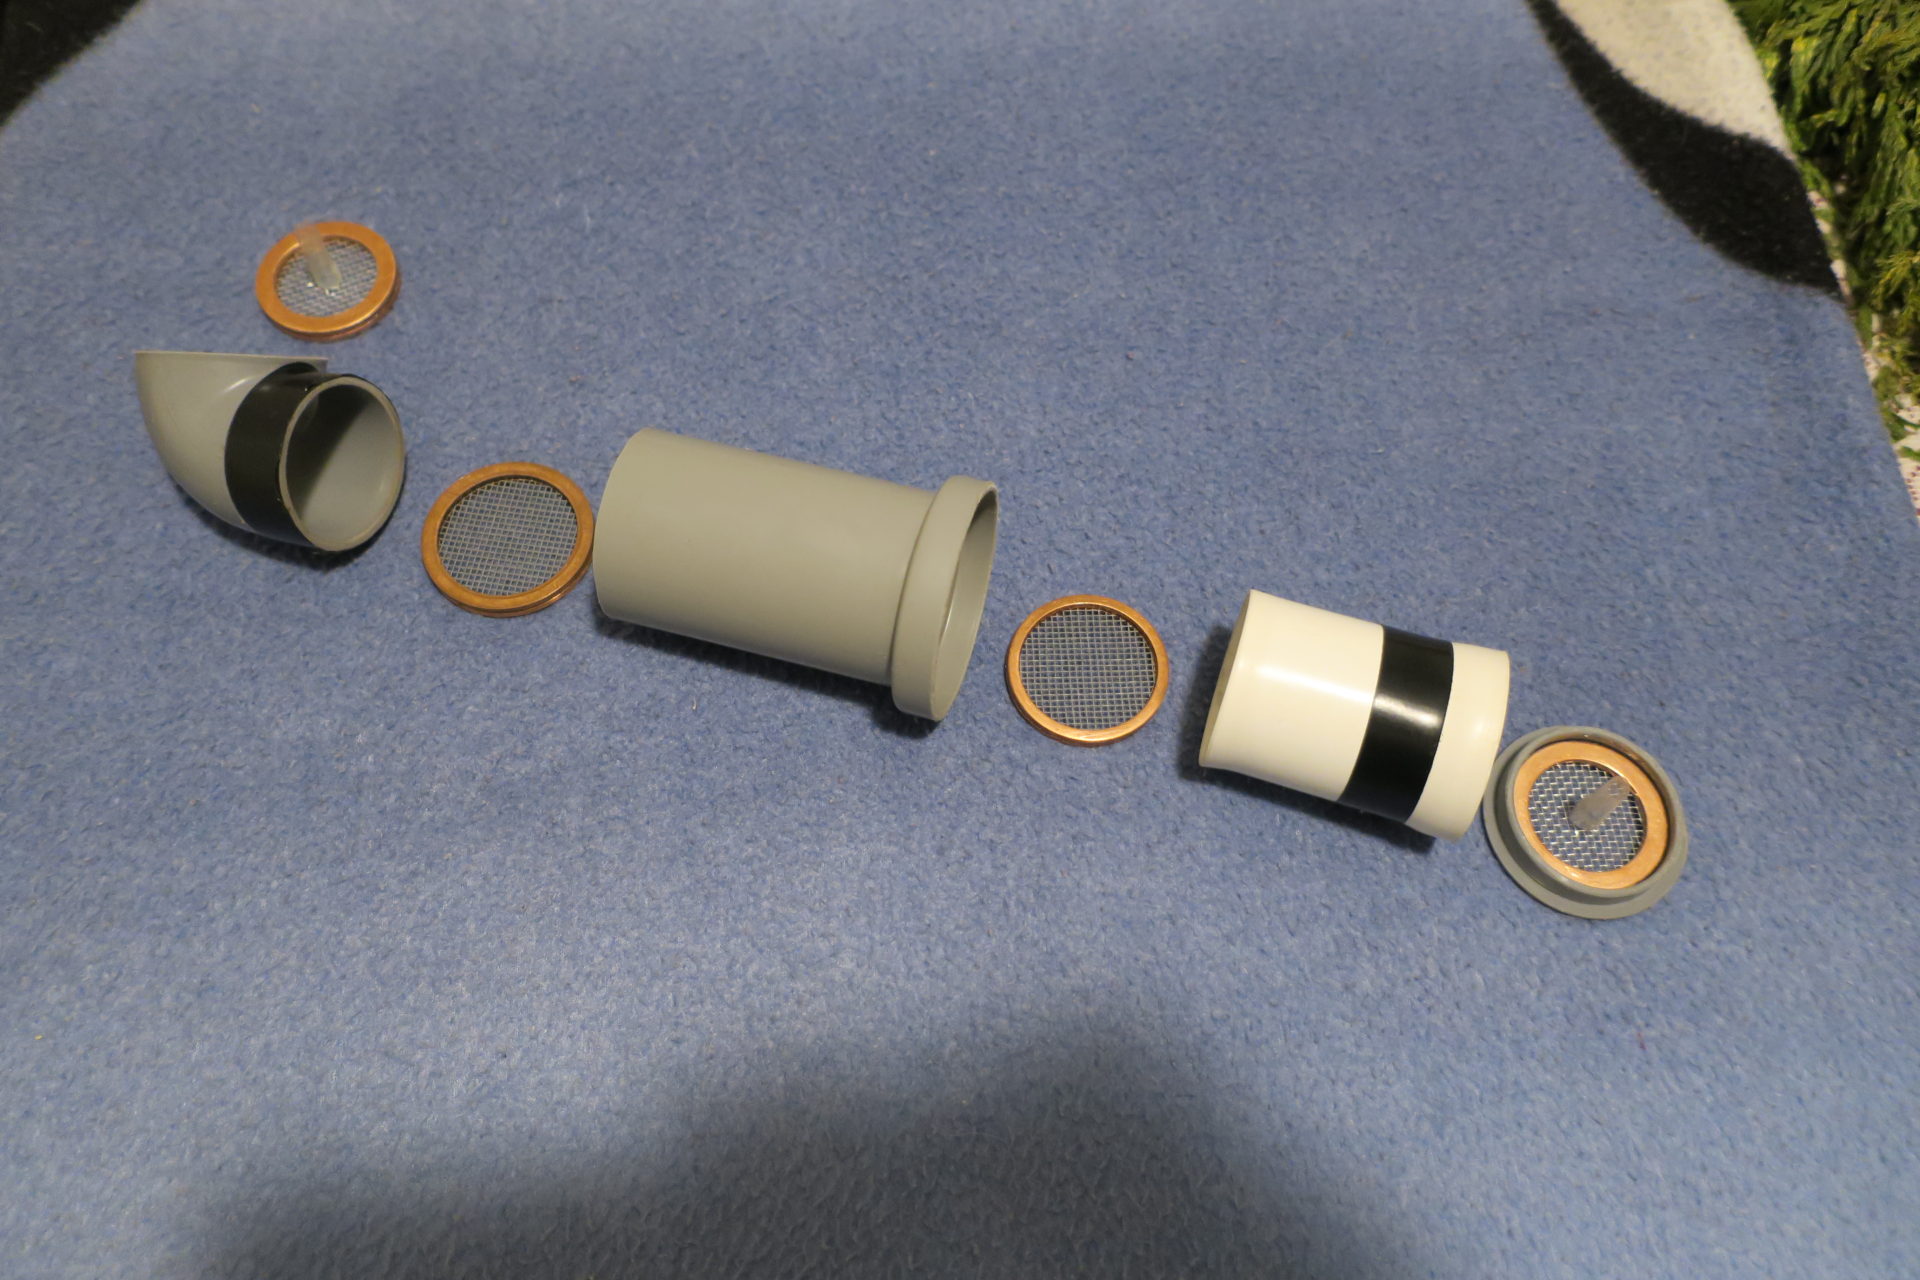
Street ventilation according to Pavel Fereš
Photo P. Fereš
The white part contains the sticky trap from Chemstop.
The second sticky trap is in the knee.
The two parts are separated by a mesh that allows the white part to be removed and yet prevents parasitic bumblebees from entering the hive.
Street ventilation according to Pavel Fereš
Photo P. Fereš
Street ventilation according to Pavel Fereš
Photo P. Fereš